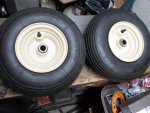
Composite drive wheels

Status
Not open for further replies.

Functional Artist

Well-known member
Messages
5,654
Reaction score
3,293
Location
Toledo, Ohio
I have been looking for some narrow(er) "keyed" (6") "drive" rims (~3" wide)
...but, most of the (6") rims that I've found are (~5") wide (~$19.00 ea.)
https://www.bmikarts.com/6-x-4-12-Steel-Rim-1-Bore_p_5402.html

Then, I was thinkin' :idea2:
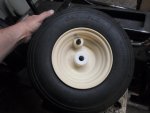
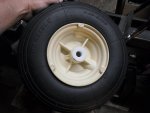
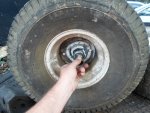
...maybe I can just add hubs to those composite rims from Surplus Center (~$7.00 ea.)
...would even be lower cost & lighter weight :thumbsup:
https://www.surpluscenter.com/Wheel...0-6-Carlisle-Wheel-Tire-Assembly-1-116259.axd


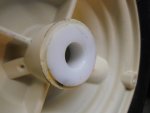
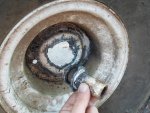
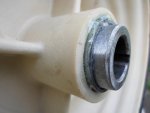
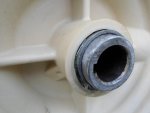
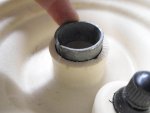
Lookin' into it a bit, the "hub hole" of these composite rims is (~1 5/8")
…& a hub for a 1" axle is to big (~1 3/4" OD)
…but, the hub for a 3/4" axle seems like it will work (~1 1/2") :cheers2:

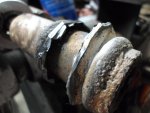
* Just happen to have a differential with 3/4" axle shafts :cool:

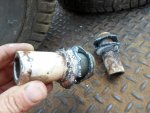
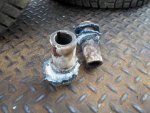
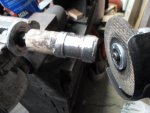
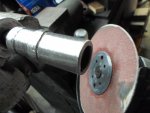
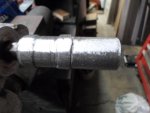
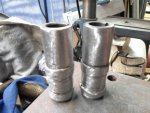
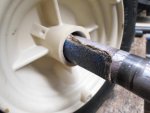
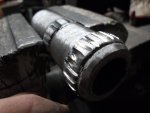
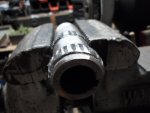
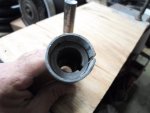
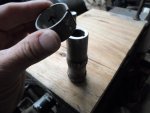
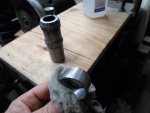
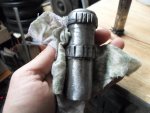
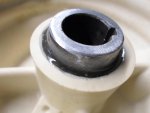
So, I rounded up some 3/4" hubs (from a Craftsman riding lawn mower)
…& then, cut 'em out of the (way too huge) rims

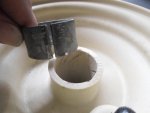
Now, we gotta get 'em installed into the composite rims :cheers2:

I'm gettin' 'em ground down to the hubs (removing the excess material)

Questions:
1.) Would an epoxy work to bond these hubs into these rims?
…if so, recommendations on types or kinds of epoxy

2.) Should the hubs be "shiny" clean metal or painted?

3.) How long do ya think they will last? :huh:

Thanks, fellas
 

Attachments

  • SAM_9819.jpg
    SAM_9819.jpg
    171.7 KB · Views: 1
  • SAM_9821.jpg
    SAM_9821.jpg
    174.7 KB · Views: 1
  • SAM_9822.jpg
    SAM_9822.jpg
    127.8 KB · Views: 1
  • SAM_1228.jpg
    SAM_1228.jpg
    262.7 KB · Views: 1
  • SAM_1227.jpg
    SAM_1227.jpg
    360.1 KB · Views: 1
  • SAM_1226.jpg
    SAM_1226.jpg
    385.2 KB · Views: 1
  • SAM_1224.jpg
    SAM_1224.jpg
    371.6 KB · Views: 1
Texan

Senor Member
Messages
461
Reaction score
12
Location
Deep In The Heart of Texas
Looks iffy, but you are a pretty crafty guy. We use a few epoxies at my job, and we try to get the surfaces as clean as possible for the best adhesion.
 

anickode

Active member
Messages
2,296
Reaction score
74
Location
S.E. Michigan
It really depends on what type of plastic the wheels are made of. Polyethylene products for example, are basically unglueable.

I'd bet they're probably a Nylon or PAG (glass fiber reinforced nylon). An epoxy made for plastics should work. I wouldn't rely solely on the bond strength to transmit torque however. I would go inside the bore with a saw blade and make a series of shallow radial cuts (like splines) to allow a mechanical interface between the epoxy and wheel. Do the same on the outside of the hub sleeve, either cutting into it with a grinder, or by adding some beads of weld along the length of it.

That's your best bet, IMO. Only thing better I could think of would be to machine some thicker hub sleeves, cut shallow splines into the outside of it, heat it up, and press it straight into the bore of the wheel, melting the plastic and fusing them together. But that is a lot more complicated, and would probably cost more than sourcing the proper wheels in the first place.
 

Functional Artist

Well-known member
Messages
5,654
Reaction score
3,293
Location
Toledo, Ohio
exothermic reaction

Been doin' some grindin' & shapin"
…& a little research :thumbsup:

"Epoxy glue is a synthetic mixture of a resin or epoxy polymer and a hardener used to attach or join a variety of the same or different surfaces together with a strong, durable and resilient thermosetting bond that can withstand extreme stress and environmental conditions"

"Epoxies are created by polymerizing a mixture of two starting compounds, the resin and the hardener. When resin is mixed with a specified catalyst, curing is initiated. Curing is the process by which molecular chains react at chemically active sites, resulting in an exothermic reaction."

Think Ima gonna try some of this stuff :cheers2:

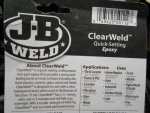
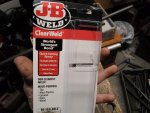
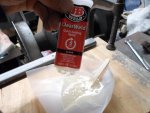
JB Weld Clear Weld

•ClearWeld is a quick setting, multipurpose two part epoxy that provides a strong and lasting bond on most surfaces including tile, most plastics, ceramic, glass, wood and metal
•ClearWeld is designed to cure with a clear, transparent bond when used at thicknesses of less than 15 mil
•ClearWeld has a 1:1 mixing ratio, sets in 5 minutes and cures in 1 hour
•With a tensile strength of 4400 PSI, ClearWeld sets to a hard, permanent bond :2guns:
 

Attachments

  • SAM_1241.jpg
    SAM_1241.jpg
    217.2 KB · Views: 0
  • SAM_1243.jpg
    SAM_1243.jpg
    210.2 KB · Views: 0
  • SAM_1246.jpg
    SAM_1246.jpg
    201.6 KB · Views: 0
  • SAM_1247.jpg
    SAM_1247.jpg
    180.4 KB · Views: 0
  • SAM_1250.jpg
    SAM_1250.jpg
    252.9 KB · Views: 0
  • SAM_1277.jpg
    SAM_1277.jpg
    303.1 KB · Views: 0
  • SAM_1276.jpg
    SAM_1276.jpg
    220 KB · Views: 0

Functional Artist

Well-known member
Messages
5,654
Reaction score
3,293
Location
Toledo, Ohio
Directions say:

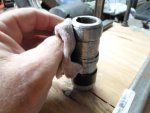
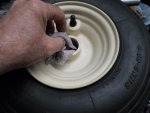
1.) prep by roughening both surfaces (#40 sand paper)
2.) clean 'em with degreaser (alcohol)
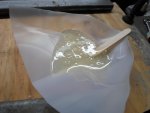
3.) thoroughly mix equal amounts of epoxy (A) & (B)
 

Attachments

  • SAM_1278.jpg
    SAM_1278.jpg
    337.8 KB · Views: 1
  • SAM_1261.jpg
    SAM_1261.jpg
    195.4 KB · Views: 0
  • SAM_1262.jpg
    SAM_1262.jpg
    192.5 KB · Views: 0
  • SAM_1264.jpg
    SAM_1264.jpg
    170.1 KB · Views: 0
  • SAM_1265.jpg
    SAM_1265.jpg
    173.3 KB · Views: 0
  • SAM_1271.jpg
    SAM_1271.jpg
    165.6 KB · Views: 0
  • SAM_1270.jpg
    SAM_1270.jpg
    216.6 KB · Views: 0
  • SAM_1269.jpg
    SAM_1269.jpg
    201.5 KB · Views: 0
  • SAM_1268.jpg
    SAM_1268.jpg
    198.5 KB · Views: 0
  • SAM_1267.jpg
    SAM_1267.jpg
    226.5 KB · Views: 0

Functional Artist

Well-known member
Messages
5,654
Reaction score
3,293
Location
Toledo, Ohio
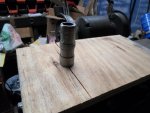
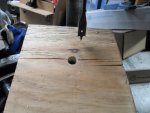
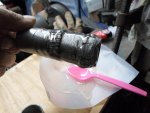
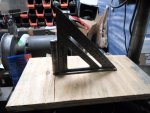
Before, I mixed the epoxy, I drilled a 3/4" hole (@ 90*) in a piece of plywood :thumbsup:
…& then, inserted a piece of 3/4" axle shaft :cheers2:
(to use as a centering/squaring/mounting/gluing/epoxying stand)

After, mixing the epoxy, I slathered a heavy layer of it onto the outside of the metal hub & then, slide it into the 3/4" shaft
…then, carefully set the composite rim down onto/over the hub
…then, drizzled some of the remaining epoxy down into the gap (~1/16") between the hub & rim
…& then, weighted the rim down to keep 'er from moving while the epoxy cured :2guns:
 

Attachments

  • SAM_1272.jpg
    SAM_1272.jpg
    191.5 KB · Views: 0
  • SAM_1266.jpg
    SAM_1266.jpg
    195 KB · Views: 0
  • SAM_1260.jpg
    SAM_1260.jpg
    220.5 KB · Views: 0
  • SAM_1258.jpg
    SAM_1258.jpg
    252.6 KB · Views: 0
  • SAM_1257.jpg
    SAM_1257.jpg
    259.3 KB · Views: 0
  • SAM_1273.jpg
    SAM_1273.jpg
    237.9 KB · Views: 0
  • SAM_1274.jpg
    SAM_1274.jpg
    165.2 KB · Views: 0
  • SAM_1280.jpg
    SAM_1280.jpg
    204.1 KB · Views: 0
  • SAM_1288.jpg
    SAM_1288.jpg
    160.7 KB · Views: 0
  • SAM_1289.jpg
    SAM_1289.jpg
    177.4 KB · Views: 1

Functional Artist

Well-known member
Messages
5,654
Reaction score
3,293
Location
Toledo, Ohio
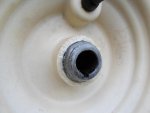
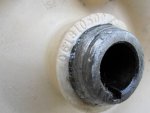
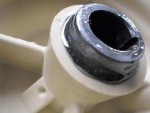
Well, that's the first one :thumbsup:
…& it seems like a pretty solid bond to me

On the second one, Ima gonna add try-n-add some "splines" to the hub & rim
...like "anickode" suggested :cheers2:

I just wanted to see how the first one, would turn out...first :cool:
 

Functional Artist

Well-known member
Messages
5,654
Reaction score
3,293
Location
Toledo, Ohio
Spacer Ring

The original plan was to make & use a "temporary spacer ring"
...as a "removable" centering/alignment spacer, between the hub & rim :thumbsup:

I put it on the bottom side
…& left it protruding out ~1/8"

The plan was to only apply the epoxy to the top side
…& let it "set" (~5min.)

Then, flip the rim over
...remove the "spacer ring"
…& then, drizzle in some of the epoxy, to bond the other side. :cheers2:

Here's what actually happened :huh:

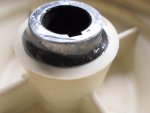
1.) the epoxy "drained" all of the way down/thru the rim
…& "glued" the now-permanent "spacer ring" in place

2.) also, when I flipped the rim over to drizzle some more of the epoxy into the other side
...the rest of the epoxy had already "set up" in the pan :mad2:

Well, it didn't go "according to plan"
...but, it got the job done :cheers2:
 

Attachments

  • SAM_1286.jpg
    SAM_1286.jpg
    174.1 KB · Views: 0
  • SAM_1283.jpg
    SAM_1283.jpg
    162.7 KB · Views: 0
  • SAM_1282.jpg
    SAM_1282.jpg
    163.6 KB · Views: 0

Functional Artist

Well-known member
Messages
5,654
Reaction score
3,293
Location
Toledo, Ohio
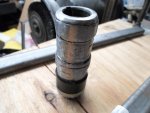
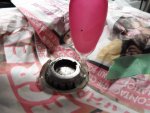
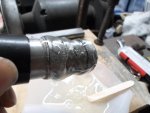
Been cuttin' some splines :thumbsup:
...inner & outies :cheers2:

Made a new centering spacer :2guns:
...this one will be permanent too :rolleyes:

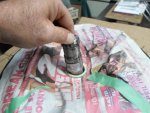
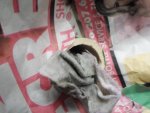
Then, masked/covered the rim to protect it from any "excess/mess" :huh:
 

Attachments

  • SAM_1408.jpg
    SAM_1408.jpg
    189.9 KB · Views: 1
  • SAM_1409.jpg
    SAM_1409.jpg
    173.5 KB · Views: 1
  • SAM_1410.jpg
    SAM_1410.jpg
    140.9 KB · Views: 1
  • SAM_1412.jpg
    SAM_1412.jpg
    182.3 KB · Views: 1
  • SAM_1413.jpg
    SAM_1413.jpg
    177.1 KB · Views: 1
  • SAM_1428.jpg
    SAM_1428.jpg
    249.8 KB · Views: 1
  • SAM_1420.jpg
    SAM_1420.jpg
    174.7 KB · Views: 1
  • SAM_1419.jpg
    SAM_1419.jpg
    182.9 KB · Views: 1
  • SAM_1423.jpg
    SAM_1423.jpg
    159.6 KB · Views: 1
  • SAM_1422.jpg
    SAM_1422.jpg
    165 KB · Views: 1
Functional Artist

Well-known member
Messages
5,654
Reaction score
3,293
Location
Toledo, Ohio
Sorry for the delay, I had to get some more epoxy :huh:

This centering spacer is made of a bit thicker material
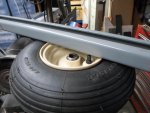
…so, it fit's over both the hub & inside of the rim, pretty tightly :thumbsup:

After givin' everything a good cleanin'/de-greasin', I applied some epoxy onto the hub
…slid the centering ring on
…then, slathered a thick layer over the whole thing
…& finally, slid it into the rim

It took a bit of effort to slide 'er in :smiley_omg:
...but, she fit's nice-n-snug
…& is very well centered

Had to align the hub, within the rim, so that ~3/8" was stickin' out on each side (just like the other rim)
...then, drizzled some of the epoxy into the "gap" & around the hub, on both sides :cool:

*While the epoxy was still "runny", I also "sealed up" the back side of the first rim by drizzling some of the remaining epoxy around it :cheers2:

Boom! (2) composite drive wheels :2guns:
 

Attachments

  • SAM_1437.jpg
    SAM_1437.jpg
    239.1 KB · Views: 0
  • SAM_1436.jpg
    SAM_1436.jpg
    202.8 KB · Views: 0
  • SAM_1431.jpg
    SAM_1431.jpg
    212.9 KB · Views: 0
  • SAM_1433.jpg
    SAM_1433.jpg
    163.2 KB · Views: 0
  • SAM_1432.jpg
    SAM_1432.jpg
    223.4 KB · Views: 0
  • SAM_1439.jpg
    SAM_1439.jpg
    161.2 KB · Views: 0
  • SAM_1440.jpg
    SAM_1440.jpg
    234.4 KB · Views: 0
  • SAM_1443.jpg
    SAM_1443.jpg
    183 KB · Views: 0
  • SAM_1444.jpg
    SAM_1444.jpg
    175.1 KB · Views: 0
  • SAM_1445.jpg
    SAM_1445.jpg
    254.8 KB · Views: 1
Functional Artist

Well-known member
Messages
5,654
Reaction score
3,293
Location
Toledo, Ohio
I'll bet you a haircut one of them will fail.

Oh, ye of little faith :rolleyes:

It's just an experiment :thumbsup: to see
A.) if I could do it
B.) & if so, how long they would last
C.) data: if/when one of them fail (or both) I/we'll know, for sure "what, where, when, why & how" :cheers2:

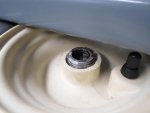
* These rims are actually made/sold for/as wheelbarrow wheels
...but, low cost/light weight ...hmmm
…& I'm always re-purposing stuff :2guns:


I have tested these rims on, the front of, the Torsk kart, Damien & also, the Atom kart
...with NO ISSUES what so ever :wai: (just installed "proper" bearings)


My initial concerned was, if they could handle all of the dynamic loading that can be applied by the front of a kart :huh:
...but, they seem to handle it pretty well (so far anyways) :cool:


So, now we are gonna find out if/how well they hold up to the dynamic loading applied by the rear of a kart
...plus, we'll "throw in" the torque applied by an electric motor too :smiley_omg:

* Stay tuned, there's more to come :sifone:
 
Status
Not open for further replies.
Top