OzFab
New member
Now that I’m living in a house with large yards (which is my responsibility to maintain), I found I had a need for a wheelbarrow or cart of some description but, as my funds are currently extremely limited, I want to achieve this spending as little money as possible…
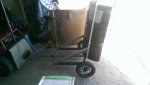
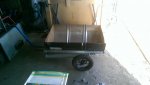
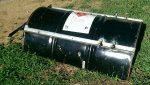
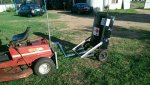
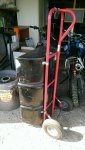
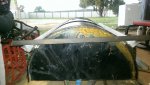
The first few pics below show where I started, a make-shift tub fashioned from a sheet of colorbond fence resting on a cheap trolley (aka dolly); the only reason for the make-shift tub was, at the time, I couldn’t lay my hands on anything more suitable but, it didn’t take me long to find a used steel 44 gal drum, which was then integrated to the trolley… but, this still wasn’t good enough because there were times when I needed the trolley…
6 weeks ago, while I was packing everything at my mums, as I was seeing some of the things that were just lying around, I started brainstorming & seeing uses for certain things, which was, kind of, essential as my brother had told me he “wouldn’t be happy about paying to move broken lawn mowers & ‘other useless junk’” so, I had to choose carefully between what was packed & what was scrapped…
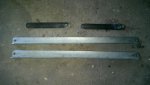
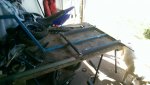
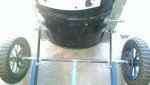
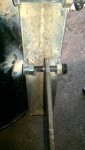
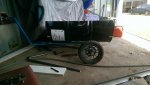
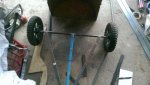
Once I had everything home I started planning & building; first, obviously, I had to make an axle, draw bar & hitch; I used a small length of square tube, two bolts & two opposed U brackets to create the hitch; that was the easy part, now it’s getting technical; I have to create a frame to hold the half drum, a support frame attached to the axle/draw bar assembly, then connect the two so that it tipped the drum without having to disconnect the hitch…
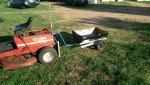
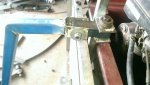
Therein lies the issue; to keep the CoG as low as possible, at rest, the drum will sit on the draw bar which sits ~ 6” off the ground (due to the 12” pocket bike wheels I’m using) but will overhang the axle by ~ around 13”…
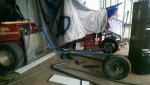
I think I have it figured out, lets see what happens when I put the theory into practice…
N.B. At this point, I’m into it for $8; $5 for the drum & $3 for the axle bolts & nuts…
The first few pics below show where I started, a make-shift tub fashioned from a sheet of colorbond fence resting on a cheap trolley (aka dolly); the only reason for the make-shift tub was, at the time, I couldn’t lay my hands on anything more suitable but, it didn’t take me long to find a used steel 44 gal drum, which was then integrated to the trolley… but, this still wasn’t good enough because there were times when I needed the trolley…
6 weeks ago, while I was packing everything at my mums, as I was seeing some of the things that were just lying around, I started brainstorming & seeing uses for certain things, which was, kind of, essential as my brother had told me he “wouldn’t be happy about paying to move broken lawn mowers & ‘other useless junk’” so, I had to choose carefully between what was packed & what was scrapped…
Once I had everything home I started planning & building; first, obviously, I had to make an axle, draw bar & hitch; I used a small length of square tube, two bolts & two opposed U brackets to create the hitch; that was the easy part, now it’s getting technical; I have to create a frame to hold the half drum, a support frame attached to the axle/draw bar assembly, then connect the two so that it tipped the drum without having to disconnect the hitch…
Therein lies the issue; to keep the CoG as low as possible, at rest, the drum will sit on the draw bar which sits ~ 6” off the ground (due to the 12” pocket bike wheels I’m using) but will overhang the axle by ~ around 13”…
I think I have it figured out, lets see what happens when I put the theory into practice…
N.B. At this point, I’m into it for $8; $5 for the drum & $3 for the axle bolts & nuts…
Attachments
-
 IMAG1342.jpg255.8 KB · Views: 6
 -
 IMAG1341.jpg250.5 KB · Views: 3
 -
 IMAG1340.jpg245.3 KB · Views: 4
 -
 IMAG1407.jpg263.2 KB · Views: 4
 -
 IMAG1412.jpg252.1 KB · Views: 3
 -
 IMAG1411.jpg243.1 KB · Views: 3
 -
 IMAG1410.jpg201 KB · Views: 4
 -
 IMAG1408.jpg250.1 KB · Views: 5
 -
 IMAG1409.jpg205.6 KB · Views: 5