build a TIG for $300ish

Status
Not open for further replies.

machinist@large

Active member
Messages
2,856
Reaction score
2
Location
West Michigan, 49331
Thought Id share this with you guys.
Not being much of a welder I don't really know how good of an idea this is but its something I would like to try!

http://classicbroncos.com/homemade-welder.shtml

OK, I'm not a licensed electrician, nor an electrical engineer, but I have more than a little welding experience, so here's my first impression of this idea...

How much high amperage DC wiring experience do you have? For the record, I didn't notice/ see anything about stepping up the voltage on the unit, which means you can cut the matl. thickness claims in half for a start; commercial stick/ tig machines usually run an open circuit voltage of 24~29 volts. With only half the voltage, you're going to need double the amperage to do the same size weld.

The idea probably works; the OP indicates that he had researched it somewhere else. Can it be done safely? Probably; it would depend on how much actual high voltage DC experience you have. The big problem I have with it as described is the rinky dink description of the control circuit; using a dimmer switch designed and rated for a LOW AMPERAGE high(er) voltage AC circuit in a HIGH AMPERAGE low voltage DC circuit is an automatic red flag for me.

Another minor grumble is the assumption of the OP that you can pick up the needed gas components cheaply; my issue is, even with my industrial experience, I know that I can't look at a flea bay ad and know that it actually has the parts claimed, let alone if it has the parts I need. To anyone who can, here's a tip of the hat; now, are you willing to guarantee that your recommendations will keep someone else from spending very dear $$$ on a losing bet?

Pat
 

machinist@large

Active member
Messages
2,856
Reaction score
2
Location
West Michigan, 49331

I've glanced at this one; the price listed doesn't include the price of the gas kit and a cylinder. Still, it had to meet someones basic safety certification, and it's output voltage/ amperage ranges are industry comparable.

The reason I haven't really gone deeper with this one is that it's DC only; it won't work for aluminum without becoming someones electrical degree project....

That being said, the OP's project unit is also DC only. If I were going to gamble with the few $$$ I have, HF's unit also comes with a warranty/ exchange policy, has all the (basic) controls designed to work with each other; the real question that has stopped me is this. If you have an inverter on board, why is this thing only DC? A true inverter box can generate a broad range of AC wave/ frequency counts, including high frequency's......
 

KartFab

Active member
Messages
3,381
Reaction score
9
Location
Dallas, TX
I dunno, all i know is that i am not dropping 3 grand on a miller dynasty, im sticking with my maxstar 150. Screw aluminum!!!! *cries* Its ok im just sad that i cant afford one,.
 

mckutzy

Well-known member
Messages
8,353
Reaction score
31
Location
bc, canada
I wasnt able to see the link, but have seen pretty much all of the ones floating about....

If one is frugal enough, smooth talker, a good scrounger, a wheeler and dealer, it can be done easily as described or cheaper. Do a search on homemade tig welders and you will find a host of many people that have gotten some decent results with this setup. Offroader guys have been doing similar things like this aswell for along while too.

There is a number of people who have done this on The Welding Web Forum, and many people to help if interested.

If one had the same abilities above and were to use a ac/dc stick welder tombstone type welder with a scratch tig rig you do this in about $200 or potentially less(sometimes people just want to get rid of that ol'welder sitting about and would flog it for about nothing, I have seen this many a time) .

Scratch start welders have been around along time. Basically a stick welder with a non consumable electrode(the tungsten) and gas shield(AR/CO2). Get a TIG lead assembly, AR/CO2 regulator, AR or CO2 bottle of gas, and the welder machine. set to DCEN Good to go.

Aluminum can be done with a scratch start in DC, but you need PURE Helium (not balloon gas but pure as you can get it, I think is called laboratory grade). It is also not cheap at all, like really expensive, several time the price of AR, AFAIK.

These methods dont have a fine adjustability per say( like a pedal on a Miller or other brand name machine) but can use the dimmer or a car headlight/switch dimmer with similar results to vary the input dc voltage.

I have heard people using a battery charger for the 12vdc supply to fields with/with out the dimmer, a 120vac to an electric motor to spin the alternator (with pulleys/belts a specific ratio for speed)

All in all its pretty cool.... Im half way there. I just need a motor and gas and ill be welding, got everthing else.
 

machinist@large

Active member
Messages
2,856
Reaction score
2
Location
West Michigan, 49331
I wasnt able to see the link, but have seen pretty much all of the ones floating about....

If one is frugal enough, smooth talker, a good scrounger, a wheeler and dealer, it can be done easily as described or cheaper. Do a search on homemade tig welders and you will find a host of many people that have gotten some decent results with this setup. Offroader guys have been doing similar things like this aswell for along while too.

There is a number of people who have done this on The Welding Web Forum, and many people to help if interested.

If one had the same abilities above and were to use a ac/dc stick welder tombstone type welder with a scratch tig rig you do this in about $200 or potentially less(sometimes people just want to get rid of that ol'welder sitting about and would flog it for about nothing, I have seen this many a time) .

Scratch start welders have been around along time. Basically a stick welder with a non consumable electrode(the tungsten) and gas shield(AR/CO2). Get a TIG lead assembly, AR/CO2 regulator, AR or CO2 bottle of gas, and the welder machine. set to DCEN Good to go.

Aluminum can be done with a scratch start in DC, but you need PURE Helium (not balloon gas but pure as you can get it, I think is called laboratory grade). It is also not cheap at all, like really expensive, several time the price of AR, AFAIK.

These methods dont have a fine adjustability per say( like a pedal on a Miller or other brand name machine) but can use the dimmer or a car headlight/switch dimmer with similar results to vary the input dc voltage.

I have heard people using a battery charger for the 12vdc supply to fields with/with out the dimmer, a 120vac to an electric motor to spin the alternator (with pulleys/belts a specific ratio for speed)

All in all its pretty cool.... Im half way there. I just need a motor and gas and ill be welding, got everthing else.

It sounds like you've done the leg work; if you go for it, keep us in the loop. Like I said, it seems to be doable; I just don't think it should be someones first DC electrical project. As for the other questions (actual voltage, actual safe dimmer parts, etc.) if you can find safe answers, I'll be the first to thank you, and say well done...

As for another machine to replace the Hobart I had to let go, I think I'm just going to sit back and keep my ear to the ground....

:cheers2: :thumbsup: :popcorn: Pat
 

mckutzy

Well-known member
Messages
8,353
Reaction score
31
Location
bc, canada
It probably isnt the first project that someone should undertake as far as a complete scratch build. could get a good jolt if not careful.
On the welding forum, there was a gent who used two big solar panels with a tig rig and gas to weld razor blades together with good success. I also think he did use a dimmer to control the output(????).

The easier is the scratch start tig rig that any one could wip up in no time.
I had almost converted my FC wirefeed Clarke 90e to this setup, but really wasnt wanting to fry it on a chance of success.
If I do come across a big red welder Ill be building this setup. Im going to hit up my old boss to see if he has one of those kicking around somewhere aswell.

Here is some vids on that setup.

http://www.youtube.com/watch?v=9lV4tzg4zn0

http://www.youtube.com/watch?v=CA3w9Wq5mh0
 

machinist@large

Active member
Messages
2,856
Reaction score
2
Location
West Michigan, 49331
:funnypost: :thumbsup: :cheers2:

An old Lincoln tomb stone with DC or a Miller Dial Arc AC/DC unit will make a great base for a home brew tig machine; both MFR's sell stand alone tig kits for use on any DC stick power source. That means they are a great starting point; the OEM's have already done half the work for you.

Personally, I think if you want to dabble with tig, without going gonzo $$$ wise, this is the way to go. You would be starting with a dang good stick welding power source, and add tig capabilities to it. You also have the upsides of none of the rigamarole of converting your air compressor (or anything else) to drive something that may or may not live long, doing a job it was never designed for in the first place.....:surrender: :surrender:
 

mckutzy

Well-known member
Messages
8,353
Reaction score
31
Location
bc, canada
That is true. He and a few others out there(youtube the forums and a old welder guy I met once) say that if you can get good using this method, finding out where things are with the controls of the welder machine, you can do almost anything, thick thin small and large jobs and pieces.

One tip I got from somewhere(cant remember offhand right now), you can use a "scratch pad" to light off of. That is a small piece of copper attached to a arm or clamped on or otherwise right near the start of the weld joint. This piece will allow to have a good start to striking an arc, but keep the metal from strike marks and reduce the contamination to the tungsten from striking.
 

machinist@large

Active member
Messages
2,856
Reaction score
2
Location
West Michigan, 49331
That is true. He and a few others out there(youtube the forums and a old welder guy I met once) say that if you can get good using this method, finding out where things are with the controls of the welder machine, you can do almost anything, thick thin small and large jobs and pieces.

Clarification please; in your above, were you referring to the stick to tig plan, or the home-brew mystery machine?

One tip I got from somewhere(cant remember offhand right now), you can use a "scratch pad" to light off of. That is a small piece of copper attached to a arm or clamped on or otherwise right near the start of the weld joint. This piece will allow to have a good start to striking an arc, but keep the metal from strike marks and reduce the contamination to the tungsten from striking.

Not really; any metal you "scratch start" off of will be a potential source of contamination for the tungsten electrode. When you have to scratch, you need to treat the electrode the same as you would a stick welding rod; strike it fast, establish the arc, then get to work. The more time you spend trying to light the arc, the bigger the chances of heavy contamination.

I think what the OP was trying to tell you was to start on a sacrificial plate next to your intended weld. Although it's not "Technically Correct Procedure", where you're supposed to regrind your tungsten clean after you "accidentally" contaminate it (like after you accidentally "dip" your tungsten in the weld puddle), most experienced tig welders have learned that you can "usually" burn thru the small stuff (this only applies for NON CODE work; anything code related is beyond the scope of this thread). That means you would probably want a piece of scrap of the same matl. you are setting up to weld; that way, if you get a "flare up" (contamination on the 'trode), you can try to burn most of it off before you start on the real work. If you don't, you'll wind up with exploding sponge metal for a weld. You'll need to grind out the contaminated zone back to clean metal to even begin to fix it, otherwise.

:cheers2: :thumbsup: :popcorn: Pat
 

mckutzy

Well-known member
Messages
8,353
Reaction score
31
Location
bc, canada
I was meaning, Get good at TIG using the TIG rig, then go onto a dedicated homebrew or regular store bought.
 

Scout

Nutjob
Messages
554
Reaction score
4
Location
Indiana
My DIY tig.


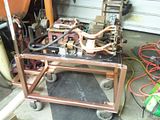
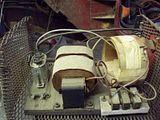
I started with a Miller Thunderbolt, AC only, transformer based stick welder. It was free. $40 got me a set of silicon stack rectifiers out of a 3 phase industrial machine, I used wo out of the three. Ebay sold me a selector switch from a Hobart welder, and a friend gave me a high frequency generator. The big money came when I bought the torch, regulator, and tank. With the way I set it up I have ac, dcen, and dcep, and can add hf to whatever I choose, which is nice when welding stick. I want to build a circuit so I can control the amperage with a foot pedal, and add a timer and gas valve.

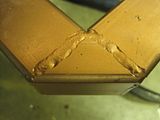
Some of the tig welds I did when I first used it.


More pics of the build. http://s7.photobucket.com/user/Fryloc/library/welder?sort=3&page=1
 

machinist@large

Active member
Messages
2,856
Reaction score
2
Location
West Michigan, 49331
My DIY tig.


I started with a Miller Thunderbolt, AC only, transformer based stick welder. It was free. $40 got me a set of silicon stack rectifiers out of a 3 phase industrial machine, I used wo out of the three. Ebay sold me a selector switch from a Hobart welder, and a friend gave me a high frequency generator. The big money came when I bought the torch, regulator, and tank. With the way I set it up I have ac, dcen, and dcep, and can add hf to whatever I choose, which is nice when welding stick. I want to build a circuit so I can control the amperage with a foot pedal, and add a timer and gas valve.

Some of the tig welds I did when I first used it.


More pics of the build. http://s7.photobucket.com/user/Fryloc/library/welder?sort=3&page=1

:kewlsmiley::thumbsup::cheers2:

Nice!! You started with a great base, sourced rectifiers that could actually handle the job and smile; it wouldn't suprize me in the least to see if the AC transformer from your original 225 wasn't almost identical to the unit in my Miller Dial Arc 250 AC/DC stick machine...

What's got me curious is your high frequency generator; while I know that my electrical skills most likely aren't up to this type of project, we have many members that are. Any in depth details you can provide would be great......

Pat :thumbsup: :cheers2: :popcorn:
 

RCcrawlerguy

New member
Messages
3
Reaction score
0
:funnypost: :thumbsup: :cheers2:

An old Lincoln tomb stone with DC or a Miller Dial Arc AC/DC unit will make a great base for a home brew tig machine; both MFR's sell stand alone tig kits for use on any DC stick power source. That means they are a great starting point; the OEM's have already done half the work for you.

Personally, I think if you want to dabble with tig, without going gonzo $$$ wise, this is the way to go. You would be starting with a dang good stick welding power source, and add tig capabilities to it. You also have the upsides of none of the rigamarole of converting your air compressor (or anything else) to drive something that may or may not live long, doing a job it was never designed for in the first place.....:surrender: :surrender:

What he said. Most of the people who are going to use the link that the OP posted, dont need to be tryiing to make their own welder. Check craigslist, ebay, local trader papers, auctions. Find an old DC buzz box. A decent machine will cost ya around $200, plus another $200 for a tig torch, gas hose, and flow meter. That will make you a decent machine. Dont burn your house down trying to hack something together.
 

Scout

Nutjob
Messages
554
Reaction score
4
Location
Indiana
:kewlsmiley::thumbsup::cheers2:

Nice!! You started with a great base, sourced rectifiers that could actually handle the job and smile; it wouldn't suprize me in the least to see if the AC transformer from your original 225 wasn't almost identical to the unit in my Miller Dial Arc 250 AC/DC stick machine...

What's got me curious is your high frequency generator; while I know that my electrical skills most likely aren't up to this type of project, we have many members that are. Any in depth details you can provide would be great......

Pat :thumbsup: :cheers2: :popcorn:
It was an add on unit for a Sears welder. there are two sets of spark gaps, a capacitor, and a coupling coil. Maybe something else? I've got more I want to do to it. I've since bought a Miller 175 and use pretty much all the time.

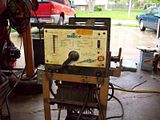
The welder I started with.


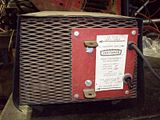
The front of the hf unit before I took it apart.


The inside of the unit. I wish I had taken more pics of this.


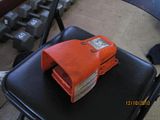
Whenever I get around to it, I'll build a voltage control circuit with this pedal. It also has a switch in it that I'll use to control a gas solenoid.


I'm losing a bit of voltage going through the rectifier, but I don't know exactly how much. I don't have a meter handy.
 

fourtogo

New member
Messages
201
Reaction score
0
Welding

It probably isnt the first project that someone should undertake as far as a complete scratch build. could get a good jolt if not careful.
On the welding forum, there was a gent who used two big solar panels with a tig rig and gas to weld razor blades together with good success. I also think he did use a dimmer to control the output(????).
I get Jodie's Web links all the time . Good info
The easier is the scratch start tig rig that any one could wip up in no time.
I had almost converted my FC wirefeed Clarke 90e to this setup, but really wasnt wanting to fry it on a chance of success.
If I do come across a big red welder Ill be building this setup. Im going to hit up my old boss to see if he has one of those kicking around somewhere aswell.

Here is some vids on that setup.

http://www.youtube.com/watch?v=9lV4tzg4zn0

http://www.youtube.com/watch?v=CA3w9Wq5mh0

Jodie's Web Links and info Video's are very good
 

fourtogo

New member
Messages
201
Reaction score
0
Welding

That is true. He and a few others out there(youtube the forums and a old welder guy I met once) say that if you can get good using this method, finding out where things are with the controls of the welder machine, you can do almost anything, thick thin small and large jobs and pieces.

One tip I got from somewhere(cant remember offhand right now), you can use a "scratch pad" to light off of. That is a small piece of copper attached to a arm or clamped on or otherwise right near the start of the weld joint. This piece will allow to have a good start to striking an arc, but keep the metal from strike marks and reduce the contamination to the tungsten from striking.
On the tips and tricks web link page . Jody shows how he built a foot switch so you don't have to strike a ARC . He used a blade type on off switch with a return spring . I get up dated web links for his page all the time .
 

mckutzy

Well-known member
Messages
8,353
Reaction score
31
Location
bc, canada
I bought the exact same switch that the guy has, it is some type of master power switch for the battery on a car.( kinda scary for a knife switch without a real handle).
I'll be able to rig up a nice pedal easily with this.
I wasn't able to find pics of this foot switch, I just took some stills from the movies he produced. Good enough for me.
 
Status
Not open for further replies.
Top