Bugzuki
New member
There aren't any requirements for shovels or fire extinguishers that I know of here in Washington. Just spark arresters in the exhaust pipe. A fire extinguisher is a good idea though. I will see if I can get one of those on there.
I have not thought about a paint color scheme very much yet. I was thinking about red and black, but that is pretty common. A scout theme of maybe green and tan would be appropriate and different. I can always repaint.
I will see if I can attach pictures to the thread.
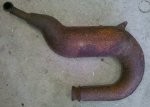
I looked at my exhaust pipe again after looking at what you (bighead) did and the pipes you have. I think my pipe will be better since it has a tighter bend. And, I can have the muffler go back on the drivers side instead of the passenger side. I will just put a 90 degree bend in the expansion pipe.
I also attached a close up picture of the tube bender I have.
I have not thought about a paint color scheme very much yet. I was thinking about red and black, but that is pretty common. A scout theme of maybe green and tan would be appropriate and different. I can always repaint.
I will see if I can attach pictures to the thread.
I looked at my exhaust pipe again after looking at what you (bighead) did and the pipes you have. I think my pipe will be better since it has a tighter bend. And, I can have the muffler go back on the drivers side instead of the passenger side. I will just put a 90 degree bend in the expansion pipe.
I also attached a close up picture of the tube bender I have.
Attachments
-
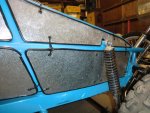
 exhaustexpansion.jpg73.4 KB · Views: 17
 -
 bender.jpg129.9 KB · Views: 34