Black Widow has begun

Status
Not open for further replies.

Aladinbama

Just Learning
Messages
89
Reaction score
0
Location
Pearland, Tx. USA
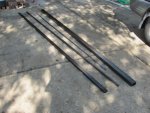
It's begun! The Black Widow build has begun! Today I purchased the tubing and started cutting it up. I'm pretty sure I'm short on the 1"x2", but it won't be hard to get some more.
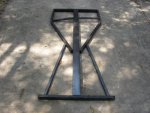
I'm extending the main frame piece 8" from 56" to 64". I think that will give me more than enough room and still allow for smaller riders with the adjustable seat. I also added 4" in width to the frame. The wheel base may not change much, but I didn't want it to look too long and narrow - spreading the weight isn't a bad idea anyway.
This will most likely take a while as I won't have a welder until after the first week of Oct. I will also be letting my students do a lot of the fitting of parts and pieces once all the welding is done - I would also like for them to actually consider the options regarding most of the parts/pieces/hubs/types of wheels etc. - of course BUDGET will be the word!
 

OzFab

Well-known member
Messages
15,615
Reaction score
71
Location
Warwick Qld, Australia
Great idea to get the kids really involved, it gives them a sense of achievement when it all works out :thumbsup:

One thing though, this would be better in the build log section of the forum. If you ask a mod nicely, they could move it for you :)
 

Aladinbama

Just Learning
Messages
89
Reaction score
0
Location
Pearland, Tx. USA
Moderator(s) feel free to move this if you deem necessary - I'll find it.
I teach in a district with a pretty good CTE program. I am actually teaching a small engine repair class to 8th graders (wish me luck). The metal shop welds trailers and Texas smokers to sell later in the year.
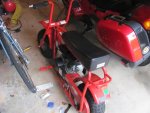
Anyway, couldn't put off a bit of work; Yesterday's hunting and gathering;

A bit of cutting later;

I picked up a cheap cut-off saw that developed issues - I think I was glazing the cutting wheel. Some of the larger pieces became a pain and I just used a grinder with a cut-off wheel (I'm pretty good with one of those - but I'll have to square off some of the ends a bit). I did cut some of the pieces a bit longer to give me some wiggle room later. I'll work from the back to the front when "fitting" it together. The 1" x 1" wasn't an issue and actually "cleaned" the wheel so it cut again (I guess).
Unfortunately, my b-day is a couple of weeks away and the welder will be my present (I hope). I should have it all cleaned up and ready to go by then.
Oh, yes, I actually cut another center frame piece out of the "extra". I guess I'll just have to build two, huh?
 

Aladinbama

Just Learning
Messages
89
Reaction score
0
Location
Pearland, Tx. USA
I thought I would save some room and do the pictures the right way! Sorry!
 

Attachments

  • IMG_3533.jpg
    IMG_3533.jpg
    110.6 KB · Views: 28
  • IMG_3535.jpg
    IMG_3535.jpg
    114.3 KB · Views: 52

Aladinbama

Just Learning
Messages
89
Reaction score
0
Location
Pearland, Tx. USA
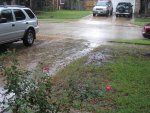
Well, a weekend with delays. I will say however that when you consider we don't get much rain, I'm REALLY looking forward to a good long rainy day.
I was going to cut the angles for the frame to get it ready to weld together, but I guess I'll have to wait until tomorrow - it's suppose to be ok for such.
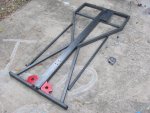
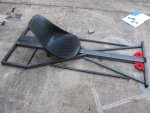
Here's the Black Widow in it's current configuration. I hope it doesn't stay that way too long! Maybe if it dries out a bit, or just lightens up, I'll get the Doodle Bug out and get it dirty :wai:.
I did a quick count and all the parts for this is going to run me about $400 - not including the engine (most likely a HF Predator 212cc). I'm glad I have a while!
 

Attachments

  • A Beautiful Day.jpg
    A Beautiful Day.jpg
    159.8 KB · Views: 24
  • IMG_3541.jpg
    IMG_3541.jpg
    86 KB · Views: 26
  • IMG_3542.jpg
    IMG_3542.jpg
    83.5 KB · Views: 28

Swabbster

New member
Messages
439
Reaction score
0
Well, a weekend with delays. I will say however that when you consider we don't get much rain, I'm REALLY looking forward to a good long rainy day.
I was going to cut the angles for the frame to get it ready to weld together, but I guess I'll have to wait until tomorrow - it's suppose to be ok for such.
Here's the Black Widow in it's current configuration. I hope it doesn't stay that way too long! Maybe if it dries out a bit, or just lightens up, I'll get the Doodle Bug out and get it dirty :wai:.
I did a quick count and all the parts for this is going to run me about $400 - not including the engine (most likely a HF Predator 212cc). I'm glad I have a while!

a 6.5hp motor is not enough, for me anyway, id recommend like a 250 4 stroke dirt bike motor
 

r97

Measure twice cut once
Messages
3,793
Reaction score
8
Location
Massachusetts, USA
Engine size will depend on what kind of performance he is looking for. Considering the frame/design he chose I would say a 6.5 would be just fine, maybe throw on a CVT if you want to go off road/uphill a lot. In my opinion, a 250 dirt-bike engine would be more suited to a race kart chassis, or an ultra light buggy.
 

Aladinbama

Just Learning
Messages
89
Reaction score
0
Location
Pearland, Tx. USA
Looking good so far. Now start cutting the right angles and get ready to weld it! :D Goodluck.

Managed to get many of the angles cut today, although not all - it started raining again. Have some touching up to do, but it's fitting together pretty well. Talked with a go kart guy (owns a shop here) and he shared his concern for the plans I'm building - worried that if "an idiot" freaked they may try to put their feet down to stop and the frame shape might allow that. Simple fix - a 1x1 up each side and use some more stretched metal - not sure if I'm really worried about it.
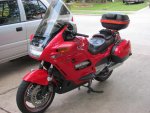
I did get the welder for my birthday so after a bit of practice I'll start "sticking" it together. I wanted to get started this weekend, but had to change the plugs, tires, and oil on my main ride to work. Not a go kart, but still a lot of fun.
 

Attachments

  • Back.jpg
    Back.jpg
    156.7 KB · Views: 13
  • Current Picture.jpg
    Current Picture.jpg
    107.5 KB · Views: 20

machinist@large

Active member
Messages
2,865
Reaction score
33
Location
West Michigan, 49331
...... I wanted to get started this weekend, but had to change the plugs, tires, and oil on my main ride to work. Not a go kart, but still a lot of fun.

:censored::mad::mad2:You know, the only thing keeping me from getting REALLY mad/ P?O when they show off one of their rides that I've lusted after for a long time, is when I consider the local climate they live in..... Texas, in the hurricane belt, fire ants and Armadillo's, drought and brush fires........

For some reason, no hurricanes, no earthquakes, no weird/ dangerous wildlife actually make it easy to deal with all the snow, (not to mention the fact that I can always add layers when it get's cold; when it get's hot, I can only take SO many layers off before I can't legally leave the house).

Up here in Michigan, cool/ killer rides like yours are really thin on the ground; that's why when someone posts that they had to work on their " Just my commuter ride, nothing great"........ I'm sorry, I just have to speak out.....:censored:

Cool ride!!!:thumbsup: I've dreamed of owning one for a Looooooong time. Good luck with the shelves/ welding project..:cheers2::roflol:
 

Doc Sprocket

*********
Messages
15,677
Reaction score
151
Location
Ontario, Canada
A "floor" on a kart is nothing short of mandatory. Your consultant is right- people do stupid crap when they panic. Not to mention, the "wildcard" factor. A bad bump at the wrong time could put your foot in exactly the wrong place, and nothing kills a good time faster than a trip to the E.R.

Also- keep in mind that altering the track width and/or wheelbase will have an effect on the required steering arm angles, which will have to be altered to maintain the Ackermann effect.
 

Aladinbama

Just Learning
Messages
89
Reaction score
0
Location
Pearland, Tx. USA
Sorry Machinist, I lived in Moorhead, Mn. for 6 years so I know your pain. I owned a Suzuki 250 there - one carb and no biggee to get going every spring. This ST is a dream bike for me as well. Thanks!

Toystory, no argument with the floor - I'm thinking expanded steel (but some other material may be used - $$$). He was saying because of the way the frame comes together near the middle, it invited "bad" judgements. I have a plan to run a 1"x1" up each side to add onto the side area so it doesn't come to the middle frame (and material to fill in that area).
Anyway, Issue - spindles will be forward pointing and I'm trying to understand how I can build in ackemann without doing anything too funky. Would spindle arms similar to these help (a BUNCH)? http://www.bmikarts.com/item/Bearing-Spindle-U-Weld-Kit-660038-3292 I was thinking I could make some, but buying is an option as well. I'm thinking the angle arm would allow something closer anyway.
 

Aladinbama

Just Learning
Messages
89
Reaction score
0
Location
Pearland, Tx. USA
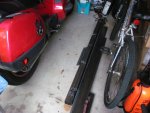
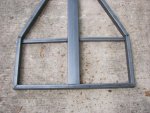
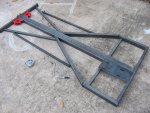
Another day, a little bit more gets done! I managed to buy some 3/4" tubing for the side additions (on sale) and finished cutting all the anges on the main frame. Now I just have to angle the new additions and weld it all together.
My neighbor also brought me some scrap to practice welding on. I guess the last couple of angles not being cut might be avoidance behavior - if they're not done I don't HAVE to start welding - yet! I am actually looking forward to that thought :worried2:.
 

Attachments

  • 10-20III.jpg
    10-20III.jpg
    151.1 KB · Views: 21
  • 10-20II.jpg
    10-20II.jpg
    141.7 KB · Views: 22
  • 10-20.jpg
    10-20.jpg
    137.5 KB · Views: 27

landuse

Moderator
Staff member
Messages
18,793
Reaction score
586
Location
Pietermaritzburg, South Africa
It looks like you have got the basic frame going nicely. Now you just have to weld. Don't be scared to weld the frame. Practice until you are are confident and then go for it. Just remember to tack weld the whole thing before you do the final weld. Tack welding is good cos you can always change things easily if the don't look good. It also helps the frame not warp too much.
 

Aladinbama

Just Learning
Messages
89
Reaction score
0
Location
Pearland, Tx. USA
practice

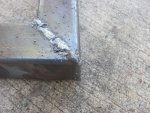
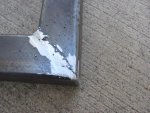
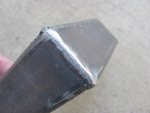
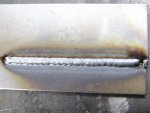
Well, I pulled out the welder, set it up and practiced on some like metal. I don't think I did too bad - allowed the puddles to get a bit big, but that's not a bad thing. I started out too hot and burned the metal, turned it down and it was ok. The gap on the inside of this 45 was better than 1/8" - managed to fill it in pretty well. A neighbor who welds for a living was impressed for it being my first try.
I might practice a bit more, but I might just go ahead and weld it up (or at least tack it up).
 

Attachments

  • before.jpg
    before.jpg
    113.3 KB · Views: 27
  • after.jpg
    after.jpg
    125.7 KB · Views: 22
  • edge.jpg
    edge.jpg
    49.7 KB · Views: 18

mysteryboy28

New member
Messages
1,582
Reaction score
11
Location
Lansing, MI
looks like you need to turn the heat back up a bit, as it looks like that's a lot of surface beading and not much penetration. it's ok if the metal looks like it got a little hot - as long as you're not blowing holes through it with the welder.

the ideal weld will look like the picture below. notice how the edges of the weld blend into the metal, and don't look like they're sitting on TOP of the metal.

practice a bit more with different heat settings and speed. i like to do small mini circles when i weld, which makes things more even.
 

Attachments

  • welding_guide.jpg
    welding_guide.jpg
    80.2 KB · Views: 28

jdmkid

New member
Messages
201
Reaction score
0
Location
Toronto, Ontario
Yeah make little e's or o's while moving foward a bit. you should get a bluish outline around your weld, which means there is good penetration. Adjust your heat settings a bit higher since its thick metal.
 
Status
Not open for further replies.
Top