Baja Warrior build

Status
Not open for further replies.

Bwdeaton

New member
Messages
405
Reaction score
7
Location
Dayton, Ohio
I've been offline for a while, since I got busy, finally back to a fixed schedule, and starting another build.

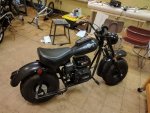
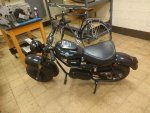
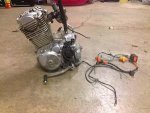
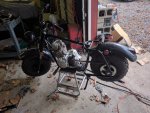
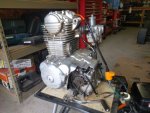
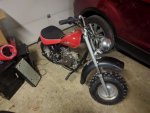
Picked up this Baja Warrior MB200 two days ago. Got it to start up but it runs pretty poorly and smokes. The clutch is also pretty worn out, slips and gets hot. I have a dirt bike engine I have always wanted to put on one of these bikes and I finally decided to do it.

I started looking at what I'll need to do to get this to work. It looks like it should fit and not be too hard to bolt up, as long as I can align the chain and get it in a good position. I also need to figure out a gas tank. I need to move the brake lever to the right bar or a foot pedal, so I can put the clutch on the left. I will also need to build a linkage to connect the shifter since the pegs are so far forward.

I would like to keep the tank look as it is, maybe I could build a tank to fit inside the toolbox on it, or find a mini chopper tank or similar.
 

Attachments

  • IMG_20170919_161621.jpg
    IMG_20170919_161621.jpg
    353.4 KB · Views: 11
  • IMG_20170919_175609.jpg
    IMG_20170919_175609.jpg
    374.1 KB · Views: 11
  • engine.jpg
    engine.jpg
    14.8 KB · Views: 106

bob58o

SuckSqueezeBangBlow
Messages
9,646
Reaction score
1,857
Location
Chicago-town USA
I'm excited to see this.

Hope my heart doesn't get broken like those poor fellas you strung along when you posted this engine for sale a year ago. LOL
 

Bwdeaton

New member
Messages
405
Reaction score
7
Location
Dayton, Ohio
I'm excited to see this.

Hope my heart doesn't get broken like those poor fellas you strung along when you posted this engine for sale a year ago. LOL

I hope it works out too, never would have posted the **** thing if I knew how much shipping would end up costing.
 

Bwdeaton

New member
Messages
405
Reaction score
7
Location
Dayton, Ohio
Pulled the governor out of the stock motor to give some throttle response, of course my brother proceeded to keep doing wheelies until he flipped it and broke my rear fender.
 

bob58o

SuckSqueezeBangBlow
Messages
9,646
Reaction score
1,857
Location
Chicago-town USA
Who needs fenders anyway. Just more weight to slow you down. Plus, as your brother showed, they get in the way of wheelies. LOL
 

Bwdeaton

New member
Messages
405
Reaction score
7
Location
Dayton, Ohio
Got it mounted up. Plenty left to do. Managed to misplace the intake manifold while I was working on it today and spent an hour trying to find it.

Things finished -
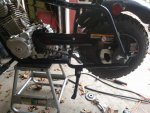
-Engine mounting. The rear mount is a bracket that bolts to the frame and motor so that I can wiggle it out if I need to. Used a straight edge to keep the sprockets in line and it seems great right now, I'll have to monitor it under load.
-New chain cut to length and installed. Modified chain guard with another guard I had laying around so it is covering the whole chain. The chain is at a different angle than it was stock so I had to redrill the holes but it turned out great.
-Connected clutch cable to the left bar and added a lever and perch on the right for the brake. both are working great.

Things I need to do before the first ride - minimum stuff
-Need to locate and modify the intake manifold so the carburetor can be angled enough to clear the frame tube.
-Need to hook up shifter lever and linkage.
-Need gas tank of some type.
-Need to buy exhaust header, have muffler already.
-Need to get throttle cable that works with this carburetor. May be able to rig something up temporarily.

Things to get done for finished product -
-Connect kill switch.
-Mounting tabs for cdi, coil, and rectifier (need to get rectifier, only necessary if I want the headlight to work/ need 12v power)
-Paint. Probably just new black paint on the areas I ground and welded rather than repainting everything.
-Shorten front fender mounting tabs so it wont bottom out anymore.
-Probably more I'll think of.

Some ideas I have - I would like to try converting the stock toolbox to be partially fuel tank an partially tool box. I think I could add a tank inside with a fill tub that leads to the outside but still retain some space to stick tools in the box, without sacrificing too much fuel capacity. If it's to impractical I can build a cylindrical tank to mount behind the seat and just leave it as a toolbox.
I'd like to add a brake light/ tail light so people behind me can see when I'm slowing down.

I'll have some pics below.
 

Attachments

  • IMG_20171007_170327.jpg
    IMG_20171007_170327.jpg
    330 KB · Views: 9
  • IMG_20171007_164120.jpg
    IMG_20171007_164120.jpg
    455.7 KB · Views: 8
  • IMG_20171007_165403.jpg
    IMG_20171007_165403.jpg
    529.7 KB · Views: 7
  • IMG_20171007_121147.jpg
    IMG_20171007_121147.jpg
    321 KB · Views: 9
  • IMG_20171007_120638.jpg
    IMG_20171007_120638.jpg
    461.9 KB · Views: 5

Bwdeaton

New member
Messages
405
Reaction score
7
Location
Dayton, Ohio
Worked some more when I had time today. Just got it running for the first time tonight.

Found the intake manifold first thing in the morning, only looked for 2 minutes which was nice, after looking an hour last night.

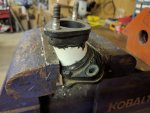
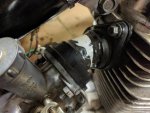
Modified the intake manifold to get enough clearance for carb without restricting flow hopefully. I kept it as short as possible. I cut it in half and used JB weld to epoxy a piece of PVC cut at an angle into the middle. I sanded the pvc and manifold before epoxying to give it enough to hold onto I hope. See pics of how it turned out. Not the prettiest but it should work.

I worked on other projects for a while until this evening when I hooked up all the wiring, and put some gas in the carb and got it started up. Rigged up temporary throttle cable for now. It will work until I get the correct one which had to be ordered from China. Still plenty to do, but I'm happy with how far I got this weekend, I'll order some parts and hopefully get them to work on it next weekend.

https://www.youtube.com/watch?v=cDfHizvBl_c
 

Attachments

  • IMG_20171008_135917.jpg
    IMG_20171008_135917.jpg
    278.8 KB · Views: 4
  • IMG_20171008_192203.jpg
    IMG_20171008_192203.jpg
    281.1 KB · Views: 4

mckutzy

Well-known member
Messages
8,353
Reaction score
110
Location
bc, canada
That's pretty cool...
You might need to brace the carb so it don't stress the joints... But nice fix...
 

Bwdeaton

New member
Messages
405
Reaction score
7
Location
Dayton, Ohio
That's pretty cool...
You might need to brace the carb so it don't stress the joints... But nice fix...

Yeah I've been thinking that, I could do it pretty easily by building a bracket to go between the flange bolts at the engine and bolt on the carb.
 

maxpower49

Member
Messages
116
Reaction score
1
Location
Up-State New York
This looks like a fun little project and it seems like it slipped together fairly quickly as well! Looks like you will be doing laps on it in no time only thing I would be slightly worried about is the brake set up but those are optional any way haha Does the motor mount slide or move around at all, I am just wondering how you are dealing with the chain tensions as it stretches and breaks in.
 

mckutzy

Well-known member
Messages
8,353
Reaction score
110
Location
bc, canada
The rear axle has a chain tensioner... I guess at a point he could put in a half link or remove a full link.....
 

Bwdeaton

New member
Messages
405
Reaction score
7
Location
Dayton, Ohio
This looks like a fun little project and it seems like it slipped together fairly quickly as well! Looks like you will be doing laps on it in no time only thing I would be slightly worried about is the brake set up but those are optional any way haha Does the motor mount slide or move around at all, I am just wondering how you are dealing with the chain tensions as it stretches and breaks in.

The motor is solid mounted. The rear wheel has adjusting nuts on it so it can slide back to tension the chain. It has a drum brake on the rear and it works decent enough for now. I have several sets of old Honda shoes that look similar so I can change them out if it wears too quickly.

It was pretty straightforward to this point, everything just lined up pretty good. I had been wanting to do this swap for a while, just never had an opportunity to get the frame at a decent price until recently.

---------- Post added at 09:46 PM ---------- Previous post was at 09:40 PM ----------

The rear axle has a chain tensioner... I guess at a point he could put in a half link or remove a full link.....

Looks like you beat me to it. I'm not too worried about this chain wearing too fast, it's pretty good quality, I bought the 125ft spool you can see in one of the pictures from a local warehouse dealer who got a bunch of it at auction. Think it only cost me about $0.85 per foot, great deal. I've put chains on around 7-8 bikes and quads already, It paid itself off quickly, and I've noticed very little wear so far on anything.
 

Bwdeaton

New member
Messages
405
Reaction score
7
Location
Dayton, Ohio
It's been a while since I've posted here, got busy with final exams and started on another project - helping a friend build a turbocharged honda civic.

So for the most part, I made very little progress on this, but I did get some stuff done which I'll list here.

I put on a shifter and made the shifter linkage but haven't welded the linkage on yet since I'm not really happy with the welds I have holding the shift lever on. I decided I need to come up with something better for the intake manifold since the JB weld can't hold up well enough, so I still have to get that figured out.

I finally came up with a solution for the fuel tank, which came spontaneously and required me spending more money I really don't have right now, but it was a great deal and I couldn't stop myself, it was a real two birds one stone type situation.

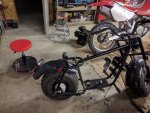
Anyway, here's the solution. I bought another minibike. I'm pretty sure this will make everything work out. I got an older version, the "mini baja" rather than the baja warrior, but their basically the same. The mini baja has a fake tank shroud that has no bottom in it so it should fit over the engine and cover it up without bumping on the throttle cable and top of the carb like the tool box tank does. This should allow me to build a tank that can take up the available space between this cover and the motor.

Then I also have another minibike I can build. It needs some motor work but I think I'll fix it up with parts from the warrior motor along with an ebay torque converter I've had on a shelf waiting to get used for something. Then I'll have two mini bikes to race each other or something. Not exactly sure what ill do with them yet but I know two is better than one.

Best part is the great deal I got on the bike, which makes this whole thing able to move forward. Got the bike for $60 which was great since now I'll hopefully have what I need to get 2 running bikes.
 

Attachments

  • IMG_20171231_220542.jpg
    IMG_20171231_220542.jpg
    247.2 KB · Views: 7
Status
Not open for further replies.
Top