Another free engine...

Status
Not open for further replies.

anickode

Active member
Messages
2,296
Reaction score
77
Location
S.E. Michigan
Snagged another free engine (well, a generator) a couple weeks ago. A coworker asked me to take a look at it. The engine ran fine but it wouldn't make power. He said if it can be repaired for less than 20 bucks (which is frequently the case if it's just a bad exciter capacitor or brushes), he'd pay me to fix it, otherwise I can just keep it.

Well the generator looked like it fell in the ocean, both outside and inside the gen head, and the exciter winding failed a megohm test miserably.

I figured out a trick for removing stubborn armatures from a tapered shaft. Simply thread a grease zerk into the end of the armature where the long retainer bolt would usually pass through, pump grease into it till you can't pump anymore, and give it a light tap with a hammer. Popped right off. No pullers, or pushers, or stacking bolt shanks up in there and cranking down.

Anywho... It's a good solid running Briggs 10hp OHV. She ain't pretty, but she starts on the first pull, doesn't leak oil or blow smoke, and has good compression. Its the tapered shaft, but fortunately it's the kind with the long straight 7/8" shaft section before the taper. Will be an easy conversion. No clue what I'll use it for, but one can never have too many good engines laying around, IMO.

Another quick note... Most portable Coleman/powermate style generators that did not come equipped with auto-idle do not have an idle jet in the carburetor, so they usually won't idle without the choke on. A different carburetor is about the only good way to rectify this.

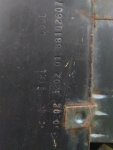
Couple quick pics... The long shaft with the tapered end. Much easier to deal with than the tapered stub-shafts that you'll frequently see.

And the end of the armature, where I tapped some 1/8" NPT threads (didn't even have to ream it to size first), and installed a grease zerk. 10,000 psi of pressure (typical for a grease gun) and one light tap with a 16oz hammer is all it took to get the armature off.
 

Attachments

  • IMG_20170715_142304.jpg
    IMG_20170715_142304.jpg
    332 KB · Views: 10
  • IMG_20170715_141544.jpg
    IMG_20170715_141544.jpg
    264.9 KB · Views: 13

anickode

Active member
Messages
2,296
Reaction score
77
Location
S.E. Michigan
Another freebie today... A nice clean Old 2hp horizontal shaft Briggs flat head. Started on the second pull with a bit of 2 stroke gas in the intake. Compression seems good. Not sure what use I'll have for a 2 horse engine, but it's a cool little motor. Maybe it's time I build an entry level kart for the kids.
 

Hellion

Staff Murderator
Messages
9,413
Reaction score
4,347
Another freebie today... A nice clean Old 2hp horizontal shaft Briggs flat head...


Seriously. Let's keep it going.
 

anickode

Active member
Messages
2,296
Reaction score
77
Location
S.E. Michigan
Fine. When I said clean I meant no rust or damage. Plenty of grime from sitting though.
 

Attachments

  • IMG_20170721_210615.jpg
    IMG_20170721_210615.jpg
    479.3 KB · Views: 24

Hellion

Staff Murderator
Messages
9,413
Reaction score
4,347
Nice. I really dig those old school ones with the mini tanks. It'll have points and condenser ignition too, if it hasn't been switched over.
We don't see those too often around hea'h because no one has the cojones to fool with them. ;)

Thanks for the photo.
 

anickode

Active member
Messages
2,296
Reaction score
77
Location
S.E. Michigan
It'll have points and condenser ignition too,

Thanks for the photo.

Im pretty certain it does, though I haven't really looked at it that closely yet. Iwas pleasantly surprised when it started up as easily as it did. Usually those breaker points corrode over time from sitting and it's the first thing you have to address to get it running.

My engine driven welder has an Onan B48M on it, and I have to clean and gap the points about once a year.

I ain't afraid of no steenkin' breaker points.
 

anickode

Active member
Messages
2,296
Reaction score
77
Location
S.E. Michigan
Started digging into the 2 hp a bit this evening. I dumped out the old oil, put in some fresh, put a pint of fuel in the (bone dry) gas tank, and a little squirt in the carb, and she fired up in 2 half-assed (didn't have it bolted down) pulls. She's a good strong runner. Revs up and idles just fine.

I think I'm gonna make a little mini trike with it. Not enough torque to be a drift trike, I'm sure, but it might be a fun little ride-around for the kids when they're a bit bigger.

I still have too look up the numbers to determine the age, but this little beastie has a breaker point ignition and an air vane governor, so that should at least give ya an idea as to the age.
 

Hellion

Staff Murderator
Messages
9,413
Reaction score
4,347
The dings and dents give it character but I'm real particular about grime--these engines are grime magnets in the area between the engine and the gas tank.

I've got a 3 or 3.5 HP that starts crazily easy too. Don't have it bolted to anything so it seriously vibrates all over the place even with me leaning on it. Quite a strong runner too.

I think it has an air vane governor too. Those are oddball.

Well yours has got to be older than 1982 which is the year Briggs introduced their solid-state ignition.
 

anickode

Active member
Messages
2,296
Reaction score
77
Location
S.E. Michigan
The dings and dents give it character but I'm real particular about grime--these engines are grime magnets in the area between the engine and the gas tank.

I've got a 3 or 3.5 HP that starts crazily easy too. Don't have it bolted to anything so it seriously vibrates all over the place even with me leaning on it. Quite a strong runner too.

I think it has an air vane governor too. Those are oddball.

Well yours has got to be older than 1982 which is the year Briggs introduced their solid-state ignition.

Yep, I've got the tank, carb, and fan shroud off, and the motor is ready for a thorough cleaning. I already cleaned up the tank and shroud, and they both turned out pretty nice. Lots of grime in the nooks and crannies right where you mentioned.
 

anickode

Active member
Messages
2,296
Reaction score
77
Location
S.E. Michigan
Well I got 'er cleaned up as good as it's going to get. Some PB Blaster brand Citrus degreaser (really good stuff, BTW), some rags, and a screwdriver for the tight spots. I'm not going to tear down a perfectly good engine for the sake of getting it factory clean.

I ditched the air vane governor... Those things are finnicky on a good day.

The foam air cleaner is basically gone... It's not even spongy anymore. You can poke it with your finger and it literally disintegrates. I'm sure I can find a foam filter for it easily enough, or just stick a little cone jobby on there

I also made a new carb to intake gasket to replace the leather (WTF?) one that was on there.

Got the famous Briggs gas seep between the carb and tank though. Gasket and mating surfaces look perfect... Probably have to try a new gasket and put some new screws in it so I can tighten it better. Looks like it has done that for a long time, based on the TOTAL absence of paint around the gasket.

Seriously, what's up with the screws on older engines? It's like they're made of pot metal. I assume they're that soft so you can't over tighten them and crack the carb or strip the threads, but dang... They strip out like they're made of silly putty
 

Attachments

  • IMG_20170801_214529.jpg
    IMG_20170801_214529.jpg
    331 KB · Views: 15

Hellion

Staff Murderator
Messages
9,413
Reaction score
4,347
You just used rags and that degreaser on the grime and it came clean?

I'm not real familiar with gas tank seep but the manuals say that if it leaks there and there's warpage, you really have no recourse except getting a new tank, carb or both. I don't see why you can't use gasket maker/RTV there, seal it up well and worry about getting it apart later.

Speaking of the lack of paint around or underneath the gaskets, it is my understanding that the engines were assembled first then painted last. There's classic, tell-tale signs of factory overspray on certain parts.

Can't speak about any quality issues with the screws. I've got one as old as 1968 but I figure if the engine's been serviced over its lifetime, the screws and bolts are going to be stretched out a bit and near their service limit. I hate galling so most every fastener gets cleaned and at least a light coating of Anti-Seize.

If you don't use it for anything, you can mount it to a wooden sled: :D
https://www.youtube.com/watch?v=sD-t3U0xTFg
 

anickode

Active member
Messages
2,296
Reaction score
77
Location
S.E. Michigan
You just used rags and that degreaser on the grime and it came clean?

I'm not real familiar with gas tank seep but the manuals say that if it leaks there and there's warpage, you really have no recourse except getting a new tank, carb or both. I don't see why you can't use gasket maker/RTV there, seal it up well and worry about getting it apart later.

Speaking of the lack of paint around or underneath the gaskets, it is my understanding that the engines were assembled first then painted last. There's classic, tell-tale signs of factory overspray on certain parts.

Can't speak about any quality issues with the screws. I've got one as old as 1968 but I figure if the engine's been serviced over its lifetime, the screws and bolts are going to be stretched out a bit and near their service limit. I hate galling so most every fastener gets cleaned and at least a light coating of Anti-Seize.

If you don't use it for anything, you can mount it to a wooden sled: :D
https://www.youtube.com/watch?v=sD-t3U0xTFg

I use pb blaster citrus degreaser. Works awesome. I pulled it all apart, sprayed it down real well, and started wiping. On real heavy gunk it can take a few applications but it works great. It also works really well for getting paint overspray off your hands.

The lil Briggs is ready to go. I made a new gasket from very thin fibre gasket material and coated it with copper head gasket spray. It's an odd combination, but I have found it to work in the past on difficult parts. Most RTV products are not rated for prolonged direct exposure to gasoline, and will fail.

I got the 10 hp cleaned up a fair bit. Pulled all the tin off and sandblasted and repainted it. Pulled the valve cover and soda blasted and painted it. I ghetto-turned the shaft with a grinder and brought it down to 3/4" and cut a 3/16" keyway in it.

I wound up with about .010 total radial run-out... Not perfect, but you can't ask for much better doing it by hand, and it'll be good enough to smack a centrifugal clutch on there. The biggest issue I think people have doing a grinder turn is bolting the engine down solid enough so it isn't vibrating. A wooden bench will not cut it. I use my extremely heavy, extremely rigid welding table (over 700 lbs and less than 1/16" deflection with a half ton sitting in the middle of it) as a base.

When an engine is running, if you look at any part of it, and the edge looks fuzzy, that distance it's vibrating, which can be 1/16" or more is how far off-center your shaft is going to be when it's done. Minimize that, and your shaft will run true. The other trick is to go VERY slowly, using a hard grinding wheel. Very light pressure. A flap disc may seem better off the bat, but because of its squishy nature, it will follow any irregularities, making them worse. A hard wheel with light pressure will skip off the high spots, taking them down, while leaving the low spots intact.

I think I'm going to try out some of this new soda abrasive I picked up to clean all the chalky white oxidation off the block. It's a little bit finer than some of the other stuff I've used.
 

anickode

Active member
Messages
2,296
Reaction score
77
Location
S.E. Michigan
The ol 10 hp... Ready for a home. I just need to crack it open and pull the gov, and put an air filter on it.
 

Attachments

  • IMG_20170810_211646.jpg
    IMG_20170810_211646.jpg
    292.5 KB · Views: 14

anickode

Active member
Messages
2,296
Reaction score
77
Location
S.E. Michigan
Another freebie today... Came with a crappy rototiller attached to it. Some fresh gas and a shot of ether, and it started in 2 pulls. Carb is gummed up though. Only runs with the choke on. Easy fix. I THINK this one has the ball bearing on the shaft end of the crank. :thumbsup:

Edit: yep. Ball bearing crank. Too new not to be. This has to be nearing the end of the pulsa-jet flatheads.
 

Attachments

  • IMG_20171021_183913.jpg
    IMG_20171021_183913.jpg
    431.5 KB · Views: 9
  • IMG_20171021_183933.jpg
    IMG_20171021_183933.jpg
    192.3 KB · Views: 6
Status
Not open for further replies.
Top