You are using an out of date browser. It may not display this or other websites correctly.
You should upgrade or use an alternative browser.
You should upgrade or use an alternative browser.
Sequoia Electrathon Racer
- Thread starter Functional Artist
- Start date
Functional Artist
Well-known member
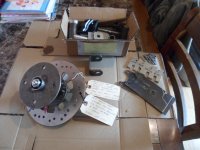
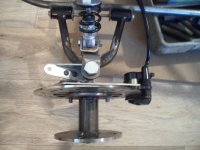
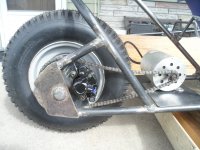
My original plan was to try-n-bend a section of the caliper backing plate
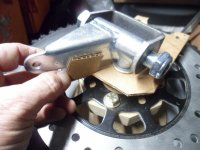
For attaching, connecting the backing plate to the spindle
...or when the brakes are applied the bracket will rotate around the spindle (NOT GOOD!)
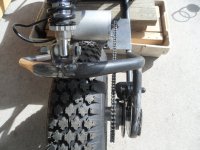
Another view
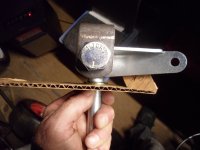
But now, after thinkin' it thru a bit more, I'm concerned that the bracket may warp
...while trying to bend them "tabs"
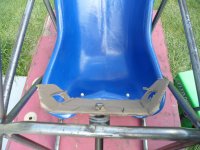
So, I came up with a "plan B" (independent "tabs")
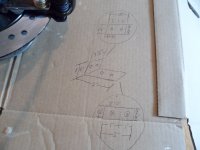
Kinda like this
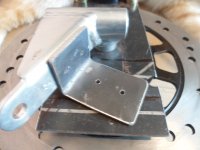
Found another use for them 1/4" x 20 Allen/button head bolts
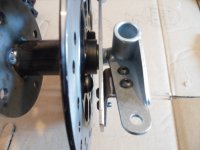
I threaded the holes in the brackets
...so, we don't need to add nuts to the back side
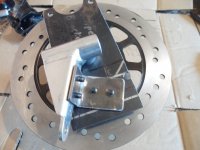
After trimmin' the other bracket down a bit, we'll have a (L & R) matchin' pair
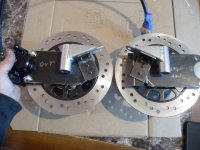

For attaching, connecting the backing plate to the spindle
...or when the brakes are applied the bracket will rotate around the spindle (NOT GOOD!)
Another view

But now, after thinkin' it thru a bit more, I'm concerned that the bracket may warp
...while trying to bend them "tabs"
So, I came up with a "plan B" (independent "tabs")


Kinda like this

Found another use for them 1/4" x 20 Allen/button head bolts

I threaded the holes in the brackets
...so, we don't need to add nuts to the back side

After trimmin' the other bracket down a bit, we'll have a (L & R) matchin' pair


BaconBitRacing
Well-known member
That’s purdy!
Master Hack
Well-known member
Look @ you, with the cool button heads!
Master Hack
Well-known member
As a public service, Scrap yard engineers would like to replay the episode of SHCS!
Those bolts that you cuss as ya try to remove them with a stripped off allen wrench are known as Socket Head Cap Secrews.
Whats the difference between a bolt and a SHCS you might ask. Well, I don't know. Go ask google.
What I do know is that they are stronger and tougher than even a grade eight bolt.
The bolt guru once told me to consider them a grade 10.5! that's why they are used in machines a lot. That and they look mo cooler.
I like to use them in the tough spots. I have cantilevered shock mounts on frank and that's an example. Your cantilevered rear axle would be a good candidate for a SHCS. Thats all I know 'bout SHCS'S. Valuable info, worth exactly what it cost ya!
Thats it for SHCS.
 www.aftfasteners.com
Those bolts that you cuss as ya try to remove them with a stripped off allen wrench are known as Socket Head Cap Secrews.
Whats the difference between a bolt and a SHCS you might ask. Well, I don't know. Go ask google.
What I do know is that they are stronger and tougher than even a grade eight bolt.
The bolt guru once told me to consider them a grade 10.5! that's why they are used in machines a lot. That and they look mo cooler.
I like to use them in the tough spots. I have cantilevered shock mounts on frank and that's an example. Your cantilevered rear axle would be a good candidate for a SHCS. Thats all I know 'bout SHCS'S. Valuable info, worth exactly what it cost ya!
Thats it for SHCS.
Socket Head Cap Screws Dimensions & Specs | AFT Fasteners
AFT Fasteners provides a helpful resource on socket head cap screw dimensions including: fhcs dimensions and shcs dimensions, material, hardness, tensile strength, and yield strength.
Functional Artist
Well-known member
Get some nice bolts for that finishing touch....
No, get yer own dam bolts!
View attachment 146717View attachment 146718 View attachment 146719
Hey T,Look @ you, with the cool button heads!
Yup, I put that sh*t on everything

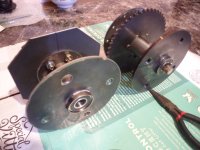
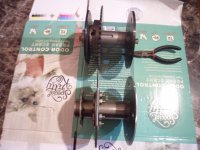
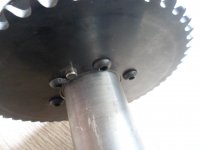
Rotor bolts
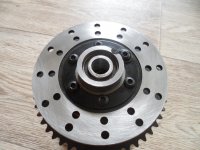
Sprocket bolts
* Notice the locator pin?
It don't git no better (or professional) than that
Master Hack
Well-known member
Nice bolts finish that off perfectly!
Now ya see what l was trying to’splain about the whole doughnut deal?
Now ya see what l was trying to’splain about the whole doughnut deal?
Functional Artist
Well-known member
Yup, it's pretty "sweet"!Nice bolts finish that off perfectly!
Now ya see what l was trying to’splain about the whole doughnut deal?
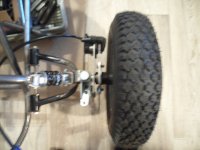
Now that we know (or have a good idea of) overall chassis height (front & rear) we can "set" the Caster angle, of the front spindles
I set an A-frame on a level surface
...double checked with an angle gauge
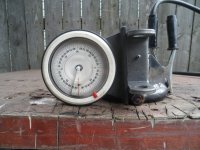
Then, adjusted the spindle bracket to ~5* negative (toward the rear)
* It looks a bit "off"
...but, that is due to the camera angle
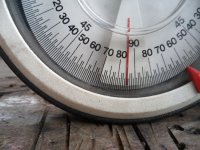
Yup, that's more like it

...& then, couple of "tacs" to "lock" 'er in place
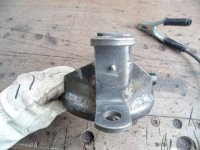
Double checked the setting
...then, removed the adjusting "screw"
Functional Artist
Well-known member
Denny
Canned Monster
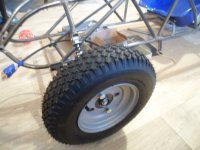
Good clearance Clarance!
Master Hack
Well-known member
The wheel actually fits?
How did THAT happen?
You might notice the rear brake rotor is warped a little. I don't think it will cause a problem, but you might need the 娜吉艾哦 dewarping tool. I found the rotor to be "flexible" might be a good term.
How did THAT happen?
You might notice the rear brake rotor is warped a little. I don't think it will cause a problem, but you might need the 娜吉艾哦 dewarping tool. I found the rotor to be "flexible" might be a good term.
BaconBitRacing
Well-known member
Despite your best efforts, it seems to be securely mounted.The wheel actually fits?
How did THAT happen?
Functional Artist
Well-known member
Hey T,You might notice the rear brake rotor is warped a little. I don't think it will cause a problem, but you might need the 娜吉艾哦 dewarping tool. I found the rotor to be "flexible" might be a good term.
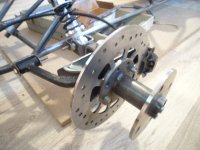
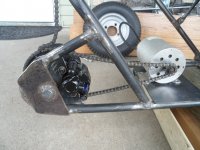
Yup, I noticed that "warpage" while test fittin' the brake caliper, on the rear hub today
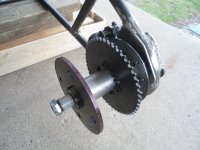
Caliper mounted w/M8 buttonhead's
...& notice the bleeder screw is toward the top
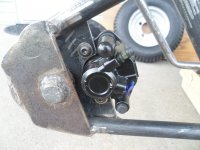
Also, the adjustable sprocket/rotor "carrier' came in handy

...as I needed to adjust the rotor, inwards, toward the caliper ~1/32" for optimal rotor to caliper alignment

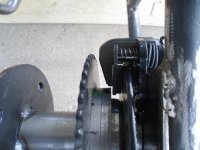
Het Denny,Good clearance Clarance!
The hub to caliper clearance seems ta be "tight" but, adequate in the rear as well
Master Hack
Well-known member
I noticed mine are not flat either. Grab it with a cresent wrench and bring it into compliance.Yup, I noticed that "warpage" while test fittin' the brake caliper, on the rear hub today
Master Hack
Well-known member
If you need a little more clearance between caliper and sprocket, it can be shimmed.
i cheated you out of the 3/16 flange in your drawings.
(don't ya love it when yer drawings are ignored)
i cheated you out of the 3/16 flange in your drawings.
(don't ya love it when yer drawings are ignored)
Functional Artist
Well-known member
Denny
Canned Monster
Thanks for the clearance Clarance! Kevin is married so he’s used to being ignored.

nobled2
Member
- Messages
- 33
- Reaction score
- 36
My kart is not in this level of building but I found that if I leave the rotor to float while keeping it attached to the axle with a simple keyway, it keep unwanted rubbing and friction to a minimum.Hey T,
Yup, I noticed that "warpage" while test fittin' the brake caliper, on the rear hub today
View attachment 147053
Caliper mounted w/M8 buttonhead's
...& notice the bleeder screw is toward the top
View attachment 147055
Also, the adjustable sprocket/rotor "carrier' came in handy
...as I needed to adjust the rotor, inwards, toward the caliper ~1/32" for optimal rotor to caliper alignment
View attachment 147054
Het Denny,
The hub to caliper clearance seems ta be "tight" but, adequate in the rear as well

