Silver Fox and a Bald Guy

panchothedog

Well-known member
Messages
2,887
Reaction score
3,904
Kill switch: put one on your parking brake handle if you wish. BUT PUT one on the steering wheel or in very close proximity to the driver. ESPECIALLY with kids when they are on their own. It is the most important safety device on the kart. Sticking throttles are something that CAN happen. A toggle switch that you can knock down with one quick hand movement as opposed to a button that needs to be held in for a second or two, to completely kill the engine.
 

ct_racer

Member
Messages
20
Reaction score
28
You need a 40 series torque converter for that engine
I already have on in my shopping cart. Just holding off until I get the engine out of the box and inspected.

Your front tires look fine as tread is concerned. Even if they are dry cracked,
Yeah, that's kind of what I figure. My take is, if I can get a couple years out of them while I get the rest of the kart in order, and figure out the long term plans, I won't feel too bad in a couple of years spending a little more on a set of square knobbies. I only paid $30 for the set of 4, so I'm pretty happy with the deal, and where they're at.

I think I've got a solution for the hubs figured out that only needs minor milling work. First steps right now are going to be getting the brakes back in working order, finish the steering, and get it back on the ground. Then figure out the engine. Once it's drivable, I'll pick up the hubs I need to get this set of wheels on.

BUT PUT one on the steering wheel or in very close proximity to the driver
Really solid advice. I know there's a switch on the dash I can use, but something closer to natural hand position is more than just a good idea. I'll get something figured out there.


Should have some actual progress updates on it soon.
 

ct_racer

Member
Messages
20
Reaction score
28
Finally making some good progress. The front suspension is back on, and I've finished building the steering pivot with the kids. We're painting it now, so we should be able to get that mounted in the next week or so. I've got new hiem joints for between the pitman arm and the pivot as well.

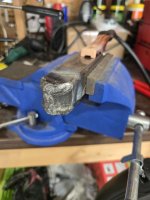
These are my first welds, and they're not pretty. I got the part cleaned up enough to be functional and solid at least. It feels smooth on the shoulder bolt even without being greased. It'll be good to get this painted, and the front end back on the ground.
 

Attachments

  • 20260718_141228.jpg
    20260718_141228.jpg
    1.8 MB · Views: 11
  • 20260728_215425.jpg
    20260728_215425.jpg
    1.2 MB · Views: 11

ct_racer

Member
Messages
20
Reaction score
28
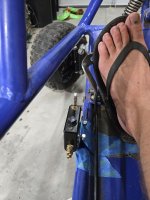
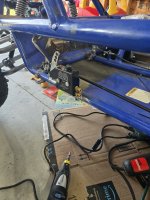
Also moved the master cylinder bracket so the seat is adjustable again. I need to plumb the new brake lines for it yet, and then fill/bleed the system. I also need to setup a linkage to the pedal.

With it being closer to the pedal I can't depend as much on the slop of the linkage rod as when the mount was closer to the rear, so it will need to be a little more solid of a setup. I'm thinking a turnbuckle and couple of eye bolts to be able to get some adjustability as well.
 

Attachments

  • 20260727_215946.jpg
    20260727_215946.jpg
    1.5 MB · Views: 9
  • 20260728_194759.jpg
    20260728_194759.jpg
    1.9 MB · Views: 9

ct_racer

Member
Messages
20
Reaction score
28
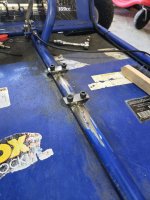
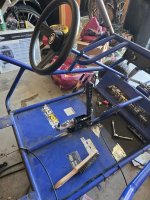
More slow progress made on the kart. Finished the mount tabs for the handbrake lever. This should complete the frame mods I'm planning on. I got a couple of coats of primer on this morning. The frame should be painted by the end of the weekend.

I also went through the rear axle, and while I was in there, I added a second rotor for the handbrake. I still need to fabricate a bracket for the caliper, but after getting the rotor situated I want to wait until I see the engine on the swingarm to make sure I don't have any interference issues. Should be plenty of space, but I don't want to have to rework something either.

Tonight should be the big night. I need to get the swingarm mounted back up, but I'm planning to unbox the motor with the kids tonight, and set it in place. Not ready for starting, but I should be able to finish my parts list, and get a lot of what I need ordered/know what I need to run to the hardware store for.

I'll get the caliper bracket mocked up, and hopefully built in the next few days as well.
 

Attachments

  • 20260817_090847.jpg
    20260817_090847.jpg
    183.9 KB · Views: 10
  • 20260817_103941.jpg
    20260817_103941.jpg
    226.8 KB · Views: 10

Hellion

Murderator
Messages
9,050
Reaction score
4,044
Neat and tidy work. I think your welds look high quality even if (maybe) they are not those artsy fartsy ones that look like a stack of overlapping crescent moons in a row. That hydraulic brake setup looks nice and compact and fitting for the application—don’t see that too often
 

ct_racer

Member
Messages
20
Reaction score
28
Thanks! I'm happy with it so far. I've been learning a lot from the small amounts I've used the welder so far. I figure there's a time and a place to practice those pretty welds, but adding to the structural frame isn't that time or place. I've already burned enough holes I've needed to booger-fill to try to worry about the appearance of these ones. Practical is all this application calls for, and I think I managed that here at least.

I like the application of handbrake too; it feels pretty good in that spot from both seats. I'm looking forward to fab and paint being finished so I can get it all buttoned together.
 

ct_racer

Member
Messages
20
Reaction score
28
Making some steady progress. Told the kids in April it'd be ready by the end of summer... which it now is, so I'm trying for driving by Labor Day.

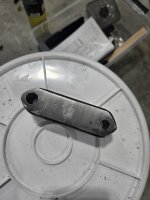
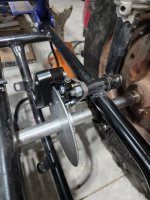
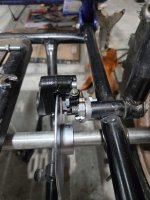
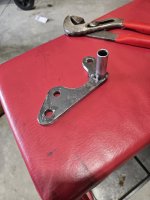
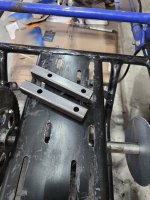
Handbrake caliper mount is fabricated, and now primer is drying. I've got primer on the frame over all the changes there. I still need to make some shims for the brake pads, but that feels like nothing after working with plate steel the last couple of days.

The engine was in to make sure on the clearance of the caliper; shouldn't be any issues there. The torque converter arrived yesterday. I'm planning to start setting that up tomorrow morning. While the paint dries, I'll get the engine in and running, and driving the axle. I can't finish brakes until the paint has cured for a bit, but that should hopefully be all that is left after the next week or so.
 

Attachments

  • 20260820_214753.jpg
    20260820_214753.jpg
    142.1 KB · Views: 7
  • 20260820_214750.jpg
    20260820_214750.jpg
    146.2 KB · Views: 7
  • 20260821_140134.jpg
    20260821_140134.jpg
    153.7 KB · Views: 7

ct_racer

Member
Messages
20
Reaction score
28
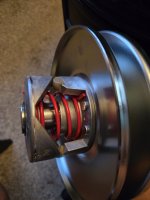
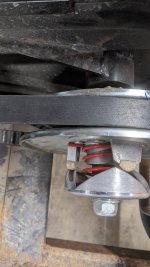
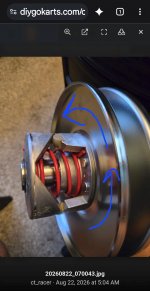
I'm setting up the torque converter this morning, and after verifying I need to install the driven outboard I went to buy a yellow spring. After looking at the image of the yellow spring, and comparing it with my spring, I think mine is already reverse wound (though it is red). When comparing to an image of an actual comet red spring, I think that my spring is the opposite of the comet red one.

Here is an image of my driven with the spring, I'm hoping someone could maybe do a verification of what I'm thinking with this.
 

Attachments

  • 20260822_070043.jpg
    20260822_070043.jpg
    91.8 KB · Views: 4

Edwin Spangler

Well-known member
Messages
991
Reaction score
977
I'm setting up the torque converter this morning, and after verifying I need to install the driven outboard I went to buy a yellow spring. After looking at the image of the yellow spring, and comparing it with my spring, I think mine is already reverse wound (though it is red). When comparing to an image of an actual comet red spring, I think that my spring is the opposite of the comet red one.

Here is an image of my driven with the spring, I'm hoping someone could maybe do a verification of what I'm thinking with this.
Is it one that came with the plate? Those usually come with a reverse red.


EDIT: Heres mine. Reverse wound red.PXL_20250418_233641826.jpg
 

ct_racer

Member
Messages
20
Reaction score
28
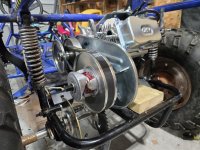
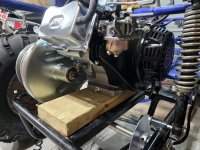
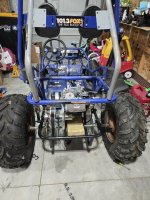
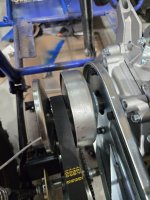
Thanks again for the confirmation. I've lubed everything up, and have the engine back on the kart. Trying to figure out placement and fitment of everything right now. Out of time for the day, but hoping I should have everything mounted up in the next couple of days or so.

Paint is going on the frame tomorrow, which will really start to make it feel like it's coming together.
 
Top