High Compression GX200 - Oil blowing out valve cover, gas blowing out the carb

Darren

Active member
Messages
163
Reaction score
238
Location
Essex, England
I been reading up on a few other old 4cycle posts, and you can draw the timing marks through the on off switch, so you can happily run the kart, then switch it off by earthing out the switch on the crankcase somewhere. Timing lights can only show actual ignition timing, for instance, it will show you if you've put the offset key the wrong way round. The timing light will also show if the timing is falling behind and if the coil has a limiter as part of the circuit, although it won't confirm if the cap is a rev limiter.
There's a guy who showed how to bore out a gx carb to give better flow characteristics. It looks like he's done a few, might be worth playing around with, Just need a reamer and jet kit, he only removes a small amount of metal, guess less is more.
I've never done it, I'm usually at stage 4/5 on an engine build, not sure what stage a full efi system would fall into :cool:
 

busted_blocks

Active member
Messages
110
Reaction score
99
Location
Dongguan, China
I been reading up on a few other old 4cycle posts, and you can draw the timing marks through the on off switch, so you can happily run the kart, then switch it off by earthing out the switch on the crankcase somewhere. Timing lights can only show actual ignition timing, for instance, it will show you if you've put the offset key the wrong way round. The timing light will also show if the timing is falling behind and if the coil has a limiter as part of the circuit, although it won't confirm if the cap is a rev limiter.
There's a guy who showed how to bore out a gx carb to give better flow characteristics. It looks like he's done a few, might be worth playing around with, Just need a reamer and jet kit, he only removes a small amount of metal, guess less is more.
I've never done it, I'm usually at stage 4/5 on an engine build, not sure what stage a full efi system would fall into :cool:
Interesting. Assuming what he does works, it's a pretty straight forward process. Might be worth trying...
 

busted_blocks

Active member
Messages
110
Reaction score
99
Location
Dongguan, China
@busted_blocks

Here's an adjustable coil bracket you can probably make with what you have already.

1* adjustments, can really help you dial it in for your track.


In this video, he says the cast aluminum flywheel is only 18* btdc with stock timing key.

Thanks, I might try that kind of bracket. What I don't love about it is how the screws for the coil are very short into aluminum. I was thinking to redesign my bracket and just have 1 set of holes. 1 bracket, 1 offset in degrees. laser cut stuff is cheap, though it wouldnt' be as nice to change, but functionally equivalent.

Right now though, I'm on a bit of a mission to make a connecting rod. Keep staring at a number of samples, pictures on the internet and want to make a cheaper connecting rod. Not sure where this will end up...
 

busted_blocks

Active member
Messages
110
Reaction score
99
Location
Dongguan, China
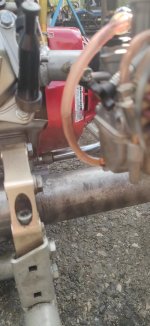
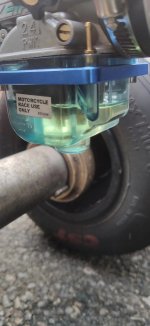
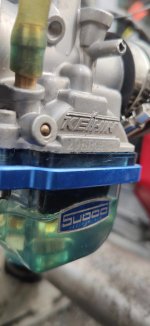
I'm making some progress on my engines. I have 1 that runs OK, it's been a few hours on the track, no issues besides the carb and I'll get to that in a second. I have second engine with a new connecting rod, added a oil scoop to the dipper (There is a thread on that) that runs pretty well now but I still have gas blowing out the air filter. Since this has been a consistent problem since the beginning, there is something I'm doing consistently wrong. It's either all the crabs I have are bad, which I don't believe, or I'm making the same error over and over. I haven't blown up an engine since limiting the rpm, so definite overall progress. The engine is about 10.5:1 GX200 27mm in take, 25mm exhaust 28deg (measured with timing light) timing advance with PWK24 carb. 32 pilot and 108 main. It runs well on the stand, oxygen sensor in the exhaust shows things are OK ( 12:1 ish) but when I get it on the track it spits gas. Not only does it spit gas, there is gas in the carb throat and gas in the overflow tube.

I have a pressure/vacuum gauge on the crank case and there is no significant pressure. All the nuts stay tight, no excess vibration.

I thought this might be related to the float level as I never set it, but it's not. I spent all kinds of time setting up the float level and testing it, but after a lap on the track the bowl is again over flowing. It doesn't seem to be a leaking needle it's clean and stops the flow as expected when I test it manually by pressurizing the gas tank a bit. This is normally how we fill the carb on karts. I've set it so low the engine barely starts and after one lap again the bowl is over flowing. this did have the least spray out the air filter, but there was still gas in carb and intake when I checked after a few laps. I changed the bowl to a clear one during float adjusting so I could see the level. I also tried a 120 main but reduced it to 108 as the plug was looking very black (but not oily). I took off the choke and there was no debrit. In this carb it's a rubber flat stopper held over a hole with a spring. I see nothing obviously wrong but maybe weak spring?

Any thoughts would be very much appreciated. I feel close to having a couple of good running engines, just something with these carbs is not clicking for me.
 

Attachments

  • carb3.jpg
    carb3.jpg
    2.1 MB · Views: 5
  • carb2.jpg
    carb2.jpg
    2.2 MB · Views: 5
  • carb1.jpg
    carb1.jpg
    1.8 MB · Views: 5

Rat

Well-known member
Messages
1,750
Reaction score
1,298
Location
SW Virginia
I'm making some progress on my engines. I have 1 that runs OK, it's been a few hours on the track, no issues besides the carb and I'll get to that in a second. I have second engine with a new connecting rod, added a oil scoop to the dipper (There is a thread on that) that runs pretty well now but I still have gas blowing out the air filter. Since this has been a consistent problem since the beginning, there is something I'm doing consistently wrong. It's either all the crabs I have are bad, which I don't believe, or I'm making the same error over and over. I haven't blown up an engine since limiting the rpm, so definite overall progress. The engine is about 10.5:1 GX200 27mm in take, 25mm exhaust 28deg (measured with timing light) timing advance with PWK24 carb. 32 pilot and 108 main. It runs well on the stand, oxygen sensor in the exhaust shows things are OK ( 12:1 ish) but when I get it on the track it spits gas. Not only does it spit gas, there is gas in the carb throat and gas in the overflow tube.

I have a pressure/vacuum gauge on the crank case and there is no significant pressure. All the nuts stay tight, no excess vibration.

I thought this might be related to the float level as I never set it, but it's not. I spent all kinds of time setting up the float level and testing it, but after a lap on the track the bowl is again over flowing. It doesn't seem to be a leaking needle it's clean and stops the flow as expected when I test it manually by pressurizing the gas tank a bit. This is normally how we fill the carb on karts. I've set it so low the engine barely starts and after one lap again the bowl is over flowing. this did have the least spray out the air filter, but there was still gas in carb and intake when I checked after a few laps. I changed the bowl to a clear one during float adjusting so I could see the level. I also tried a 120 main but reduced it to 108 as the plug was looking very black (but not oily). I took off the choke and there was no debrit. In this carb it's a rubber flat stopper held over a hole with a spring. I see nothing obviously wrong but maybe weak spring?

Any thoughts would be very much appreciated. I feel close to having a couple of good running engines, just something with these carbs is not clicking for me.

I had to play with the intake runner length and diameter for the PWK24 on my 208.

Too long and ran a bit dodgy with a lot of reversion.
(The proper technical term for that gas cloud being ejected from the carburetor)

It does seem to prefer having the velocity stack more than a filter, that cut down a lot of fine tuning quirks. I got a nice billet CNC one with a stainless screen, I stitched together a cotton cover for that.

Your issue is most likely runner length causing a lot of pile up when the valve closes which gives reversion with any carb.
I have found that having the runner a slightly oversized diameter compared to the port to closer match the carb and funneling the size down to match the port helped a lot as well
 

busted_blocks

Active member
Messages
110
Reaction score
99
Location
Dongguan, China
I had to play with the intake runner length and diameter for the PWK24 on my 208.

Too long and ran a bit dodgy with a lot of reversion.
(The proper technical term for that gas cloud being ejected from the carburetor)

It does seem to prefer having the velocity stack more than a filter, that cut down a lot of fine tuning quirks. I got a nice billet CNC one with a stainless screen, I stitched together a cotton cover for that.

Your issue is most likely runner length causing a lot of pile up when the valve closes which gives reversion with any carb.
I have found that having the runner a slightly oversized diameter compared to the port to closer match the carb and funneling the size down to match the port helped a lot as well
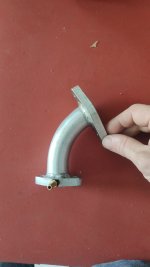
The intake runner is homemade, though I took inspiration from a commercial tube. The commercial one is 26mm ID which seemed a bit large in my mind. My tube is 24mm ID. I can try the 26mm one and see if it improves things. The length is hard to make shorter, the rear wheel of the kart is in the way. I'll see what I can come up with.

I would also like to try a stock carb with larger jet for comparison but it doesn't fit with an air filter adapter and air filter. I'll try and 3D print something to curve the air intake tube 45 degrees out of the path of the wheel.
 

Attachments

  • intake1.jpg
    intake1.jpg
    1 MB · Views: 0
  • intake2.jpg
    intake2.jpg
    694.9 KB · Views: 0
  • intake3.jpg
    intake3.jpg
    812.8 KB · Views: 0

Denny

Canned Monster
Messages
12,048
Reaction score
8,576
Location
Mayberry, Indiana
Being you said you had fuel coming out of the overflow I can’t help but wonder if you are overpowering the float (needle and seat). I wonder if you might not need a bypass circuit in your fuel supply line?
 
  • Like
Reactions: Rat

Rat

Well-known member
Messages
1,750
Reaction score
1,298
Location
SW Virginia
Yes, there is a fuel pump. Driven off a barb on the intake tube.
If your fuel tank is well above the carb, you don't need it.

I have no idea what exactly, but there are special tuning requirements to run a gravity fed carb off of a pump even if the tank sits lower than the carburetor and requires a pump to even move any gas at all. The problem with running a pump is you put pressure on the float needle effectively blowing it open with more fuel than the carb or engine needs and you flood it (vent tubes draining, excessive reversion, oil full of gas, etc)
The intake runner is homemade, though I took inspiration from a commercial tube.
I make my own as well
The commercial one is 26mm ID which seemed a bit large in my mind. My tube is 24mm ID. I can try the 26mm one and see if it improves things. The length is hard to make shorter, the rear wheel of the kart is in the way. I'll see what I can come up with.
Tilting the filter end of the carb upward is exceptable within reason (maximum of 35° ish max) if need be. Most motorcycles that would use a PWK, TM, or VM carb have it tilted up around 25°.
I would also like to try a stock carb with larger jet for comparison but it doesn't fit with an air filter adapter and air filter. I'll try and 3D print something to curve the air intake tube 45 degrees out of the path of the wheel.
For a PWK24 the boot that holds it is right around 30mm ± 2mm so when I said I funneled it down I mean I made my own intake with a 28mm open end to the carb and sleeved up externally to fit the boot, and it tapered down to meet the D window at just under 1" (1"OD)

The one I use now is 25mm ID straight diameter and sits level1000001352.jpg
 
Last edited:

Rat

Well-known member
Messages
1,750
Reaction score
1,298
Location
SW Virginia
Being you said you had fuel coming out of the overflow I can’t help but wonder if you are overpowering the float (needle and seat). I wonder if you might not need a bypass circuit in your fuel supply line?
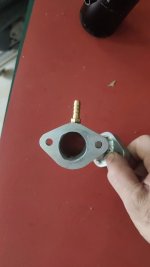
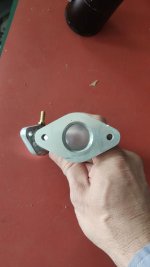
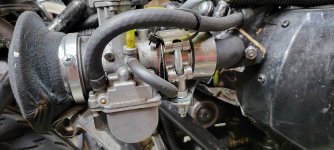
I noticed in his pics, he's got the Power jet disconnected (it's only effective on a 2t, usually floods out a 4t) but not plugged. It's inconsequential but it's also a way into the carb for crud to find.

I completely deleted mine. As in removed the brass nipple for the source line, and plugged it with a screw. I removed the jet and top plug then plugged with another screw then cut and filed them both flush and smooth ESPECIALLY inside the venturi
 

busted_blocks

Active member
Messages
110
Reaction score
99
Location
Dongguan, China
I noticed in his pics, he's got the Power jet disconnected (it's only effective on a 2t, usually floods out a 4t) but not plugged. It's inconsequential but it's also a way into the carb for crud to find.

I completely deleted mine. As in removed the brass nipple for the source line, and plugged it with a screw. I removed the jet and top plug then plugged with another screw then cut and filed them both flush and smooth ESPECIALLY inside the venturi
I think that's just for that picture. I did reconnect it every time I took off the bowl. The screw is completely closed. I find it a pain, those tubes get stiff so quickly and then have a loose fit. Then I zip tie the tube, but it's annoying. I will certainly consider deleting it.
 

busted_blocks

Active member
Messages
110
Reaction score
99
Location
Dongguan, China
Being you said you had fuel coming out of the overflow I can’t help but wonder if you are overpowering the float (needle and seat). I wonder if you might not need a bypass circuit in your fuel supply line?
Yeah, this makes sense that the fuel pump is overpowering the needle. What would a bypass circuit look like?. On these racing go karts, the take is under the steering wheel and lower than the carb. They all have a pump, even with the stock GX200 carb. This really sounds like we've zero'ed in on the issue, I'm hoping the solution it's too complicated :ROFLMAO:.

I have brackets and fuel tanks for gravity fed that I could use for a test, but long term it really should use the tank with the fuel pump. I don't think I can get to the track today, but I should be able to do testing tomorrow.
 

busted_blocks

Active member
Messages
110
Reaction score
99
Location
Dongguan, China
If your fuel tank is well above the carb, you don't need it.

I have no idea what exactly, but there are special tuning requirements to run a gravity fed carb off of a pump even if the tank sits lower than the carburetor and requires a pump to even move any gas at all. The problem with running a pump is you put pressure on the float needle effectively blowing it open with more fuel than the carb or engine needs and you flood it (vent tubes draining, excessive reversion, oil full of gas, etc)

I make my own as well

Tilting the filter end of the carb upward is exceptable within reason (maximum of 35° ish max) if need be. Most motorcycles that would use a PWK, TM, or VM carb have it tilted up around 25°.

For a PWK24 the boot that holds it is right around 30mm ± 2mm so when I said I funneled it down I mean I made my own intake with a 28mm open end to the carb and sleeved up externally to fit the boot, and it tapered down to meet the D window at just under 1" (1"OD)

The one I use now is 25mm ID straight diameter and sits levelView attachment 145266
Since my intake is homemade, they are not all the same. The angle varies a bit. I noticed yesterday on that tube it angles the other direction to yours by a few degrees. Some are neutral (0deg). I will try machining a .040" or so off on an angle to drop it a bit.
 

Denny

Canned Monster
Messages
12,048
Reaction score
8,576
Location
Mayberry, Indiana
Put a y into the line going from the pump to the carb. Run a line from the open end of the y to an adjustable valve like a brass one for a fish tank air line. Then from the valve back to the tank. This way you create a controlled leak to reduce fuel pressure at the needle and seat.
 
  • Like
Reactions: Rat

Rat

Well-known member
Messages
1,750
Reaction score
1,298
Location
SW Virginia
Since my intake is homemade, they are not all the same. The angle varies a bit. I noticed yesterday on that tube it angles the other direction to yours by a few degrees. Some are neutral (0deg). I will try machining a .040" or so off on an angle to drop it a bit.
Idk about dropping it unless it's really tipped up steep. If the the angle through the centerline (venturi to throat) is 50° or less I would work out the fuel pump situation and bother with the angle for now... if it's not incontinent when parked and not running (exactly like a stuck float) then it's more than most likely fine.
 

busted_blocks

Active member
Messages
110
Reaction score
99
Location
Dongguan, China
Idk about dropping it unless it's really tipped up steep. If the the angle through the centerline (venturi to throat) is 50° or less I would work out the fuel pump situation and bother with the angle for now... if it's not incontinent when parked and not running (exactly like a stuck float) then it's more than most likely fine.
Fair enough. You can maybe see in the picture it's only a few degrees, 5 maybe? I'll work on the fuel situation.
Put a y into the line going from the pump to the carb. Run a line from the open end of the y to an adjustable valve like a brass one for a fish tank air line. Then from the valve back to the tank. This way you create a controlled leak to reduce fuel pressure at the needle and seat.
I will do something similar. I don't have the right valve but I can make a Y fitting with a restriction on the return line. I was thinking to use PE main jets for the restrictions on the return. The reason for PE style jets is they would fit under a M8 hose barb. I just need to drill and tap a few holes in a scrap of aluminum and I'm good to go. First though I will try 100% gravity feed. If that eliminates the problem I'll work on the exact by-pass design. I'm really excited that I have a direction to go that makes sense. This also would explain why the carbs were so hard to tune. I've watched too many videos and read articles on how to tune a carb and it just never seemed to DO what it was supposed to do :ROFLMAO: Fingers crossed...

I keep thinking about this bypass, I think you can do this with a ball bearing and a spring. Adjust preload on the spring with a set screw. That might be even easier, with the only issue being if the spring is an order of magnitude too strong, it just wont' activate at all. I will just pick one design to start with but haven't picked yet :cool:
 
Last edited:
Top