Box Trailer Rebuild

Status
Not open for further replies.

OzFab

Well-known member
Messages
15,615
Reaction score
69
Location
Warwick Qld, Australia
As most of you would know by now, I started building my daughters go kart in about October last year. About two months in, I suddenly thought "this thing is 5' long & 3' wide. How am I going to move it from place to place?" (she lives with her mum, I only have her on weekends)

So, I started looking on ebay & other similar sites for a used trailer. Thinking ahead to the buggy I will eventually get around to building, which is 7' long, I decided to look for a 7 x 4 trailer.

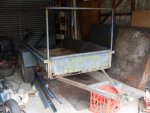
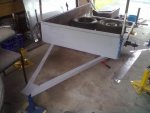
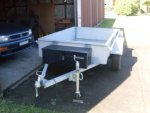
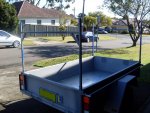
After a month of looking & losing auction after auction, I finally won this (see pic below). It needed a lot of work (I had to jerry rig the lights to get it home) but it only cost me $100.

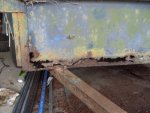
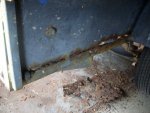
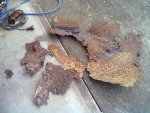
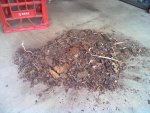
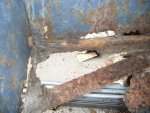
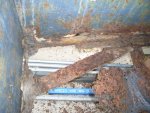
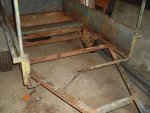
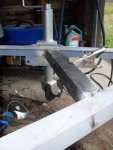
After the 50 mile drive home, I went around it with a hammer, knocking on the frame to shake all the rust loose (see pic #5). Hmm, this is gonna be a biiiig job.
 

Attachments

  • SDC10125.jpg
    SDC10125.jpg
    97.2 KB · Views: 21
  • SDC10126.jpg
    SDC10126.jpg
    101.3 KB · Views: 18
  • SDC10128.jpg
    SDC10128.jpg
    91.2 KB · Views: 14
  • Photo129.jpg
    Photo129.jpg
    145.9 KB · Views: 19
  • Photo127.jpg
    Photo127.jpg
    144.5 KB · Views: 17

OzFab

Well-known member
Messages
15,615
Reaction score
69
Location
Warwick Qld, Australia
More pics.

What you can see here is the end of the A frame. If I put weight on the corner, the whole thing moved
 

Attachments

  • SDC10133.jpg
    SDC10133.jpg
    114.8 KB · Views: 10
  • SDC10131.jpg
    SDC10131.jpg
    137.1 KB · Views: 11

Bluethunder3320

New member
Messages
5,677
Reaction score
38
haha!! reminds me of my truck!!! every time you hit the frame with a hammer, chunks come off.

i went around the frame with a shop vac sucking up all the lose chunks. i have a metal box full of rust and junk sheet metal just like that

maybe recycle some material for it? like scrap sheet metal

then when you get it all fixed up paint it with POR15

EDIT: just saw your second post, wow, there is nothing there
 

OzFab

Well-known member
Messages
15,615
Reaction score
69
Location
Warwick Qld, Australia
Next step, off to the steel merchant:
13 metres of 40 x 40mm x 1/8" angle
3 metres of 50 x 50mm x 5mm angle
1 x 8' x 4' sheet of 16 guage gal
3 metres of 30 x 30mm SHS
= $160

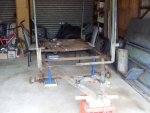
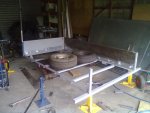
Back home, I took out the grinder & started cutting; sides off, front off, floor out, remove axle assembly & put the frame up on stands
 

Attachments

  • SDC10134.jpg
    SDC10134.jpg
    109.2 KB · Views: 19
  • SDC10135.jpg
    SDC10135.jpg
    99.5 KB · Views: 17
  • SDC10136.jpg
    SDC10136.jpg
    105 KB · Views: 14

OzFab

Well-known member
Messages
15,615
Reaction score
69
Location
Warwick Qld, Australia
At this point, there's not much to look at as my camera died so, use your imagination.

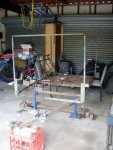
Next I started to recreate the frame using the new materials. The original frame had 4 ribs, it now has 5. I reused the best one in the new frame just to say "it's not a new trailer, it's a rebuilt trailer."

At this point I need to mention that, where I live, a new trailer must be accompanied by an engineers certificate in order to register it for road use. Anyone who has ever needed one will know, they don't come cheap.

Before I welded anything I coated the steel with a rust proof primer where the pieces overlap; I'm not taking any chances.

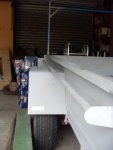
Then I attacked the side & front panels. The bottom of all three were badly rusted so, using the guillotine at a friendly local machine shop, I cut the rusted section off, cut new pieces to fit from the sheet offcut & welded them on. The advantage of doing this is I could make the panels as high as I wanted but, being governed by the tailgate, I couldnt go too far. In the end I added around 2" of height. You can see in the pic (if you look past the kart frame) the new section that was welded on.
 

Attachments

  • Photo149.jpg
    Photo149.jpg
    91.3 KB · Views: 21

OzFab

Well-known member
Messages
15,615
Reaction score
69
Location
Warwick Qld, Australia
haha!! reminds me of my truck!!! every time you hit the frame with a hammer, chunks come off.

i went around the frame with a shop vac sucking up all the lose chunks. i have a metal box full of rust and junk sheet metal just like that

Yeah, I've seen your truck, it's terminal :roflol:

The great thing about this is everything is straight, no contours to worry about, unlike a car

maybe recycle some material for it? like scrap sheet metal

then when you get it all fixed up paint it with POR15

EDIT: just saw your second post, wow, there is nothing there

But wait, there's more...
 

bighead

New member
Messages
4,022
Reaction score
53
Location
Pacific Northwest USA
I love it when people bring stuff back to life like this. Going to be nice little rig when you get done.

Fab some loading ramp holders under the bed?

From the lenth of the A-frame it looks like it will tow well. Also room for tool box if you want to go that far. Spare tire room anyway. I like the side rails and the fenders. They look like good ones.
 

OzFab

Well-known member
Messages
15,615
Reaction score
69
Location
Warwick Qld, Australia
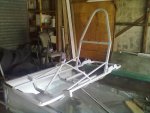
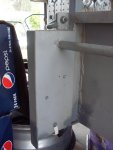
You may have noticed in the first few pics that there were upright bars at the 4 corners connected by cross bars. This setup was very limiting but I like the idea of expansion so, as well as the basic frame, I welded a length of 30 x 30mm SHS in each corner (more on that later).

Now it's time to weld the front & side panels back in.

:oops: I forgot about heat warping from welding :censored:

The sides were ok, I just tacked the front end & weighted down the frame to close up the 35mm gap (that's about 1.5"). The front panel was a bit harder so I just pulled the uprights together so they were parallel & welded it in
 

Attachments

  • Photo142.jpg
    Photo142.jpg
    73.8 KB · Views: 15
  • Photo141.jpg
    Photo141.jpg
    76.7 KB · Views: 15

OzFab

Well-known member
Messages
15,615
Reaction score
69
Location
Warwick Qld, Australia
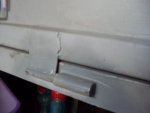
Next, the tailgate. It was made with "dodgy," opposing hinges so the gate could not be removed, no latches jus a hole to put a bolt through & a simple right angle fold on the bottom; sorry, not good enough.

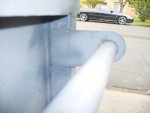
First, cut off the hinges (no more than a bent piece of rod inside a short piece of tube), then I straightened out the fold on the bottom (there's my extra height) & welded a length of 30 x 30mm SHS across the bottom to create a more solid base.

Next, replace the hinges. A length of 7/16" rod & a short length of pipe should do it. Funny thing is, I couldn't buy a peice of tube with a 7/16" ID so, 9/16" rod & bore it out to fit the 7/16" rod, but not all the way through. Now take a piece of 1/8" plate, line everything up, weld the plate to the tailgate & the small rod, weld the larger rod to the frame & we have hinges... & they both face the same way so I can remove the gate. Also, the gate is now balanced in such a way that, once it gets to a certain point, it pulls itself closed
 

Attachments

  • SDC10176.jpg
    SDC10176.jpg
    40.2 KB · Views: 6
  • SDC10177.jpg
    SDC10177.jpg
    58.5 KB · Views: 6

OzFab

Well-known member
Messages
15,615
Reaction score
69
Location
Warwick Qld, Australia
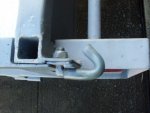
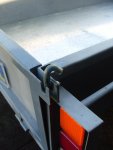
Now on to the latches. I didn't want anything big & bulky; small & simple was what I was looking for. At first I looked at drop toggle latches but thought "na, they won't be strong enough." I eventually came up with this simple yet effective design
 

Attachments

  • SDC10170.jpg
    SDC10170.jpg
    66.3 KB · Views: 16
  • SDC10171.jpg
    SDC10171.jpg
    58.9 KB · Views: 12

OzFab

Well-known member
Messages
15,615
Reaction score
69
Location
Warwick Qld, Australia
On to the guards/fenders. The tops had some rust pitting & there were bits... missing... where they were attached to the frame. Some quick welding & fabbing & they were ready to reattach.

As you can see from the last pic, I made a housing for the new LED tail lights which I then attached to the upright & rear rail which I had left long for that purpose. A small 1/8" plate at the front & on go the rope rails &, finally, in goes the floor
 

Attachments

  • SDC10181.jpg
    SDC10181.jpg
    70.7 KB · Views: 8
  • SDC10178.jpg
    SDC10178.jpg
    67 KB · Views: 11
  • SDC10179.jpg
    SDC10179.jpg
    50.4 KB · Views: 8

OzFab

Well-known member
Messages
15,615
Reaction score
69
Location
Warwick Qld, Australia
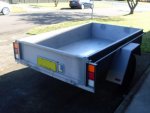
Then it was on to the little things like refit the axle in new hangers, fit the coupling & safety chain & run the wiring. I know they seem like major things but, compared to what I'd done, it was nothing.

Once all that was done it was off to the weighbridge, then in for a roadworthy inspection & it's registered... just in time to deliver the kart to my daughter for her birthday.

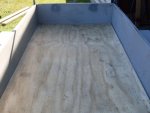
Since then I've mounted a rope/tool box to the A frame, attached a jockey wheel & made a pair of H bars. I also put in a sheet of ply just to protect the floor a bit.

Remember the uprights in the corners I mentioned earlier, the H bars slip right in. I'm currently in the process of welding a lateral bar across the A frame as I noticed that it flexes when I put weight on it &, sometime soon, I will be making a removable cage for the big jobs.

It still needs a coat of paint but it's usable & it tows like it's not even there
 

Attachments

  • SDC10167.jpg
    SDC10167.jpg
    59.9 KB · Views: 26
  • SDC10169.jpg
    SDC10169.jpg
    61.1 KB · Views: 27
  • SDC10172.jpg
    SDC10172.jpg
    143 KB · Views: 22
  • SDC10174.jpg
    SDC10174.jpg
    75.5 KB · Views: 19
  • SDC10182.jpg
    SDC10182.jpg
    85.9 KB · Views: 21

OzFab

Well-known member
Messages
15,615
Reaction score
69
Location
Warwick Qld, Australia
Purchase Date: 18th January 2012
Registration Date: 19th April 2012

...&, don't forget, I was building a go kart at the same time, not to mention life in general

Purchase price: $110
Materials: $180 (I'm rounding up & including H bars)
Lights: $45
Wiring: $25
Coupling: $30
Primer: $40
Welding Wire: $90
Rego: $180
Total: $700

That may sound like a lot to some but, when you consider it's made to my specs, it's not too bad. To buy something like this new you're looking at $1000+
 
Status
Not open for further replies.
Top