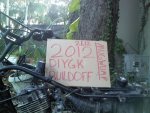
Build Off Entry: Dirt Devil Quadrunner

Status
Not open for further replies.

brandongeiger2

New member
Messages
584
Reaction score
0
Location
Valrico Florida
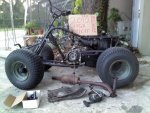
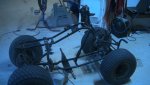
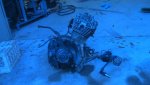
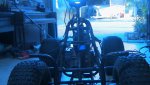
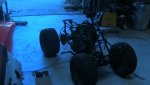
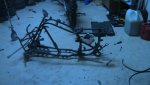
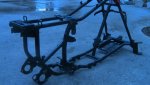
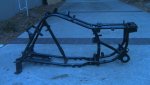
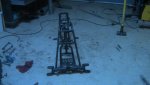
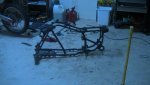
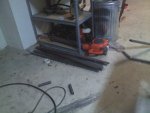
So got the quad need to get it running but ill be buying some steel next week i believe... can't wait to get this started! This will be my first "ground up" build
 

Attachments

  • 0201121756.jpg
    0201121756.jpg
    122.2 KB · Views: 110
  • 0201121756a.jpg
    0201121756a.jpg
    117.4 KB · Views: 84
  • 0201121756b.jpg
    0201121756b.jpg
    109.3 KB · Views: 80
  • 0201121757.jpg
    0201121757.jpg
    101 KB · Views: 80
brandongeiger2

New member
Messages
584
Reaction score
0
Location
Valrico Florida
Alright everyone this is an extension of the build thread i starte

Alright everyone this is an extension of the build thread i started last week:
http://www.diygokarts.com/vb/showthread.php?t=14974
Ill be posting pictures as much as possible

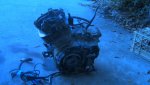
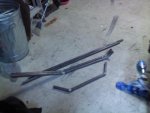
Right now ive taken my attention away from the sometimes running engine and will be starting on the chassis on the 10th when ill be able to get some steel and some other things Here are some pictures of what went on today!
I may start a "video log" if i have a chance to use my brothers camera
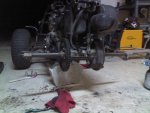
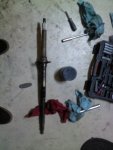
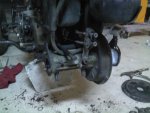
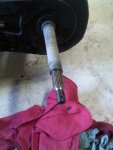
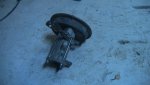
I think the axle components havent ever been touched because everything still had factory paint(washers,nuts,etc) but theses are just some pictures i took when i tore apart the axle today and got rid of the very annoying chain guard....unfortunately this chain doesn't have a master-link so its going to be real fun resizing it for the kart but the brakes are really good so im real happy so far except for the engine problems but my buddy's dad is a Yamaha mechanic so he may be able to help me out.
 

Attachments

  • 0202121950.jpg
    0202121950.jpg
    83.8 KB · Views: 44
  • 0202121843a.jpg
    0202121843a.jpg
    71 KB · Views: 21
  • 0202121843.jpg
    0202121843.jpg
    81 KB · Views: 32
  • 0202121645.jpg
    0202121645.jpg
    73.5 KB · Views: 20
  • 0202121634.jpg
    0202121634.jpg
    43.2 KB · Views: 17

brandongeiger2

New member
Messages
584
Reaction score
0
Location
Valrico Florida
so i found that my spark plug is kinda weak i'm gonna get a new one in the morning and also one of the holes in my carb was gunked up and it was the one that controls the idle with the choke on(i guess?) so im gonna work at everything when i wake up and see where it takes me haha lost track of time out there!
 

brandongeiger2

New member
Messages
584
Reaction score
0
Location
Valrico Florida
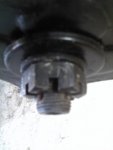
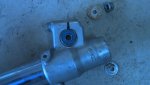
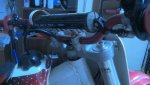
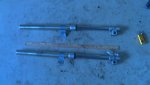
Today i was brainstorming about suspension i know im using atv or motorcycle shocks than i thought about using motorcycle forks for front suspension but after some thinking id have no way of connecting the top of the fork tube because most are aluminum
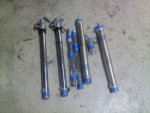
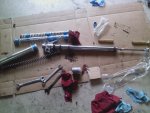
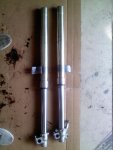
i could use a triple clamp to connect two of the forks to the top of the rear wheel shock tower and just the holes at the bottom for the axle to connect to the swingarm...luckily for me i bought a set of 1996 cr125 forks a while back to help me rebuild the forks on my bike so i have some extra fork tubes!
since the mounting holes are all clamps i was thinking how they could still pivot while being clamped... to my suprise skateboard ball bearings are 7/8''! (the same size as the hole in the triple clamp for handlebars so i think i may have motocross bike fork tubes as rear suspension...SO MUCH TRAVEL!(12.5 inches to be exact haha) What does everyone think?
sorry if that was hard to understand haha
Hows it sound??? i think itll work:D
 

Attachments

  • IMG_0128.jpg
    IMG_0128.jpg
    61.8 KB · Views: 20
  • IMG_0127.jpg
    IMG_0127.jpg
    66.9 KB · Views: 22
  • IMG_0126.jpg
    IMG_0126.jpg
    52.3 KB · Views: 22
  • IMG_0125.jpg
    IMG_0125.jpg
    58.1 KB · Views: 22
  • IMG_0124.jpg
    IMG_0124.jpg
    53.9 KB · Views: 27
  • 0205121043.jpg
    0205121043.jpg
    80.3 KB · Views: 26
  • 0205121123.jpg
    0205121123.jpg
    106.5 KB · Views: 25
  • 0205121144.jpg
    0205121144.jpg
    87.1 KB · Views: 23

brandongeiger2

New member
Messages
584
Reaction score
0
Location
Valrico Florida
Flywheel puller

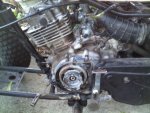
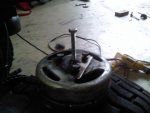
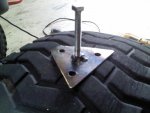
so i needed a way to check how my magneto was holding up since that could of been the problem...only one problem i didnt have a flywheel puller. So why not make one...This is what i came up with and it worked great:wai:
 

Attachments

  • 0206121554.jpg
    0206121554.jpg
    59.4 KB · Views: 36
  • 0206121552.jpg
    0206121552.jpg
    64.9 KB · Views: 23

brandongeiger2

New member
Messages
584
Reaction score
0
Location
Valrico Florida
How does that puller work?

Well the flywheel connects to a spindle just like on any clone engine, honda, tecumseh, etc... i drilled three holes where the starter basket bolted on than drilled a centered one and welded a nut to it so a bolt could be threaded in.
Once the plate is connected and you turn in the main bolt it forces the flywheel off the spindle.
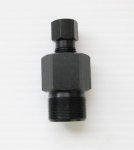
This isn't my idea there have flywheel pullers for years just of a different design because most pullers thread into the very center of the flywheel and have a bolt in the middle to force the bolt off.

Here's a pic of a conventional one:

EDIT: i forgot to add the reason you would need one is because on dirt bikes, motorcycles, atvs anything with a magneto has a very strong magnetic hold to the flywheel and cannot normally be pulled without the use of special tools.
 

Attachments

  • $(KGrHqUOKiME31cufW6YBOBqRZi9zw~~_35.JPG
    $(KGrHqUOKiME31cufW6YBOBqRZi9zw~~_35.JPG
    7.4 KB · Views: 29

bighead

New member
Messages
4,022
Reaction score
53
Location
Pacific Northwest USA
Today i was brainstorming about suspension i know im using atv or motorcycle shocks than i thought about using motorcycle forks for front suspension but after some thinking id have no way of connecting the top of the fork tube because most are aluminum
i could use a triple clamp to connect two of the forks to the top of the rear wheel shock tower and just the holes at the bottom for the axle to connect to the swingarm...luckily for me i bought a set of 1996 cr125 forks a while back to help me rebuild the forks on my bike so i have some extra fork tubes!
since the mounting holes are all clamps i was thinking how they could still pivot while being clamped... to my suprise skateboard ball bearings are 7/8''! (the same size as the hole in the triple clamp for handlebars so i think i may have motocross bike fork tubes as rear suspension...SO MUCH TRAVEL!(12.5 inches to be exact haha) What does everyone think?
sorry if that was hard to understand haha
Hows it sound??? i think itll work:D


I thought about using forks ever since that member big 4x4 build. If you did it right they would look like those high dollar long travel buggy shocks.
 

brandongeiger2

New member
Messages
584
Reaction score
0
Location
Valrico Florida
I thought about using forks ever since that member big 4x4 build. If you did it right they would look like those high dollar long travel buggy shocks.

EXACTLY WHAT IM GOING FOR...but i cant invert them because i dont have an independent suspension setup in the back so they will be in the same config. as a normal shock just cooler and im possibly using a linkage system for smoother shock travel if i have extra material
 

brandongeiger2

New member
Messages
584
Reaction score
0
Location
Valrico Florida
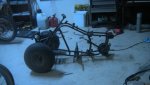
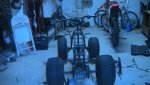
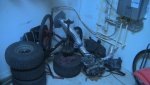
Alright guys I've been working on tearing apart the four wheeler even though its not running but I'm buying my materials tomorrow so i decided to just get the engine running whenever its done and mounted.. Here's a bunch of pics!
 

Attachments

  • IMG_0138.jpg
    IMG_0138.jpg
    71.1 KB · Views: 31
  • IMG_0137.jpg
    IMG_0137.jpg
    78.2 KB · Views: 27
  • IMG_0136.jpg
    IMG_0136.jpg
    67.2 KB · Views: 30
  • IMG_0135.jpg
    IMG_0135.jpg
    76.3 KB · Views: 33
  • IMG_0134.jpg
    IMG_0134.jpg
    61.6 KB · Views: 30
  • IMG_0143.jpg
    IMG_0143.jpg
    68 KB · Views: 25
  • IMG_0142.jpg
    IMG_0142.jpg
    60.5 KB · Views: 30
  • IMG_0141.jpg
    IMG_0141.jpg
    62.1 KB · Views: 29
  • IMG_0140.jpg
    IMG_0140.jpg
    69.8 KB · Views: 37
  • IMG_0139.jpg
    IMG_0139.jpg
    70.9 KB · Views: 27

brandongeiger2

New member
Messages
584
Reaction score
0
Location
Valrico Florida
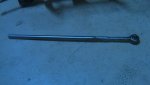
And the rest. the first one is of the breaker bar i made out of an old wrench haha works great though!

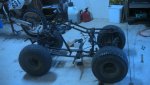
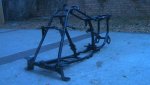
EDIT:Just added some pictures from today, i cleaned the frame up and took the rest of it apart, next step is to cut out the engine mounts and axle mounts.I'm real happy with some of the paints condition some looks brand new!
 

Attachments

  • IMG_0144.jpg
    IMG_0144.jpg
    45.2 KB · Views: 20
  • IMG_0145.jpg
    IMG_0145.jpg
    66.2 KB · Views: 22
  • IMG_0150.jpg
    IMG_0150.jpg
    75 KB · Views: 17
  • IMG_0149.jpg
    IMG_0149.jpg
    78.9 KB · Views: 14
  • IMG_0148.jpg
    IMG_0148.jpg
    73.3 KB · Views: 14
  • IMG_0147.jpg
    IMG_0147.jpg
    57.9 KB · Views: 15
  • IMG_0146.jpg
    IMG_0146.jpg
    62.9 KB · Views: 14

brandongeiger2

New member
Messages
584
Reaction score
0
Location
Valrico Florida
Update!

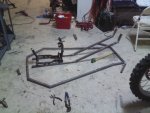
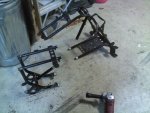
So today i finally got started and got some steel...I think i need to slow down considering this is my first build and all ive made a few mistakes but nothing that will bother my version of the plans Angles aren't easy to cut for a novice(more of a beginner) with a grinder haha but here is what i finished today when i got home...

EDIT and by the way in the third picture i put the engine carrier in to check for size im extending the bottom rails along with the top nerfs 10" longer than the plans call for
 

Attachments

  • 0210121913.jpg
    0210121913.jpg
    77.9 KB · Views: 20
  • 0210121913a.jpg
    0210121913a.jpg
    65.7 KB · Views: 24
  • 0210122232.jpg
    0210122232.jpg
    101.9 KB · Views: 41
  • 0210122233.jpg
    0210122233.jpg
    99.4 KB · Views: 27

Doc Sprocket

*********
Messages
15,677
Reaction score
151
Location
Ontario, Canada
Measure twice, cut once. Don't rush too hard, you've got four months. Besides- Even if you don't make the contest deadline, you're still building something cool and you can finish it whenever you can.

How are you cutting the angles? Doing it by hand, it's best to measure and mark all 4 sides of the tube and just cut slowly and carefully. I had the use of a 14" cut-off saw, and found I was actually making more accurate cuts by hand...
 

TeamCheap

New member
Messages
258
Reaction score
2
Location
Southeast michigan
For something that complex you may want to get a sheet of 3/4" plywood and cut it down to a reasonable size that you can use as a layout table.

One of the tricks you could use to help cut matching angles is to lay one piece of square tubing on top of two other pieces, get them all lined up and carefully mark where the tubes interesect each other then cut.

If you lay it out on something flat and make some reference marks you should be able to make matching sides relatively easy.
 

theo

New member
Messages
872
Reaction score
1
Make a jig table, use small plywood blocks and assemble all the pieces for the floor and the mid section before you weld.
 

fowler

New member
Messages
5,463
Reaction score
18
Location
Bullsbrook West Aus
and tack weld it together first then go back and slowly weld each joint
so it doesnt warp
and it makes it easy to chop peices out
 
Status
Not open for further replies.
Top