Honda Odyssey FL250 to Yamaha 340 Sled Power Conversion

Status
Not open for further replies.

bighead

New member
Messages
4,022
Reaction score
52
Location
Pacific Northwest USA
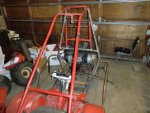
Picked up this old Ody for next to nothing. Found a nice rinning 1983 Yamaha Inticer 340 snowmobile for $195 bucks.

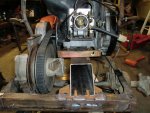
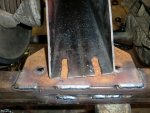
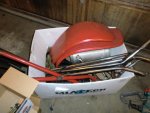
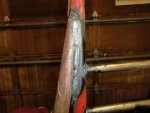
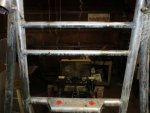
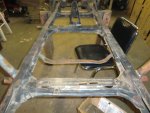
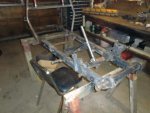
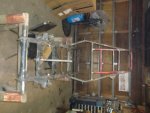
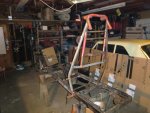
The motor would not drop down between the frame rails. So i added the square tube you see. welded the Sled motor mount plate to that. I slotted the rail and also slotted the frame. It has 1" adjustment in both forward and sideways.

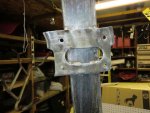
The back fender mount rails were made like that for the original fender mounts would not work. The engine was in the way ofcorse. I just made some 2" spacer on the bottom frame which extended the fender out 2". For the top fender mounts I just bent some pipe and followed the fender up the the hoop bar that I made as well. I was able to use the original Ody tabs. I will weld some tabs brackets to hold the upper fender on.

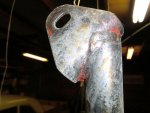
The pipe was pretty easy really. I just cut the original Y pipe with a hack saw untill it was almosy cut off. I then bent the cut part strait down. Then made a peace of pipe to fit. Hope it works :)

I have some 3" wheel spacers comming for the back. Along with some wider tires.

When all is done and painted I will have about $500 into this toy. The last few pics are my other Ody's. I will post a thread on the blue Buggy soon.

Also for anyone looking for a easy cheap buggy project. You can pick these old Odysseys up pretty cheap. Cheaper than Manco's/Yerf Dogs and the like in some cases. (basket case projects) They already come wth a Driven Clutch thats ready to go. Sled motors are perfect and easy swaps. You can beat the hell out of them as well.

Here is my project. Hope to have it done in 3 weeks. Just working on a cool side cage and Nerf bars right now. More bars to come.


 

bighead

New member
Messages
4,022
Reaction score
52
Location
Pacific Northwest USA
I got the side cage made tonight. Just started bending until I came up with something I thought was cool. Turned out okay I guess. Lots more protection at least.

Also mounted the exhuast and fenders. Will do wiring and test ride this weekend. If it goes okay I will post vid. Then it is tear down time. I am going to paint the frame black and the cage white and have red fenders. I also got new bearings seals for the rear. And new bushings and bearings up front. Also putting 3" wheel spacers.

I will be adding a guard behind the drivers seat. The clutch is right at your head level.

My plans changed with this Ody for I picked up another better Odyssey. I was going to add a full cage to this ody but I want to spend my money on my new toy.

Also can anyone tell me how to add a spacer in my rear driven clutch? Any threads on this? I want to run the larger sled belt. Also when removing the rear driven do you have to wind up that spring when putting back togather? Or just push it on? Or I should say is it loaded? Really need to figure out how to space that clutch?

What size steel or aluminum would be a safe guard for that clutch thats right next to your neck? I got to ge that fixed as well.


bighead

New member
Messages
4,022
Reaction score
52
Location
Pacific Northwest USA
Well I started stripping the Odyssey. I got the hoop bar done and the side cage. The belt most of been lose on my mock up so I had to redo my slots in the Ody frame. So I welded a plate to the frame to extenion. I need to slot the plate still. The set up gives me 2" adjustment in all 4 ways.

When I saterted this build I had big plans for it. But then I got the blue Ody above. So now I am really trying to get this done and out of the way. Thats why the roll cage looks like it does. Was going to make a full cage. I quess this will be a friend buggy if you will.

I will sand blast and Por15 this weekend.

Test run was pretty good. Lots of low end power. Even more when I get all the bugs out of the clutch. I will also grind the steering stops off to get a tighter turning radius.

If your wondering why the big bar is not strait? I needed room to get the belt off. this motor would not fit below the frame rails. So I had to go up. If I had to do it over I would find a smaller sled engine. This way I could drop it low like the original ody engine sits. I did order some 3" wheel spacers and some wider tires. The big square box/engine mount will also be a tool box and belt holder. I have a lid already made for the ends.

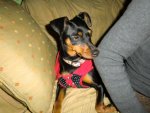
The last pic is a dog I just rescued. It was living in a rabbit cage for 4 months. First night the dog was so skittish it was not even funny. One day in a loving house and it is now a totaly different dog. I am shocked how fast in mellowed out. Super cool. I know she knows that her nightmare is over. She follows my wife step for step.
 

Attachments

  • CIMG1289.jpg
    CIMG1289.jpg
    100.9 KB · Views: 23
  • CIMG1290.jpg
    CIMG1290.jpg
    97.6 KB · Views: 28
  • CIMG1291.jpg
    CIMG1291.jpg
    107.8 KB · Views: 35
  • CIMG1292.jpg
    CIMG1292.jpg
    102.4 KB · Views: 21
  • CIMG1293.jpg
    CIMG1293.jpg
    75.3 KB · Views: 33
  • CIMG1279.jpg
    CIMG1279.jpg
    95 KB · Views: 24
  • CIMG1295.jpg
    CIMG1295.jpg
    76 KB · Views: 20
  • CIMG1294.jpg
    CIMG1294.jpg
    60.8 KB · Views: 24

bighead

New member
Messages
4,022
Reaction score
52
Location
Pacific Northwest USA
Well time to get started on this project. Should be a fun weekend. I got lots of cleaning to and painting to do. I got new bearings but I have to open the reduction box to switch thos out.

Test ride was fun. The buggy has rocket out of the hole speed. Top speed about 50 MPH.

I did have to do one mod to the Driven clutch. The sled belt is wider than the Ody's Belt. To make the drivin clutch open more I had 3/16 machined off the clutch cam face. (where the snap ring sits) This allows the driven clutch to open up 3/16 more for the wider sled belt. 3/16" O-Ring spacer was also added. Now my belt rides like it should, I hope !!

Here is a shot of the belt before this mod. The part I had machined is the cam on the clutch right where the bolt that holds it on is. This let the clutch open some without changing anything on the spring or buttons.


bighead

New member
Messages
4,022
Reaction score
52
Location
Pacific Northwest USA
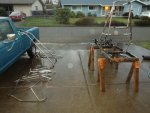
Been busy working on a few projects at the same time. I got the frame sand blasted. Also collection engines and parts to stock pile.

Here is some pics. As you can see it is going slow.


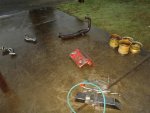
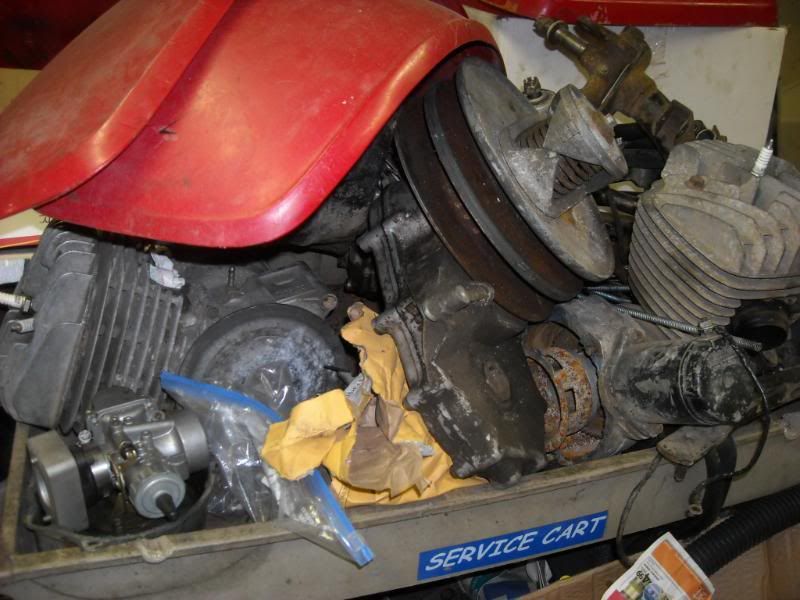
Looks like junk but there is some good goodies in the pile. New carb with billit adapter. Ody engine with Goki electric starter.


I got a lot of cleaning to do.
 

bighead

New member
Messages
4,022
Reaction score
52
Location
Pacific Northwest USA
Well the holidays are over. The Yerf Dog is done. So I am pulled out the Odyssey frame from under the tarp out back. It is going to get a Complete POR15 paint job. The Por15 Starter Kit cost about $30 shipped. 1/2 pint will do two coats on the frame,roll bar and wheels. About $15 more for the top coat.

I cannot wait to get this thing going. On the first test drive it wanted to pull the wheels up. I plane to have this done in 2 weeks. So lots to come. Here some pics.

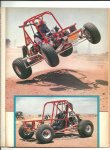
Here is a 440 sled odyssey in action. Mine did not wheelie like that. But was crazy fast out of the hole.

http://www.youtube.com/watch?v=HtAZww3AMkM

Edit: I just ordered the POR15. I bought 2 starter kits. One silver and one black. this way I can paint black one day. Silver the next. $45 shipped
 

Attachments

  • CIMG3319.jpg
    CIMG3319.jpg
    98.8 KB · Views: 16
  • CIMG3320.jpg
    CIMG3320.jpg
    76.1 KB · Views: 18
  • CIMG3317.jpg
    CIMG3317.jpg
    66.3 KB · Views: 25
  • CIMG3316.jpg
    CIMG3316.jpg
    66.4 KB · Views: 17
  • CIMG3307.jpg
    CIMG3307.jpg
    88.3 KB · Views: 20

bighead

New member
Messages
4,022
Reaction score
52
Location
Pacific Northwest USA
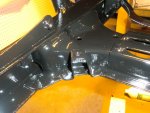
Spent the afternoon geting the Ody ready for Por15 paint job. The first pics are washing of the Marine Clean cleaner. It is a very powerfull water based degreaser. Best I have ever used b far.

After we washed the Marine Clean off. We sprayed with Por15's Metal ready. This step turns rust to Zinc Phosphate. If you look at the later pics you will see a chalk like stuff on the parts. This zinc coating is a big key on how well Por15 works. Without it Por15 will fail. It also etches the non rust metal.

Here are some pics. it is drying right now. I will paint tomorrow afternoon.
 

Attachments

  • CIMG3456.jpg
    CIMG3456.jpg
    85.4 KB · Views: 11
  • CIMG3455.jpg
    CIMG3455.jpg
    75.5 KB · Views: 13
  • CIMG3454.jpg
    CIMG3454.jpg
    116.3 KB · Views: 12
  • CIMG3446.jpg
    CIMG3446.jpg
    96.9 KB · Views: 16
  • CIMG3444.jpg
    CIMG3444.jpg
    96.1 KB · Views: 20
  • CIMG3457.jpg
    CIMG3457.jpg
    121.6 KB · Views: 13
  • CIMG3458.jpg
    CIMG3458.jpg
    83.7 KB · Views: 13
  • CIMG3459.jpg
    CIMG3459.jpg
    83.3 KB · Views: 15
  • CIMG3461.jpg
    CIMG3461.jpg
    87.9 KB · Views: 14

bighead

New member
Messages
4,022
Reaction score
52
Location
Pacific Northwest USA
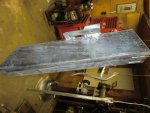
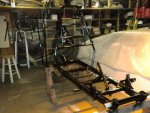
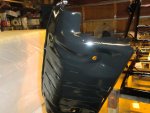
Got the Por15 on today. Turned out very nice. Remember that nasty looking red skid plate above? Por15 made it like new(pic 6)

The side cage,nerf bars and wheels will be por15 silver as well. Red plastics.

Here are some pics.
 

Attachments

  • CIMG3467.jpg
    CIMG3467.jpg
    73.9 KB · Views: 19
  • CIMG3466.jpg
    CIMG3466.jpg
    85.9 KB · Views: 24
  • CIMG3476.jpg
    CIMG3476.jpg
    89.3 KB · Views: 26
  • CIMG3471.jpg
    CIMG3471.jpg
    68.8 KB · Views: 20
  • CIMG3472.jpg
    CIMG3472.jpg
    75.1 KB · Views: 21
  • CIMG3474.jpg
    CIMG3474.jpg
    81.7 KB · Views: 20
  • CIMG3475.jpg
    CIMG3475.jpg
    106.5 KB · Views: 18
  • CIMG3464.jpg
    CIMG3464.jpg
    75.3 KB · Views: 22
  • PB050963.jpg
    PB050963.jpg
    105 KB · Views: 18

bighead

New member
Messages
4,022
Reaction score
52
Location
Pacific Northwest USA
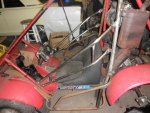
Check this out! I used little newspaper balls pushed into all the threaded bolt holes on the frame. I let the POR15 dry for 2 days. I went to pull the little paper balls out. Nope, First I tried to grab the end of the paper with some neddle nose. Nope, solid as a rock. Hmmmm. To get the little paper ball out of the hole I had to find a nail and hammer them out. I said it a million times. This stuff is amazing strong paint. After 2 days drying I can hardly scuff it with full force scew driver scrape. Vid coming soon.
 

mrfreyguy

Buggy Almost Done
Messages
388
Reaction score
1
Location
Iowa
Check this out! I used little newspaper balls pushed into all the threaded bolt holes on the frame. I let the POR15 dry for 2 days. I went to pull the little paper balls out. Nope, First I tried to grab the end of the paper with some neddle nose. Nope, solid as a rock. Hmmmm. To get the little paper ball out of the hole I had to find a nail and hammer them out. I said it a million times. This stuff is amazing strong paint. After 2 days drying I can hardly scuff it with full force scew driver scrape. Vid coming soon.

I'm really starting to consider using por 15 on my buggy. Can you pm me some info and where to buy it?
 

bighead

New member
Messages
4,022
Reaction score
52
Location
Pacific Northwest USA
Heres one in Austin PA... $200

Looks a bit rough...

That paint looks awesome... and you said you could paint the whole frame with just the starter kit?

Maybe just the frame. I did paint a Dingo with the starter kit. I used a 1/2 pint on everything you see on this Ody.

Starter kit will paint a normal go kart though.
 

B.M.800

TheBeal.
Messages
2,387
Reaction score
24
Location
Central PA
Maybe just the frame. I did paint a Dingo with the starter kit. I used a 1/2 pint on everything you see on this Ody.

Starter kit will paint a normal go kart though.
Like thisin?
Ive been thinking about re painting it... might just go the cheapo way with spray paint though. depends on how much $$$ i got to spend in the end... we'll see.

What colors were available with the starter kit?
 

bighead

New member
Messages
4,022
Reaction score
52
Location
Pacific Northwest USA
Yes A starter kit would paint that kart. You can get gloss black,semi gloss black and silver.

You must remember that you need to top coat as well. I just use rattle can rustulm while the por15 is still tacky.

If you can find it local the starter kit is about $20. Then you need a few rattle cans or spray a top coat.

The reason colors are limited is something to do with color pigments. The por15 does not work right with color pigmants. Por15 does have another pruduct called Hardnose paint. It is UV safe and lots of colors.
 

redsox985

Active member
Messages
4,092
Reaction score
11
Location
PA
So POR15 must be coated with some type of clear coat? Does this clear coat dry as hard as POR15? Does Hardnose need a top coat? How does it cure?
 
Status
Not open for further replies.
Top