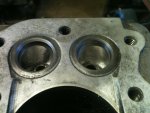
Port and Polish Job on a Clone Engine

Status
Not open for further replies.

Doc Sprocket

*********
Messages
15,677
Reaction score
10
Location
Ontario, Canada
Thanks. I will have to give it a try...

There is a HUGE volume of Dremel (and other brand) accessories on the market to do this with, everything from mini grinding stones in cylindrical, conical, and spherical shapes, to 1/4" and 1/2" diameter sanding drums in varying grits, and burrs, too. You should have no problem whatsoever, finding this stuff.
 

jamyers

Well-known member
Messages
1,444
Reaction score
38
Location
Buffalo Gap, TX
And WEAR EYE PROTECTION!!!

when I was diy-porting my Buick 455 heads, I thought my eyeglasses would be ok, and then I got to go visit the nice optometrist and have him remove the rusting bit of iron from my eye.

NOT fun.
 

AMMFAB

New member
Messages
57
Reaction score
0
Location
Phoenix, AZ
Careful dropping the port floor so far.. I can see this head only on a relatively high revver.

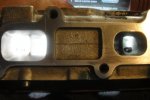
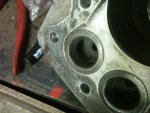
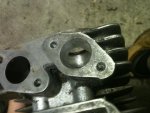
i rarely lower the floors on any given head. i lowered the floors on the inlet of the intake port and the outlet of the exhaust port on the clone head just enough to even them out and no more. i can only assume u say u would see this on a high revver because it looks as though hogged the ports out but theres a taper effect going on sir. funny thing is that engine will see north of 8k though.


mike
 

AMMFAB

New member
Messages
57
Reaction score
0
Location
Phoenix, AZ
heres a good example of what my all out high rpm race port looks like on a gm ld9 exhaust port compared to stock, big in all directions but down..... for big power in the higher rpms....


mike
 

Attachments

  • LD9head027.jpg
    LD9head027.jpg
    54.3 KB · Views: 69

machinist@large

Active member
Messages
2,856
Reaction score
2
Location
West Michigan, 49331
heres a good example of what my all out high rpm race port looks like on a gm ld9 exhaust port compared to stock, big in all directions but down..... for big power in the higher rpms....


mike

:eek::eek::eek: Yikes!!! I'm guessing you're gasket matching the intake and exhaust on this head? A little bit of miss match would really suck after that much work......:sifone:
 

AMMFAB

New member
Messages
57
Reaction score
0
Location
Phoenix, AZ
that was actually just a test port that i had flow benched compared to stock... at .500" lift and 28" of water the stock port flowed 148cfm and the new port flowed 201cfm.


mike
 

poordad

New member
Messages
26
Reaction score
0
just interested if after porting all of the valve components as well as the fly wheel need to be upgraded or is this just helping it breath?

looks good:thumbsup: and now i'm in trouble:idea2:
 

AMMFAB

New member
Messages
57
Reaction score
0
Location
Phoenix, AZ
just interested if after porting all of the valve components as well as the fly wheel need to be upgraded or is this just helping it breath?

looks good:thumbsup: and now i'm in trouble:idea2:


it helps it breath better. u can gain pretty decent amounts with just head work but when u upgrade the whole breathing system from in to out u (filter, carb, head cam, possibly valves and exhaust) u really see gains. but along with all that top end stuff, ur gonna want to rev higher to get the most out of it and thats where the a built and balanced bottom end comes in so it doesnt grenade on u after a couple high rpm pulls. enter piston (higher comp) rod, crank and flywheel and any other mod that these single thumpers need.


mike
 

oscaryu1

New member
Messages
2,767
Reaction score
0
i rarely lower the floors on any given head. i lowered the floors on the inlet of the intake port and the outlet of the exhaust port on the clone head just enough to even them out and no more. i can only assume u say u would see this on a high revver because it looks as though hogged the ports out but theres a taper effect going on sir. funny thing is that engine will see north of 8k though.


mike

Yes, looked a bit hogged out. For 8k I can see why though I do think dropping the port floor is the wrong way 'round. I can see your taper but I can also see a sharp increase in area from so much bowl blending.. you'll get some flow separation at lower rpms. Remember a banana port will always flow more..
 

AMMFAB

New member
Messages
57
Reaction score
0
Location
Phoenix, AZ
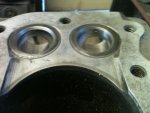
I blended the throats to seats but did not do any material removal to the bowls only cartridge rolled them. until I can get a spare head to cut up I'm not going to do anything extreme. I could always get the welder out and raise the floors a bit so it's not a straight shot and then a 90 degree turn into the cylinders but that will cost some $$$ For the person that wants that..... believe me I've thought about it. I've done to some ford cobra jet heads..... What a pita that was.
 

Amped

New member
Messages
180
Reaction score
0
Location
Port St Joe, Florida , U.S.A.
You use some terms that i don't follow clearly. Would you explain a few for us un-informed folks. When you say floor, throat , seat , bowl which areas does that refer to? I'm very interested in learing some basic machining for building my on small engines. I find them all the time that people throw away because they dont know any better so extra heads to practice on are not a problem . You also mentioned cutting a head up. Do you do this to allow you to examine which areas would be best to work? What are basic areas to look at?
 

k-man1081

New member
Messages
20
Reaction score
0
Location
Cambridge, Ontario, Canada
Hey, awesome thread. Thank you!

I've been working on and researching cars for about 13 years now, so I follow almost everything that you're talking about except when you talk about the areas like floors, throats, seats, and bowls. So I learned something new tonight.

I wanted to make a comment about this subject. In order to achieve proper flow throughout all cylinders, each cylinder should be the same mass (E.g. Mike said the original ports flowed at 148 c.f.m. (cubic feet per minute), and after the porting was finished, the port flowed at 201 c.f.m. Well, all ports should be close, if not match, the 201 c.f.m. Which it looks like the OP did.

Cylinder #1 should = 201 c.f.m. or very close to it
Cylinder #2 should = 201 c.f.m. or very close to it
Cylinder #3 should = 201 c.f.m. or very close to it, and
Cylinder #4 should = 201 c.f.m. or very close to it

Mass production cylinder heads from the factories that create them aren't matched most of the time, they have discrepancies, but they also have tolerances. As long as the head is within the manufacturers' tolerances, they send it out to be built and placed on a vehicle that will be sent to the customer.

My second comment is that when porting an aluminum head with a porting bit; the bit should ONLY be used for aluminum. So if someone used a porting bit on a metal head, they shouldn't use it on an aluminum head. There should be 1 specific bit for each metal; in order to prevent contamination of the metals.

Again, awesome write-up, you seem to know exactly what you're talking about on this subject.
 
Last edited:

88nightrider

New member
Messages
130
Reaction score
0
Location
Norway, Sandnessjoen
the only thing that doing a mirror finish on combo chambers or exhaust would help to do is the slowing of carbon build up over time. which i dont think these things go for long enough to ever build up enough carbon to start to effect air flow.... but i could be wrong

I know this is an old thread.
But just to add to this. Polishing the exhaust port to a "mirror" finish also helps on cooling.
A flat surface has less surface area then one that is rough. So less material is in contact with the hot exhaust gasses to soak up the heat. While the "mirror" finish also reflects some of the heat :wai:

what u dont want in a ported head especially on theses little carburated engines is a mirror smooth finish (intake port). which alot of people think is what u want and they are wrong. if u notice i have a bit of a texture on the ports walls and thats on purpose. it helps the fuel to stay atomized as it enters the engine instead of "falling out of vortex and pooling" some people say

This is absolutely right :thumbsup:
You can clean up your intake port to smoothen it up a bit, while still leaving a bit of texture.
Some of the same as with the exhaust port applies here (just the other way around). By having less texture there are less time for the intake charge to pick up heat while entering the cylinder.
But balancing this might not be so easy... :stir:
 

Metal_Rott

New member
Messages
91
Reaction score
0
Location
Laredo, TX
Cool, use the tools to knock of the excess and finish it with a finger wrapped in Emery Cloth. I love seeing a great port job.
 
Status
Not open for further replies.
Top