Summit Racing Bar Stool Racer & Shooping Cart Trailer Build Thread

Status
Not open for further replies.

bighead

New member
Messages
4,022
Reaction score
50
Location
Pacific Northwest USA
Hello Friends

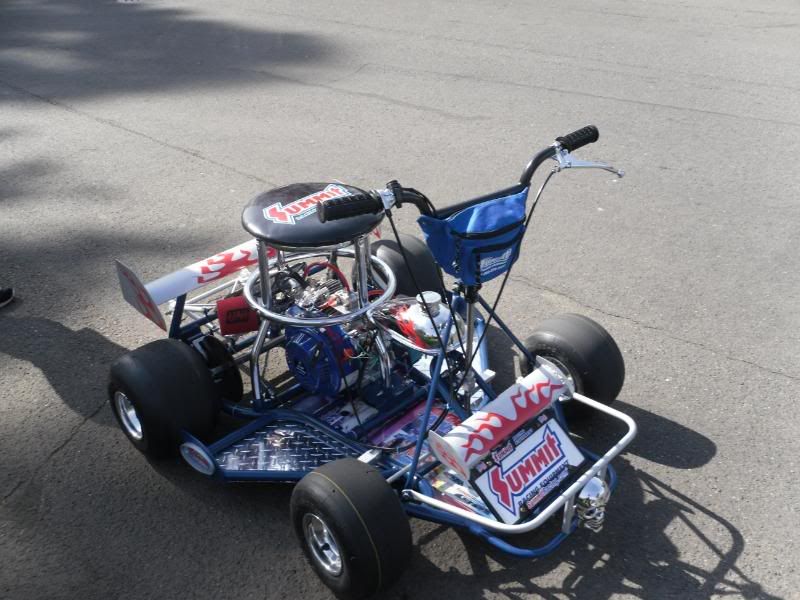
I have been working on a Bar Stool Racer for about a month now. I will be done tomorrow and post finished pics then. To start my thread I will post pics of what I started with and some of what I did. I lost a lot of the mock up pics so I will have to jump ahead some.

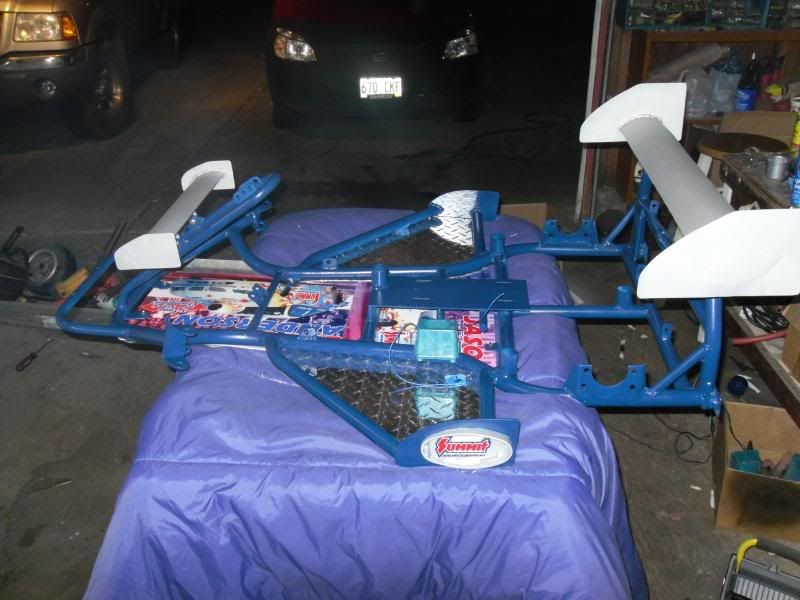
Here is what I started with. It was a older shifter Kart in it's glory days. Not sure what type but it is all metric stuff. The bent steering bar you see use to come up betwwen the kart drivers legs. I just cut and flip around.


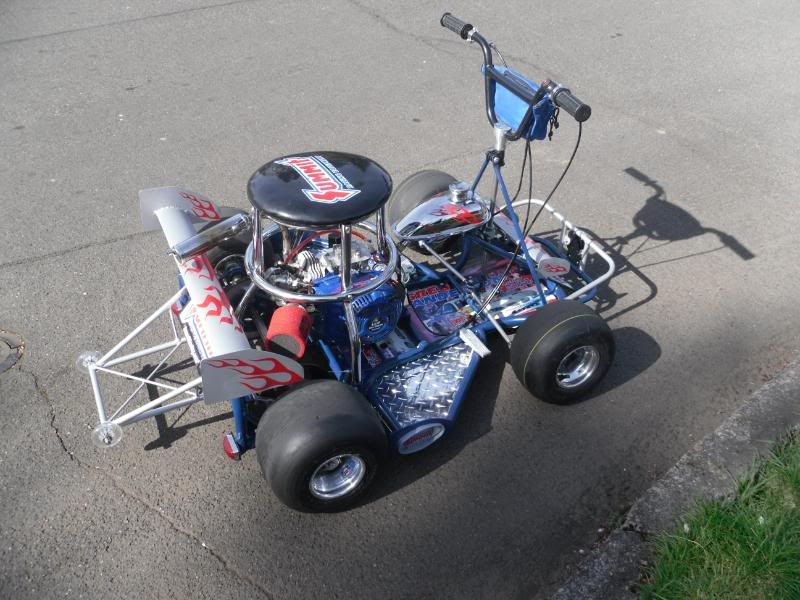
First thing I notice is the stool was way to tall. SO chop chop it went.


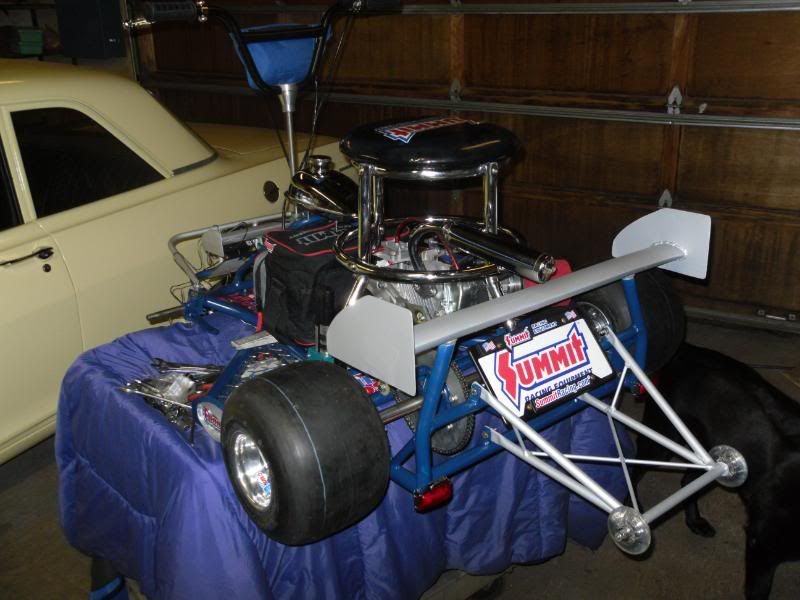
I just hack away and came up with this.


bighead

New member
Messages
4,022
Reaction score
50
Location
Pacific Northwest USA
Here is the shopping cart that will be a matching trailer.


For my steering I just did like this. (mods had to be done after test ride for to much woble at top of shaft)


For the nerf bars and foot pegs I set up like this.


On the nerf bar wing you see the oval on the end? This will protect a little Summit Racing emblem that will go inside the oval.


Fot the wing I just used a 6" exhaust pipe. I cut about 1.5" off each side. Then welded the two parts back to a oval wing. The two shorter parts I cut off will be used for a front wing.


These are Summit fender covers for cars. They will be used for the floor and back rest enterior if you will. I will just stample them to a plywood sheet thats cut to fit.


bighead

New member
Messages
4,022
Reaction score
50
Location
Pacific Northwest USA
Had to have some wheelie bars. I just used stamped tube ends and some home made tabs. It was simple but is solid. The wheels are from Harbor Freight Tools.


My brakes went like this. Simple and solid.


bighead

New member
Messages
4,022
Reaction score
50
Location
Pacific Northwest USA
For the floor boards I just used some Summit Racing Greg Anderson and Jason Line tin wall signs I got from Summit for $5 each. I pop rivit some wings on the ends.


Like I said before I lost a lot of pics so we will have to move on. This is the fun part anyway.


bighead

New member
Messages
4,022
Reaction score
50
Location
Pacific Northwest USA
Here is the first shot of the front wing. I love this part of the build.


I used diamond plate under the nerft bars.


Here is the summit emblem I was talking about.


Here is my power source for my LED lights. It is an Makita battery and charger. I just cut the charger in about an 3rd. I used the original cercuit board to wire my neg. and pos wires to. It works great. It will run my LED for 12 hours. And thats with a 5 year old battery.


I went to Autozone and got this skull. I did ot like the look and took it off. I have plans for this skull though.


bighead

New member
Messages
4,022
Reaction score
50
Location
Pacific Northwest USA
Time to add the stool


Notice how I made my lincense plate mounts?


Some more shots of my power set up. It is pop rivit on the bottom. It was a little to wobbly so I added the bolt. The bolt works great for it holds it solid. It also pinches the battery and holds it in snug. It take a good jerk to get the battery out now.


I made the plate short on the bottom so I can still take it off and on if problems later on. The bottom plastic charger bottom is pop rivit to the steel plate. I used the original charger mounting holes on the outside of the plate. This way I can take off and on. I picked the tall makita battery for i had some extras. But the tall makita battery will double as a chain guard.


I put the Sumiit plates back on. I think is goes with the flow better that the skull.


So now I have this skull.


I took my heat gun and pulled the two sided tape off. I was left with this. It even has holes for LED lights.


So after all that I came up with this.


I just mounted it like this. I got luckey for the tabs were already there. It worked out great.


bighead

New member
Messages
4,022
Reaction score
50
Location
Pacific Northwest USA
Back plate goes on.


Axle and pipe.


Being a bar stool the gas tank was tricky. I needed to be able to take thge stool off to get the motor out. So I came up with this.


Spring loaded chain tensioner.


Wheelie bars and led tail lights.


bighead

New member
Messages
4,022
Reaction score
50
Location
Pacific Northwest USA
I did not like the last pipe so I changed to this.


Steering set up. Later had to add strenth up high.


Controls and kill switch.


Thats all the pics I got for now. I will finish this thread this weekend. I have lots more to come. Flames and all.

enjoy.

Oh yah and my summit cooler. LOL


anderkart

Moderator
Messages
6,427
Reaction score
366
Location
Surprise Arizona USA
Awesome job there bighead :thumbsup: 
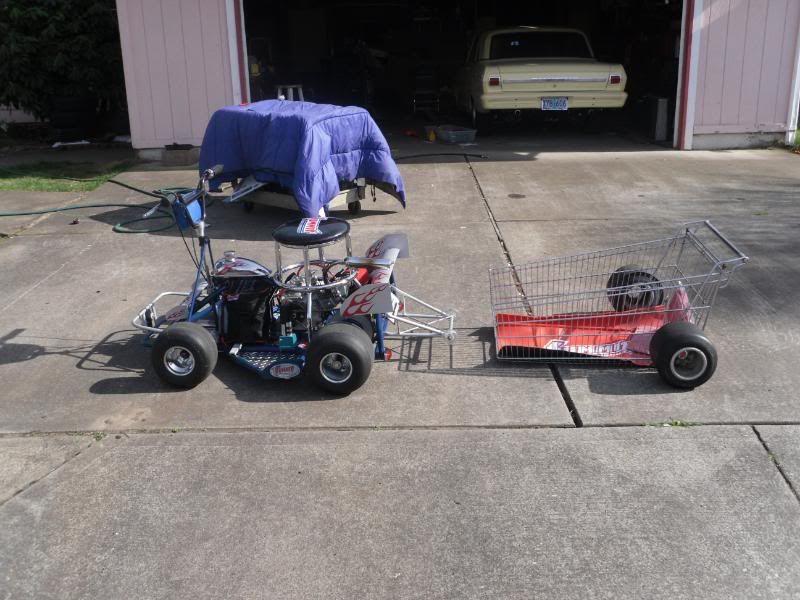
Are ya gonna cruse it at swap meets?
You should send Summit some pics, I'll bet they'd turn you onto some swag and maybe dealer pricing.
Kinda looks like your chassis was an Invader. Cool Nova man!
 

bighead

New member
Messages
4,022
Reaction score
50
Location
Pacific Northwest USA
Thanks for all the kinds words. I have her finished now. I added those cross bars on the steering. I just added another bushing on the shaft. I flatten the tube ends in my vise. I then drilled some holes and bolted it the bushing and my bumper mounts. Lots better now.

Here are the finished pics. I am starting on the trailer now.


It's all about the smiles right?


bighead

New member
Messages
4,022
Reaction score
50
Location
Pacific Northwest USA


I forgot to add the summit cooler.


Good shot on how I beefed up the steering. I did not hav e to weld and repaint.


This will give you an idea on what my trailer will be. Also my next project will be a shopping cart/bar stool racer combined.


This is why they call me bighead. even my head showdow in big.


The shopping cart will take me a few weeks to finish. I been working on this BSR none stop for like 4 weeks. Time to slow down and enjoy the spring.

I would also like to say that this is my very first welding job as well as a welder. I bought an lincoln 175t and love it to death.

Anyway enjoy the pics. Feel free to chime in. This is my first kart so if you see anything let me know. It's all new to me.

More to come.
 

Doc Sprocket

*********
Messages
15,677
Reaction score
142
Location
Ontario, Canada
Man, that is absolutely STUNNING!!! Excellent job! Can we get you to put up a video? I'd love like he// to see the turning radius, and to see 'er up on the wheelie bars!
 

bighead

New member
Messages
4,022
Reaction score
50
Location
Pacific Northwest USA
During the test ride it was okay. It does not ride that well yet. It is like there is no weight on the front wheels. It does not pull but like bites and then pulls for a secound. Kind of like bitting and then letting go. If I push down on the front wheels it drivs better.

Also when not running with no rider when I turn the wheels one front wheel will lift off the ground enough to spin it.

The tires and wheels I have on the kart now are way way larger than the tiny ones that were on it.

Can I do anything here? I just eyeball the tires strait to line it up.

Is my center of gravity all messed up?

I can move the wheel about an 1/4 closer the the frame. Will that help?

I think my pitman arm my be to short. Can you look at my pitman arm and tie rod angle?

Help. It not safe to drive like it is now.

Oh and making a sharp turn slow of fast...Well it sucks. I need to work this out.

Thanks
 

bighead

New member
Messages
4,022
Reaction score
50
Location
Pacific Northwest USA
Here are some pics of the steering setup. I can tell by looking and the turning that the pitman arm needs to be longer. The original ones were. It looks like it losses turning ratio and pulls the tie rod around instead if out towards spindles.

Also some about the tire problem I think I am having?

Any tips?


That little wheel in the background is what was on it before.
 

anderkart

Moderator
Messages
6,427
Reaction score
366
Location
Surprise Arizona USA
Yeah your seat's mounted pretty far back. These race karts front/rear weight bias are usually setup pretty close to 50/50 so they'll steer well. (kinda looks like you've got about 70% of your weight on the rear now)

Besides moving your seat forward... a few easy things you could try first is adjusting your tie rods to achieve a 3/16" tow-out, this usually improves steering ability but can make it kinda twitchy going strait at higher speeds.

Something else you could experiment with is some different front track width's. There's usually a stack of wheel-spacers on front spindles like yours that are there to help tune your steering characteristics.

Also try running more air in the back tires so they don't hook up as well. You might try like 15/20lbs. in the rears and like 5lbs. in the fronts.

You could also experimented with some different front/rear ride height adjustments. Your rear axle bearings should adjust up/down in the frames slotted mounting holes and you'll probably find your front spindle/king pin mounts have a stack of washers that can be located differently to raise/lower the front.

Its normal for these race karts to lift one front wheel off the ground while turning. That's part of its design to help transfer weight off the the inside-rear tire while making a turn. This unloading of the inside rear tire is the most important thing you can do to make a live axle kart turn well. That weight you transfer goes to the opposite sides front and rear where its needed.

With your seat up high like that I'd imagine your leaning your body kinda like riding a motorcycle while turning. If so, this would probably be worsening your turning problem. You've got to let your weight transfer away from that inside rear tire while making a turn. You need it to unload/ loose some gripping ability to make a live axle kart turn well.

Installing an open rear axle would would help your turning issues a bunch but I think you can work it out without going there.
 

anderkart

Moderator
Messages
6,427
Reaction score
366
Location
Surprise Arizona USA
I can tell by looking and the turning that the pitman arm needs to be longer. The original ones were. It looks like it losses turning ratio and pulls the tie rod around instead if out towards spindles.

Yeah good Idea, go back to an original length pitman arm. (with your front wheels pointing straight ahead, you'll want your tie rods to be running straight across and level)

Most Sprint/shifter kart pitman arms also had 2 separate tie rod mounting holes spaced about an inch or 2 apart. (like this pic: http://www.cometkartsales.com/store/steer/images/cksshaft.jpg) This increases the Ackerman effect and causes the inside front tire to turn sharper than the outer. This feature usually ends up improving turning ability.
 

anderkart

Moderator
Messages
6,427
Reaction score
366
Location
Surprise Arizona USA

Man, maybe its just the camera angle but it sure looks like you've got a bunch of camber there. Do your front spindles have adjustments for caster/camber? If not, I'm wondering if somethings either bent or maybe you've possibly got your R/L spindles installed on the wrong side... (kinda looks like that tires got too much air pressure too)
 
Status
Not open for further replies.
Top