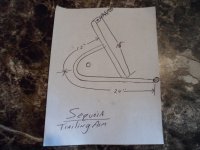
Sequoia Electrathon Racer

Master Hack

Well-known member
Messages
1,977
Reaction score
3,164
Location
Mountain top Labratory
I'm not questioning "your work" at all
I'm not suggesting ya are. I may not be 'splainin stuff well.
As you know my explainations are brief and to the point, without a bunch of excessive BS.
Due to my brieviety my explanations and posts may not be clear or even as l intended.
ln keeping with the breif theme, and especially in this case, pics are worth a thousand words. Standby for pics.
 

Master Hack

Well-known member
Messages
1,977
Reaction score
3,164
Location
Mountain top Labratory
As for Your questions:
1a. since that stuff comes from china, there probably is no runout tolerance.
1b. CNC. Nothing is made the old way. CNC weilders, laser cut parts etc.
the only human that actually touches the stuff is the guy that takes ‘em off the last machine and puts ‘em in a box.
2. No.

i’ve been out of the loop for too long.
Don’t confuse the hack method with any production method, or any normal method.
 

Functional Artist

Well-known member
Messages
4,411
Reaction score
1,694
Location
Toledo, Ohio
5/8 bolt?
Hey T,
I figured for consistency (& simplicity) it would be best to use a 5/8" axle/spindle in the rear (same as on the fronts)
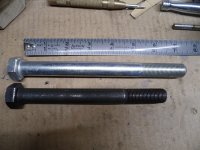
...&/also, I gots us a longer bolt (7")
SAM_1869 (1).JPG
You'll get it when l start. I'll 'splain it all soon. I think you'll like it.
you'll be building your next two or three projects around this hub.
Kool! Ima lovin' all of the pics & explanations (more...more...more) :thumbsup:
...so, keep 'em commin' :popcorn:
...& now that ya mention it...:innocent:...I think my "left brain" has been workin' on somethin behind my back :devil2:
SAM_1721 (2).JPG
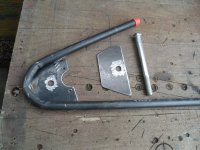
Here is the 7" spindle/bolt "dry fit" thru the backing plate(s)
SAM_1870 (1).JPG
Yup, now we gots us plenty of room for a nut & safety pin ;)
SAM_1875 (1).JPG
 

Master Hack

Well-known member
Messages
1,977
Reaction score
3,164
Location
Mountain top Labratory
Hey T,
I figured for consistency (& simplicity) it would be best to use a 5/8" axle/spindle in the rear (same as on the fronts
I figgered, but l never take anything for gtanted. My warped thought process has proven, what i consider normal is usually 180 off of normal people think is normal.
as you know assumption is the mother of all f**k ups.
 

Functional Artist

Well-known member
Messages
4,411
Reaction score
1,694
Location
Toledo, Ohio
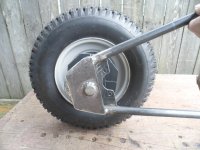
So is this a cantaliever axle setup? (one swing arm?)
Yup, I guess ya could say that :thumbsup:
...kinda like this

SAM_1900 (1).JPG
Why?
(1) side "wide open" for easy tire changes & such
...without havin' ta mess with the chain &/or brakes

Reasoning?
Super light in the rear
...& being a "soft tail"

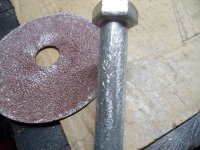
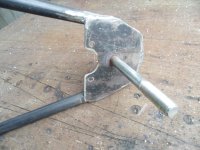
So, I cleaned up the bolt a bit (for weldin')
SAM_1880 (1).JPG
...& all of the mating/contact surfaces too
SAM_1881 (1).JPG
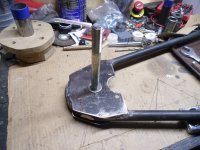
Put the bolt thru the outer plate
...& secured it in place, good-n-tight
...ta help square 'er up, for weldin'
SAM_1884 (1).JPG
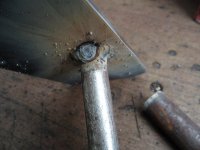
Then, welded the bolt head to the outer plate (looks pretty secure I must say) :cheers2:
SAM_1892 (1).JPG
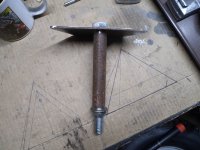
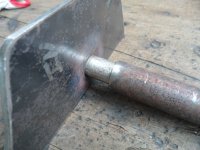
I used the bolt "sleeve" to help protect the spindle shaft of the bolt from welding debris, whilest weldin' the inside
SAM_1889 (1).JPG
Turned out kinda like this :cornut:
SAM_1891 (1).JPG
Then, assembled the inner plate with the outer plate & welded 'em up good :sifone:
SAM_1895 (1).JPG
 

Functional Artist

Well-known member
Messages
4,411
Reaction score
1,694
Location
Toledo, Ohio
Here are a few more pics :thumbsup:

Used the sleeve ta hold the inner & outer sections together for weldin'
SAM_1894 (1).JPG
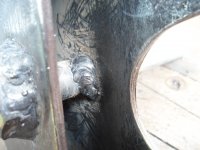
Welded the spindle inside of/in between the (2) sections too ;)
SAM_1897 (1).JPG
Another view (after weldin')
SAM_1898 (1).JPG
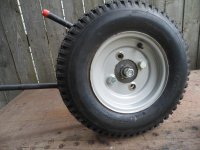
Another view (after weldin' & with wheel) :cheers2:
SAM_1902 (1).JPG
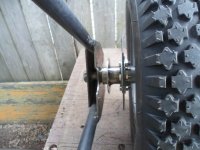
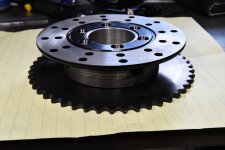
A view of the rotor, sprocket & wheel clearance :sifone:
SAM_1901 (1).JPG
 

Functional Artist

Well-known member
Messages
4,411
Reaction score
1,694
Location
Toledo, Ohio
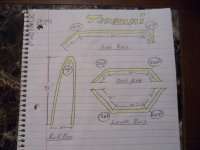
Twunami? Sounds like another design lurking in a small crevase in the deep, dark recesses of yer gray matter?
Yup, sometimes ideas just come at me like "title waves" :sifone:

Can ya see where we are goin' with this one? :devil2::innocent:
SAM_1513 (1).JPG
That's purdy cool. I like the design. Lite and strong.
How thick is the flat stock?
Hey T,

Thanks! :cheers2:

The inner piece/caliper mounting plate is ~1/8" thick
...& the outer plate is a little bit thicker/beefier (like between 1/8" & 3/16")

There's still quite a bit more to do like:

The shock mount bar
...motor mount
...bushing holders & bushing(s)
...& (maybe) fender ;)
SAM_1801 (2).JPG
 

Functional Artist

Well-known member
Messages
4,411
Reaction score
1,694
Location
Toledo, Ohio
Until something goes wrong and catches fire!
Hey T,

If done right, the chances of that happin in' are pretty low :thumbsup:
...but, just in case, there will be a metal floorboard/firewall betwixt the driver & the batt pack :cheers2:

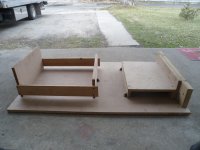
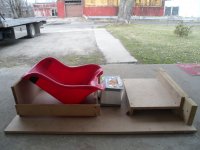
After workin' with this co*kpit "jig", Ima been thinkin' about mounting the batt pack abouts there, in Sequoia too ;)

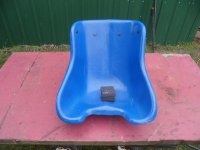
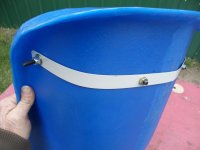
Speakin' of the seat, I gots us a kool blue plastic racing seat
https://www.bmikarts.com/Racing-Polyethene-Plastic-Sprint-Seat_p_2885.html

Polyethene (not fiberglass) racing seats are a durable seat made of almost indestructible plastic perfect for racing go karts.

  • Made for oval racing.
  • Measurements is at the narrowest point (around the hips).
* The red one was temporarily "borrowed" from my Hell-raiser kart)
SAM_1903 (1).JPG
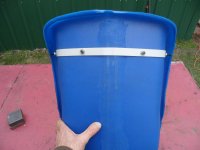
I added/installed a 3/4"w x 1/16"t steel "band" to the back
SAM_1905 (1).JPG
To strengthen/reinforce the rear seat mount bolting area
...& kinda "cup" the upper back area to help spread the "load" (weight of the driver) out
SAM_1904 (1).JPG
 

Master Hack

Well-known member
Messages
1,977
Reaction score
3,164
Location
Mountain top Labratory
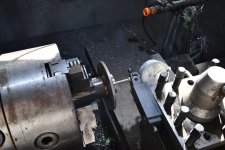
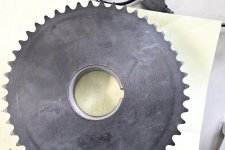
Egor worked on the spinna thing making the hub/doughnut thingy.
You asked for pics....
Be careful what ya wish for....


Front hubs.
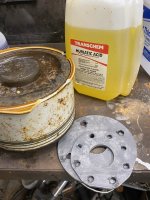
I keep acid around for removing rust, mill scale and other carp on the material. It's handy for dissolving bodies should the need ever arise.
A small crock pot ( $5 from goodwill) use it to heat the acid. Acid becomes much more agressive at higher temperatures. Small body parts dissolve in just a few minutes.
IMG_4086.jpeg
Welded the Brake rotor flange on.

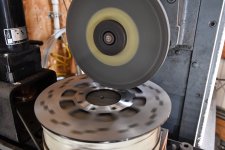
D75_3899.jpeg

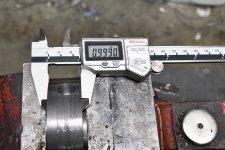
Checked runout after cooling
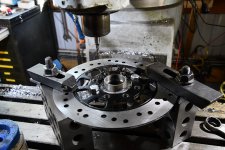
D75_3902.jpeg

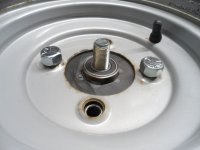
Brake rotor has to drilled for mo bigger bolts and a pin.

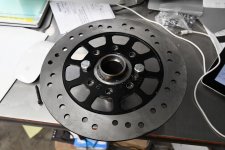
D75_3907.jpeg
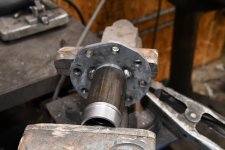
Skipping ahead, here it is on the hub.
D75_3908.jpeg
Backing up now...
The rotor had some burrs left from drilling.

D75_3904.jpeg

Posting this sh*t is difficult, for old computer challenged geezers.
 

Functional Artist

Well-known member
Messages
4,411
Reaction score
1,694
Location
Toledo, Ohio
Egor worked on the spinna thing making the hub/doughnut thingy.
You asked for pics....
Be careful what ya wish for....


Front hubs.
I keep acid around for removing rust, mill scale and other carp on the material. It's handy for dissolving bodies should the need ever arise.
A small crock pot ( $5 from goodwill) use it to heat the acid. Acid becomes much more agressive at higher temperatures. Small body parts dissolve in just a few minutes.
View attachment 146689
Welded the Brake rotor flange on.

View attachment 146698

Checked runout after cooling
View attachment 146692

Brake rotor has to drilled for mo bigger bolts and a pin.

View attachment 146697
Skipping ahead, here it is on the hub.
View attachment 146695
Backing up now...
The rotor had some burrs left from drilling.

View attachment 146693

Posting this sh*t is difficult, for old computer challenged geezers.
I think your doin' GREAT! :thumbsup:
&
Ima lovin' all of this craftsmanship :2guns:
 
Top