• OFF TOPIC fun forum - NO politics - NO religion - NO jerks. It's not complicated. Thanks!

Well... that didn't work ....

itsid

Moderator
Staff member
Messages
11,564
Reaction score
115
Location
Ruhrpott [Germany]
Hi there;

you haven't seen me in a while and I'm sorry..
as I said some time ago:
I lost my old computer and it decided to take my main hard drive and the back up drive (that luckily was connected that day :()
And that caused some 'inconveniences' to put it mildly...
As a result I got unwanted and uncalled for spare time on my hands.

A couple of months ago my sister asked me to fix her motorcycle...
that alone was a whole new story in and off itself... nevermind.
(short she asked a guy on the internet and let him pick the bike up.. not knowing his name.. took us a while to get the bike back :mad2:

Anyways.. eventually I got the bike and started what should've been a three day job (one to find out what to order, one to wait for the order to arrive)...
SHOULD HAVE -he said-... what a desaster..
the poor bike was left to rot outside for 4 years;
and I am the one now paying for it... we're now approaching the fourth week in trying to fix that dang moped.

I knew the fork was leaking, and I knew the brakes needed attention (discs as well as lines)
6053.jpg
that grime is fork oil...
and that should've been it already (there it is again)
So I stripped the fairing and with it 90% of the screws holding it on.
So new set of screws for the fairing.. okay.. no problem

then I removed the front wheel and the fork..
6066.jpg
well.. uhm the fork needed to go back on the minute after since I forgot to loosen the caps..
I did NOT loosen the caps, instead I rounded the stinky aluminium hex of one.. so a new cap 85 bucks nope.. used fork it is.
6074.jpg
and that quickly became a running gag...
if only it'd been funny.

So moving on while waiting for a replacement fork
master cylinder front brake leaking.. (replaced since that was cheaper than the repair kit)
caliper front brake seized..
frame rusty as can be...
6093.jpg6058.jpg
cap of rear brake fluid reservoir seized (stripped screws of course ..this will be the theme remember)
rear brake disc worn out (to be replaced)
right side panel broken (to be plastic welded)

A quick oil change (filter was changed not even 2000 km ago and while that's been years ago the filter should be fine still)
quickly checking the engine and battery..
battery had 2Volts left (TWO!) so I was betting on "no way to recover that thing"
but still.. I conencted it up to a vintage battery charger (no electronic control allowed.. just pure electric transformation and rectification)
and whaddya know, I charged it up over night and it came to 12.9 Volts...
I allowed it to rest for another 24h (expecting it to drop back below 11 Volts signifying at least one dead cell)
but it stayed above 12.7 at all times (I even started the bike with that battery w/o choke.. and 4year old fuel...
it ran well
(no not great that'd be a lie.. but I mean four year old fuel and a likely gummed up carb or two... it ran stable enough for me to be surprised let's say ;))
So... plugs cleaned and the rest of the engine will be left as is until it got fresh fuel, then we'll see if the carbs need attention or not.

I spend a week wire wheeling the rust off, soaking the frame in rust remover (acid based I think)
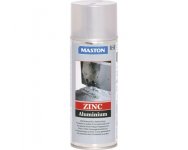
and spray zincing every nook and cranny afterwards
6116.jpg6147.jpg6135.jpg6151.jpg6154.jpg

[and there goes the ten pic per post limit... uhm .. tbc!]

.......

'sid
 
Last edited:

karl

Well-known member
Messages
2,363
Reaction score
546
Location
North east Ohio
Glad to hear from ya, that turned into a major project real quick!

Most extractors expand the bolt and make it tighter, no fun. More or less asking it nicely.
Had better luck drilling the hole and hammering in a sacrificial torx bit , just enough so the tips have some bite.

Yeah Carbide is the best bet, had some luck with the 1/8in burrs, with the tits on the end, shove it straight down.
Hope the drills work out.

Wish ya the best of luck! She better appreciate it !
 

itsid

Moderator
Staff member
Messages
11,564
Reaction score
115
Location
Ruhrpott [Germany]
Thanks,

Most extractors expand the bolt and make it tighter, no fun.
yeah.. NOW I know ... sometimes youtube is of absolutely no help :D:D

and for those who wonder.. I snipped the text above (for image reasons ;))

.....


With that done I thought it'd be a good idea to get the front brake caliper working again..
that was loud!
yeah remove the seized piston with compressed air alright..
yes yes lock the unseized piston with some wood or something so it doesn't come shooting out...
uhhuh ...
man that piston was seized...
(here it is soaking in penetrating oil overnight..)
6096.jpg
5bar later (~73 psi) that piston came flying with what sounded like a gunshot,
luckily I was pointing that away from me..
After that was cleaned and in good working condition again,
6177.jpg6179.jpg
I ordered brake lines (from a sh1tty company I'm afraid.. so I ordered another set today)

"new" (to us) fork arrived and was installed.. aaaand yepp! leaking!
6190.jpg
fortunately though the caps are 'undoable' ;) so my sis' original fork will be taken care of later this project
using those caps instead
since I'm busy ..kinda

Onto the rear brake disc..
a simple swap and all that'd be left on the back end of that two wheeler will be swapping the brake line and fluid..
that should be an easy win, right?
WRONG!

all four bolts seized up, nearly rounded the allen head...
so some gentle heat, some penetrating oil.. some patience..
some very gentle persuation with a soft, kid sized mallet..
and first bolt is out... next crackled a tiny bit.. must be the corrosion giving away... came loose after another 15 mins;
third still seized, more heat, more oil, more malleting... more cracking aaand more bolts leave the rear rim
last one.. boy that's tight... again more heat oil and knocking..
ahh the sweet sweet sound of cracking corrosion, a quick squish of oil to fill those tiny tiny cracks..
and off comes ......... THE HEAD!
Yes, just the head.. no I haven't seen that coming.. it sounded just like two and three...

No fear, it broke flush.. just weld on a nut and you'll be fine, that heat will...
well.. no.. just no!
6195.jpg
it did not break free that stubborn piece of s...teel

And then I made the biggest mistake of them all..
I was listening to that unknown youtuber that suggested a certain type of screw extractor..
aaaand I tried it... and as you might have guessed...
without ANY effort it just snapped inside my bolt;
and now I have to drill a hardened steel extractor.. :mad2:
6193.jpg

here am I four carbide drillbits later 6mm (~1/4") deep with a sore thumb
waiting for my newest amazon order (a dozen diamond drillbits for ceramics and glass...)
why? because another random youtuber actually drilled through a tap with such... an inch per hour he said
those 6mm are the result of about 8 hours, so that'd be a speed up :D

And yes, I WAS thinking about building an EDM machine, but let's be honest;
that'd take months to finish and work semi reliably.... that'll be the task for another day I guess ;)

Now.. what am I trying to say?
1) heat and penetrating oil isn't always working!
2) screw extractors only work in commercials when the screw/bolt itself is already loose
3) if my sister does NOT treat that poor bike nicely from now on I will be furious!

(Pictures have been taken mostly to show to my sister or to call for help.. so please excuse the lack of quality or completeness ;))

'sid
 
Last edited:

itsid

Moderator
Staff member
Messages
11,564
Reaction score
115
Location
Ruhrpott [Germany]
diamond tipped drill bits (hole saws really) just arrived..
aaand I got a chemical tap dissolver that won't (let's say shouldn't ;)) harm aluminium ...
(battery acid and alum)

I'll know by tomorrow I guess which worked if any ;)

'sid
 

Functional Artist

Well-known member
Messages
4,405
Reaction score
1,684
Location
Toledo, Ohio
Glad your back in the game :cheers2:
...but, don't let 'er (the bike or your sis) get to ya :thumbsup:

Um..."tap dissolver"? :huh:

So, it's supposed to melt/chemically change or dissolve some hardened tool steel
...& a piece of old rusty steel (piece of bolt)
...without harming the Aluminum rim?

Call me skeptical :innocent:
...but, interested :popcorn:
 

itsid

Moderator
Staff member
Messages
11,564
Reaction score
115
Location
Ruhrpott [Germany]
:unsure: tap dissolver....curiosity just got unleashed.

What zinc paint? Looks like it layed nice and even.

Zinc spray paint.. some -new to me- generic sounding brand (Maston).. it's been aluminium silver coloured [see below]
the tap dissolver was a youtube tip.. cannot recall the channel or video..
but it's exactly as I said above, just battery acid and Alum (as much alum as the battery acid is willing to dissolve)
and the saturated solution straight into the hole.. it's bubbling like soda and with some patience all steel will be gone eventually.
the higher the concentration of the acid the better of course.
So the tap dissolver works actually quite nice..
it's just a huge PITA to use in this situation since you can only apply a few drops at a time, have to wait hours for it to become inactive, rinse repeat..
it's much better to have a bigger container and add more of that stuff and let it sit over night to do it's job.
the diamond drills are actually quite good.. I was not
so I got offcenter...
6202.jpg
I remounted the old brake disc, slipped one of the bushing from the fairing in (luckily 8mmOD 6mm ID just as I needed)
6206.jpg6205.jpg
and very carefully tried to fix my mistake
6212.jpg

it still took hours and whenever I left or needed a break I added a few more drops of the chemical magic into the hole
and let it do it's job.. and eventually it ate enough
and I had a literal breakthrough
6230.jpg
swapped tools
6232.jpg
and sized the hole
6231.jpg
cleaned it as good as I can, retapped to M8 as before
aaand finally after a week of terror that wheel gave me
6233.jpg

I still don't trust that bolt enough (and it is tightened to specs with 20Nm [should be between 18 and 25])
but I wouldn't try 25Nm ...so this is temporary for now I just needed to do something else (and also am waiting for a proper length helicoil)

'sid
 

Attachments

  • DV_8_6005688_01_4c_CH_20160421090111.jpg
    DV_8_6005688_01_4c_CH_20160421090111.jpg
    18.5 KB · Views: 1

itsid

Moderator
Staff member
Messages
11,564
Reaction score
115
Location
Ruhrpott [Germany]
I hope your sister is worth all this trouble. :lolgoku:
She's my sister ... so that heavily depends on the day you are asking ;)
Can we get away with....

"Sister pics not loading" 😛

Okay, I'll report myself....:bannana:
LOOOL

Glad your back in the game :cheers2:
...but, don't let 'er (the bike or your sis) get to ya :thumbsup:

Um..."tap dissolver"? :huh:

So, it's supposed to melt/chemically change or dissolve some hardened tool steel
...& a piece of old rusty steel (piece of bolt)
...without harming the Aluminum rim?

Call me skeptical :innocent:
...but, interested :popcorn:
Yeah I was too!
but since I had Alum at home (these hemostatic sticks when you cut yourself while shaving ...)
and I had one or two lead acid batteries laying around I just gave it a shot.
it was kinda lame because of the old acid I think.. so I just got some fresh acid and tried again..
and it's been fizzing away so something was going on..
and yes.. I took a short length of aluminium rod and submerged it first to see if that changes state over time..
it didn't (not noticeable at least) so I just went for it
that's how a clear solution on 'clean' steel looked an hour later
fr_6200.jpg

that short length of aluminium rod was left over from my home made plastic welder...
6170.jpg6171.jpg
basically a flat head screwdriver tip hammered and filed from aluminium rod with a slightly rounded edge on one side to have a sharp 'cutting'
edge on the other..
put into a cheap low power soldering iron (18W otherwise the aluminium rod needs to be much longer to dissipate some heat)
and then punch drag lift punch drag lift half to threequarters the way into the broken plastic fairing ....
and afterwards a quick wipe with the rounded side to seal the stitches a bit (to not have water cracking it open next winter;))
6168.jpg

So on with the fork...
cracked both open to have enough good parts for one
6246.jpg
and quickly saw what actually ruinid the oil seals in the first place..
the retainer clips rusted very badly.. and the rust eventually ate through the rubber
6247.jpg
(those are the two better ones ;))

since that didn't seem to be something new parts would be able to solve.. I made my own retainer clips from stainless spring steel
6254.jpg
and after making an insertion tool for the new oil seals from an old oil cap
6259.jpg
I was able to verify that they fit
6258.jpg

So all that was left was to fill it back up to specs with #10 fork oil..
(an old chopping board and a 4mm brass tube and a syringe I had laying around to make my levelling tool)
6260.jpg

And the fork's been done mounted and tight..
Soo I am only waiting for new brake lines (should be here by tomorrow)
then one last shopping trip to get brake fluid aaand it's been done.

And no.. it was NOT a restoration, it's just a crude repair to get it roadlegal again (and safe for my sister to drive of course)

wish me luck.. maybe by wednesday it's back on the road

'sid
 
Last edited:

FlyFrog

Active member
Messages
467
Reaction score
127
Location
Kankakee Illinois
She's my sister ... so that heavily depends on the day you are asking ;)

LOOOL


Yeah I was too!
but since I had Alum at home (these hemostatic sticks when you cut yourself while shaving ...)
and I had one or two lead acid batteries laying around I just gave it a shot.
it was kinda lame because of the old acid I think.. so I just got some fresh acid and tried again..
and it's been fizzing away so something was going on..
and yes.. I took a short length of aluminium rod and submerged it first to see if that changes state over time..
it didn't (not noticeable at least) so I just went for it
that's how a clear solution on 'clean' steel looked an hour later
View attachment 128366

that short length of aluminium rod was left over from my home made plastic welder...
View attachment 128363View attachment 128364
basically a flat head screwdriver tip hammered and filed from aluminium rod with a slightly rounded edge on one side to have a sharp 'cutting'
edge on the other..
put into a cheap low power soldering iron (18W otherwise the aluminium rod needs to be much longer to dissipate some heat)
and then punch drag lift punch drag lift half to threequarters the way into the broken plastic fairing ....
and afterwards a quick wipe with the rounded side to seal the stitches a bit (to not have water cracking it open next winter;))
View attachment 128361

So on with the fork...
cracked both open to have enough good parts for one
View attachment 128367
and quickly saw what actually ruinid the oil seals in the first place..
the retainer clips rusted very badly.. and the rust eventually ate through the rubber
View attachment 128368
(those are the two better ones ;))

since that didn't seem to be something new parts would be able to solve.. I made my own retainer clips from stainless spring steel
View attachment 128369
and after making an insertion tool for the new oil seals from an old oil cap
View attachment 128371
I was able to verify that they fit
View attachment 128370

So all that was left was to fill it back up to specs with #10 fork oil..
(an old chopping board and a 4mm brass tube and a syringe I had laying around to make my levelling tool)
View attachment 128372

And the fork's been done mounted and tight..
Soo I am only waiting for new brake lines (should be here by tomorrow)
then one last shopping trip to get brake fluid aaand it's been done.

And no.. it was NOT a restoration, it's just a crude repair to get it roadlegal again (and safe for my sister to drive of course)

wish me luck.. maybe by wednesday it's back on the road

'sid
whats the bikes condition right now?
 
Top