XanderWiFi
New member
- Messages
- 17
- Reaction score
- 3
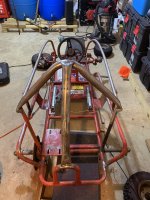
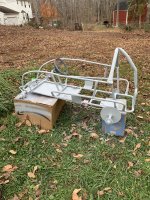
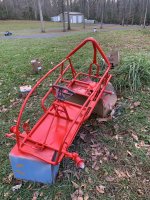
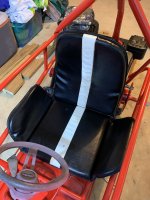
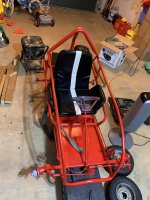
This is a go kart my grandparents got me when I was a kid. I fondly remember cruising around the neighborhood with friends and whatnot. I can't remember what went wrong but she got put in a shed and here she is 20-25 years later back in my possession. Now I am trying to get it safely operational for my own kids to play on. My grandfather can weld and he put the roll bars on aftermarket.
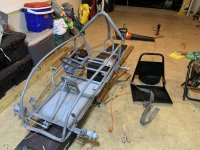
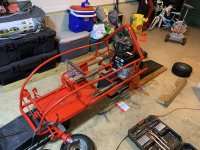
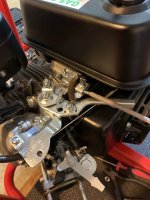
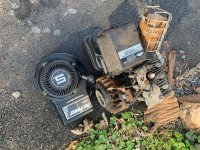
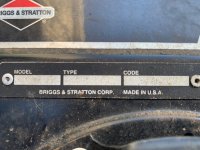
Took it to 2 small engine guys. Both said the 5 hp briggs engine it came with is shot. I was able to get it to start with relative ease prior to taking it to them. I have more of a feeling it just wasn't worth it for them to work on it. Prior to sending it to them I started it and let it run and work out whatever was inside it with some seafoam. It puttered out and never restarted. No idea what happened. I have it removed but I'm not entirely certain what to save on it. My plan at this point is to get a horizontal predator engine from harbor freight and hope I can get it to fit on the live axle.
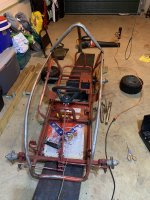
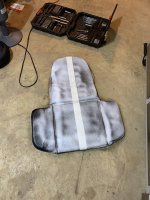
EVERYTHING in the rear was coated with oil. I don't know if a seal blew inside the engine and it sprayed everywhere. But I took a rag and pressure washer to it to clean it up as much as possible. Took the seat off which is going to need some aggressive sanding. It is actually adjustable. The silver rails you see now used to be black. I can actually get them to move with my hands now after much manipulation, wd-40 and white lithium grease.
Hosed the steering ball joints and anything remotely looking like it moves on the wheels with white lithium. She cruises smooth and steers much better. I took the wheels off for a thorough cleaning and inspection. Any reason why the air stem would have been put on the inside instead of it and the small bolts (lugs) facing outward? Cosmetically it looks better just having the bolt tops showing but slightly more difficult for filling etc. Looks like the wheels actually turn on some sort of bearing. One had quite a bit of grease outside of it. Any way to open these and pack them or do they have to be replaced after seizure?
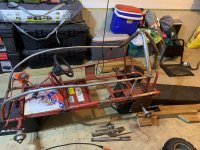
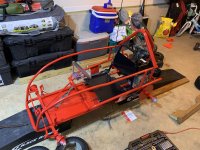
Started sanding and grinding. Lots of surface rust. I just have elbow grease and a polisher. I'd happily take recommendations on the most efficient ways to get the rust off for repainting. In the one picture you can see I have evaporust soaking on the seat to try to break it down for easier removal.
Any and all tips/sources/advice/tools welcome. It will not be a professional restore but I am going to do my best to get it set up to last a couple more decades. Right now I'm not certain how I will get the chain on the new predator engine (or if it will even fit) and how to hook the throttle cable back up. It's all one big learning experience for me.


Also has band brakes. Which definitely work a lot better once I rotated the axle with a rag on the rotor to clean it off. i was worried it would need replaced but seems to be okay at this time (when fighting it with hand strength alone). Eventually a replacement will be needed.
Top of seat post evaporust soak and grind off. Beginning of grinding off old paint/rust.

Here's the engine that was on it.
Took it to 2 small engine guys. Both said the 5 hp briggs engine it came with is shot. I was able to get it to start with relative ease prior to taking it to them. I have more of a feeling it just wasn't worth it for them to work on it. Prior to sending it to them I started it and let it run and work out whatever was inside it with some seafoam. It puttered out and never restarted. No idea what happened. I have it removed but I'm not entirely certain what to save on it. My plan at this point is to get a horizontal predator engine from harbor freight and hope I can get it to fit on the live axle.
EVERYTHING in the rear was coated with oil. I don't know if a seal blew inside the engine and it sprayed everywhere. But I took a rag and pressure washer to it to clean it up as much as possible. Took the seat off which is going to need some aggressive sanding. It is actually adjustable. The silver rails you see now used to be black. I can actually get them to move with my hands now after much manipulation, wd-40 and white lithium grease.
Hosed the steering ball joints and anything remotely looking like it moves on the wheels with white lithium. She cruises smooth and steers much better. I took the wheels off for a thorough cleaning and inspection. Any reason why the air stem would have been put on the inside instead of it and the small bolts (lugs) facing outward? Cosmetically it looks better just having the bolt tops showing but slightly more difficult for filling etc. Looks like the wheels actually turn on some sort of bearing. One had quite a bit of grease outside of it. Any way to open these and pack them or do they have to be replaced after seizure?
Started sanding and grinding. Lots of surface rust. I just have elbow grease and a polisher. I'd happily take recommendations on the most efficient ways to get the rust off for repainting. In the one picture you can see I have evaporust soaking on the seat to try to break it down for easier removal.
Any and all tips/sources/advice/tools welcome. It will not be a professional restore but I am going to do my best to get it set up to last a couple more decades. Right now I'm not certain how I will get the chain on the new predator engine (or if it will even fit) and how to hook the throttle cable back up. It's all one big learning experience for me.
Also has band brakes. Which definitely work a lot better once I rotated the axle with a rag on the rotor to clean it off. i was worried it would need replaced but seems to be okay at this time (when fighting it with hand strength alone). Eventually a replacement will be needed.
Top of seat post evaporust soak and grind off. Beginning of grinding off old paint/rust.
Here's the engine that was on it.
Attachments
-
 IMG_6711.jpg1.1 MB · Views: 5
 -
 IMG_6710.jpg690.2 KB · Views: 5