Predator 212 need help plz.

BrianSlaughter3355!

New member
Messages
22
Reaction score
0
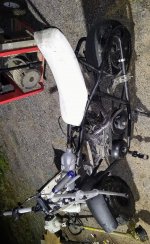
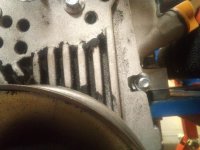
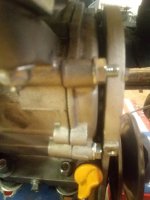
Okay so I'm new to this trying to learn as much as possible so bare with me plz. I'm not sure if I'm heading for disaster but here's what I got and what's about to happen I have a non hemi block with hemi head it has governor delete billet flyw, bolt rod +.02, flat top Pistons, super x cm grind .265 cam, 26lbs springs, ss valves, light port and polish, ..010x2 gasket, vm22 26mm carb. Up jetted. I'm fixing to put a hi comp 14cc head (which I'll port b4 installing) with 1:0 champion rockers cut to length chomoly pushrods, and everything I noted earlier what kind of compression will I have? can I run 93 octane plus oct boost and be ok do I need a bigger head gasket? Etc.. I'm also putting a valve cover spacer for clearance any suggestions and help would be much appreciated. Thanks
 

panchothedog

Well-known member
Messages
1,423
Reaction score
1,940
Add one more head gasket. You need .030" clearance between piston and head and with the longer rod you are at or VERY near flush with deck.
All else sounds like you are on your way to a very strong predator. I have built two this past year and the hotter of the two I had problems with the side cover coming loose. Grey Goat at OMB warehouse recommended I install billet side cover and it fixed the problem right now. Something I would not thought of.
I mention this because after you install the 14cc head you are going to have about as much compression as a stock predator block will handle. I don't know numerically what the compression ratio will be but it will be plenty. One more thing, buy the head stud kit instead of using the stock head bolts. You can get a lot more clamping force w/o worrying about stripping the threads in the block. I torque mine to 28-30 lbs and recheck after the first 2 or 3 heat cycles
 

madprofessor

"Loose Cannon Creations"
Messages
2,899
Reaction score
888
Location
Jacksonville, Florida
Good idea to put studs in the jug for that head. About that expensive billet sidecover, I ain't got one. What I do have is a stud set from my performance guy up in N.C., torqued in with Loctite #271 permanent red threadlocker, who said it's all that's needed to keep sidecover tight. Just like those head studs.
One thing yet to see, maybe today. I have a 30 series CVT that bolts flush to the sidecover, and I'm thinking that a couple of those studs are going to have to be cut off, and/or the CVT backplate notched out to get it flush to sidecover.
BTW: Current 212 motor (hemi) has a .020"-over rod also and a .012" head gasket, and there's no clearance problems at all. Not sure how that relates to your non-hemi with that other head. You definitely need to do a squish test with some Play-Doh or similar for your valve clearances.
 

vpd66

Active member
Messages
187
Reaction score
33
Location
Wisconsin
Goggle compression calculator. There are several online and they take all your dimensions (bore, stroke, piston dome or dish,cylinder head cc, piston deck height. head gasket thickness, and some measurements I'm sure I forgot) and it calculates your compression for you No can come on a forum with all the mix of parts you have and tell you your compression. You spent a lot of money on your engine parts, assemble it correctly.
Here is one that should work for you.

n-12872-compression-calculator.html
 

madprofessor

"Loose Cannon Creations"
Messages
2,899
Reaction score
888
Location
Jacksonville, Florida
About those sidecover studs of mine: Had to cut off 3 of the 6 studs flush with their nuts, and chose to notch out backplate for another one. Could have notched out for one that got cut off, but that would have taken out 1 of the 4 threaded bosses for the plastic CVT cover to bolt onto.
First pic below shows bottom right of the six studs is notched out for, and the second pic shows how far out the top left stud protrudes compared to the middle left stud being cut off flush to the nut. Something to consider about studs replacing bolts when a CVT is involved.
 

Attachments

  • IMG_20210825_130327_3CS.jpg
    IMG_20210825_130327_3CS.jpg
    1.4 MB · Views: 4
  • IMG_20210825_130501.jpg
    IMG_20210825_130501.jpg
    3.2 MB · Views: 4

BrianSlaughter3355!

New member
Messages
22
Reaction score
0
Thank you for all the input and advice i will definitely be addressing all issues mentioned I'm hoping to have it done in the next several days depending on how long it takes to get all parts and hardware I'll post an update when I get it done thanks once again for the help
 
Top