Found a Honda G200 engine ...

Status
Not open for further replies.

NewbCarter

Member
Messages
403
Reaction score
4
Location
Solin , Croatia
Nevermind the above , those 2 are the seals on the oil dips ..

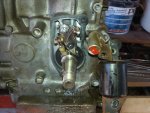
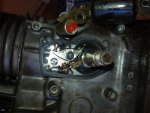
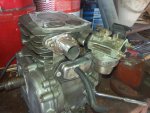
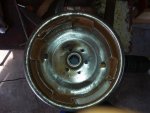
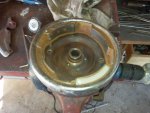
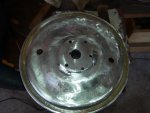
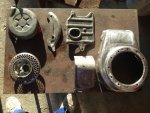
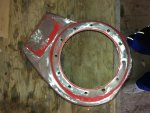
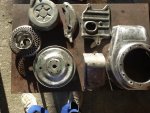
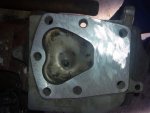
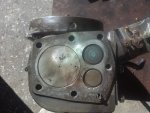
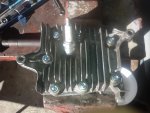
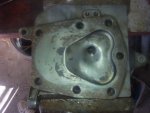
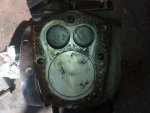
Some more work done .. finally go the 2 bolts that were stuck in the head off , tho one broke , so il have to find a way to remove it from the head ...

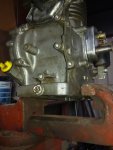
Other than that , got new bolts and washers so this doesnt happen again , and cleaned up the engine head + a new NGK sparkplug , and scavanged a fuel tank with a gauge from my old generator set

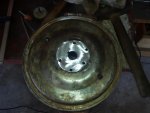
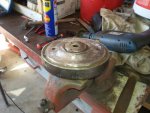
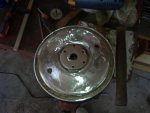
Also put all new gaskets in the engine .
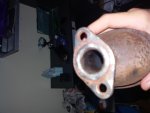
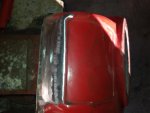
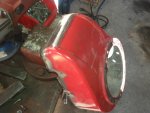
What is left to do is fabricate an exhaust , fabricate a air filter bracket , repaint the thing , pour in new oil .
 

Attachments

  • 20151017_153028.jpg
    20151017_153028.jpg
    319.4 KB · Views: 14
  • 20151017_153021.jpg
    20151017_153021.jpg
    316 KB · Views: 10
  • 20151017_141718.jpg
    20151017_141718.jpg
    209.8 KB · Views: 13
  • 20151017_140618.jpg
    20151017_140618.jpg
    334 KB · Views: 8
  • 20151017_125111.jpg
    20151017_125111.jpg
    201.9 KB · Views: 9

NewbCarter

Member
Messages
403
Reaction score
4
Location
Solin , Croatia
Pic of the old exhaust .. going to use the bracket that it mounts with for the new one since that lip on the end of it puts more pressure on the gasket , ensuring a tight fit .. guess this was only in older engines ...
 

Attachments

  • 20151019_202925.jpg
    20151019_202925.jpg
    150.2 KB · Views: 4
  • 20151019_202933.jpg
    20151019_202933.jpg
    216.6 KB · Views: 4

Lucky7

New member
Messages
178
Reaction score
0
Location
AB, Canada
Nice job on fixing the engine. The exterior looks brand new. What did you use to clean the piston, valves, head,etc. So your just going to cut the exhaust flange(thing that mounts to the motor) and then fabricate your exhaust from that?
 

NewbCarter

Member
Messages
403
Reaction score
4
Location
Solin , Croatia
The whole thing was rinced and soaked in what we call Ivasol ( de-greasing and cleaning solvent )
Cleaned the solvent with a hose but plugged up the intake and exhaust and the sparkplug hole first.

After that took a drill , locked up the engine in a bench press and used a polishing brush for the ribs and block ... same was used for the head only i was extra careful..

Next is polishing the head , intake and exhaust with very fine sandpaper ...

About the exhaust , exactly that ! Since the flange is shaped like it is , and doesnt have deep rust on it ( unlike the muffler ) i figured just cut it off and weld ontop that...
 

NewbCarter

Member
Messages
403
Reaction score
4
Location
Solin , Croatia
Okay guys , a question :

Im looking for a air filter bracket / adapter , and no wonders , due to how old the G series is ( or this engine in particular ) , i havent been able to find any ..

Or at least , i havent found the exact measuers of the GX200 carburetor intake , tho i did measure mine :

Carb is a 26mm , the rods are 5.9mm , tho i forgot to measure the spacing between the rods ....

http://www.ebay.com/itm/Upgraded-Ho...ash=item2a272259e3:g:EmoAAMXQCgpRwjeZ&vxp=mtr , i suppose something like this would work , IF it fits ?
 

NewbCarter

Member
Messages
403
Reaction score
4
Location
Solin , Croatia
Ok measured it , middle of bolt to middle of bolt is 46mm .

Also finally got the flywheel off tho i fear the engine head is unsalvagable... the bolt that snapped in half is still in there.. il have to take it to a mechanic with a lathe to remove it
 

NewbCarter

Member
Messages
403
Reaction score
4
Location
Solin , Croatia
Some more pictures ...

Alot of work .. but i think it will pay off big time :D
 

Attachments

  • 20151024_133255.jpg
    20151024_133255.jpg
    276.9 KB · Views: 4
  • 20151024_123918.jpg
    20151024_123918.jpg
    375.4 KB · Views: 4
  • 20151024_123911.jpg
    20151024_123911.jpg
    322.7 KB · Views: 5
  • 20151024_122527.jpg
    20151024_122527.jpg
    298 KB · Views: 5
  • 20151024_112257.jpg
    20151024_112257.jpg
    321.7 KB · Views: 8
  • 20151024_141512.jpg
    20151024_141512.jpg
    373.8 KB · Views: 4
  • 20151024_141507.jpg
    20151024_141507.jpg
    237.9 KB · Views: 4
  • 20151024_134922.jpg
    20151024_134922.jpg
    322 KB · Views: 4
  • 20151024_134153.jpg
    20151024_134153.jpg
    256.1 KB · Views: 4
  • 20151024_134148.jpg
    20151024_134148.jpg
    214 KB · Views: 4

NewbCarter

Member
Messages
403
Reaction score
4
Location
Solin , Croatia
And more ...
 

Attachments

  • 20151024_162801.jpg
    20151024_162801.jpg
    432.2 KB · Views: 5
  • 20151024_154854.jpg
    20151024_154854.jpg
    231.9 KB · Views: 5
  • 20151024_154847.jpg
    20151024_154847.jpg
    258.9 KB · Views: 5
  • 20151024_152818.jpg
    20151024_152818.jpg
    225 KB · Views: 4
  • 20151024_152812.jpg
    20151024_152812.jpg
    260.8 KB · Views: 5
  • 20151024_162913.jpg
    20151024_162913.jpg
    428.5 KB · Views: 5
  • 20151024_173042.jpg
    20151024_173042.jpg
    249 KB · Views: 5
  • 20151024_173049.jpg
    20151024_173049.jpg
    199.6 KB · Views: 6
  • 20151024_173056.jpg
    20151024_173056.jpg
    234.9 KB · Views: 9
  • 20151024_162907.jpg
    20151024_162907.jpg
    435.9 KB · Views: 5

Lucky7

New member
Messages
178
Reaction score
0
Location
AB, Canada
Looks sick. Good progress. Did you swap the carb? And what is that thing on the crankshaft I have no idea? And what is that thing you welded. A flywheel??? I am guessing you are going to paint it. What color are you going to choose?
 

OzFab

Well-known member
Messages
15,615
Reaction score
67
Location
Warwick Qld, Australia
Ok measured it , middle of bolt to middle of bolt is 46mm .

Let me get back to you on that...

Also finally got the flywheel off tho i fear the engine head is unsalvagable... the bolt that snapped in half is still in there.. il have to take it to a mechanic with a lathe to remove it

That's not a job for a lathe, it's a job for a mill...

You can extract it if you're careful & take your time; I see you started to drill it, have you tried an "easy out" on it?
 

NewbCarter

Member
Messages
403
Reaction score
4
Location
Solin , Croatia
Looks sick. Good progress. Did you swap the carb? And what is that thing on the crankshaft I have no idea? And what is that thing you welded. A flywheel??? I am guessing you are going to paint it. What color are you going to choose?

No , the carb is the stock G200 one , just cleaned up and all gaskets replaced .

Also the flywheel was just cleaned up and prepped for painting , the welding is "stock" so to say ..

The thing on the crank is the magneto / timing assembly . You can see the magneto on the right , with the capacitor mounted on it , and the timing assembly which i opened up to check the state , but its like brand new . The gasket did its job i presume.

The outside of the engine is going to be Honda-Red , or at least close to that , while the flywheel and the start-cage thing ( where the pullstart engages on ) in black .

---------- Post added at 01:57 AM ---------- Previous post was at 01:54 AM ----------

Let me get back to you on that...


That's not a job for a lathe, it's a job for a mill...

You can extract it if you're careful & take your time; I see you started to drill it, have you tried an "easy out" on it?


I guess your thinking of a screw extractor ? Thats how i originally tried to get the bolts out .

The first one worked nicely , as i said , and the second one broke ..

But due to how it broke , i cant use the extractor again , since it didnt break in the middle , so the extractor doesnt have anything to grip on , only thing il do is damage the threads even more ..
 

OzFab

Well-known member
Messages
15,615
Reaction score
67
Location
Warwick Qld, Australia
You do know that the mating surface needs to be completely flat?

Spray a black guide coat on the surface, then tape a sheet of 800 grit sandpaper to a piece of glass & rub the head on it until the guide coat is gone; if, after 30 seconds, there is a lot of black left, you may need to use a coarser grit...
 

Denny

Canned Monster
Messages
11,615
Reaction score
8,050
Location
Mayberry, Indiana
No, you must use only flat glass. For example a beer bottle will not work because it is round. Beer is also good for drinking. :lolgoku:

On a serious note though from the looks of that head I would tape a piece of wet/dry 220 grit sandpaper to a flat piece of glass and use some oil as a cutting fluid to start out and work my way down to 600 grit. Sand in a figure 8 pattern to avoid cutting the head crooked. :thumbsup:

Denny
:feedtroll:
 

NewbCarter

Member
Messages
403
Reaction score
4
Location
Solin , Croatia
Thats why i said cleaning... next is leveling it ..

Tho my question above ^^ : middle of bolt to midle of bolt on the carburetor is 46mm , carb itself is a 26mm with 5.9mm rods

Can i use a filter adapter for gx200s on this ?
 

mckutzy

Well-known member
Messages
8,353
Reaction score
108
Location
bc, canada
I'd start with a flat straight edge to see how warped it is... That looks pretty wavy... This is aluminum after all.
 

Lucky7

New member
Messages
178
Reaction score
0
Location
AB, Canada
No, you must use only flat glass. For example a beer bottle will not work because it is round. Beer is also good for drinking. :lolgoku:

On a serious note though from the looks of that head I would tape a piece of wet/dry 220 grit sandpaper to a flat piece of glass and use some oil as a cutting fluid to start out and work my way down to 600 grit. Sand in a figure 8 pattern to avoid cutting the head crooked. :thumbsup:

Denny
:feedtroll:


So just any flat window in your house will work?
 
Status
Not open for further replies.
Top