Dirtbox Venom mini-buggy, 40+ horsepower!

Status
Not open for further replies.

mysteryboy28

New member
Messages
1,582
Reaction score
10
Location
Lansing, MI
finally got the forward/reverse shifter hooked up. put a return spring on the gearbox arm, pulling it in the "forward" position, so that is it's natural inclination. ran a cable to the shifter (original from the snowmobile, with locking positions), so in the relaxed position it's "forward", and in the taut position (unlock and push it forward) it pulls the cable and shifts the gearbox arm into the "reverse" gear. i'm so smart. lol. pics coming soon, gonna get some more work done. :)
 

mysteryboy28

New member
Messages
1,582
Reaction score
10
Location
Lansing, MI
yup! it was the only way to do it unless i wanted to run the cable to the front of the shifter - and that would just be a waste of cable, and i'd have hoops everywhere. lol.

got the battery frame done. used angle iron to make 3 sides, then welded that to the center floor beam. drilled holes on either side so i can hook a short rubber bungee cord over the battery to keep it from bouncing around when this beast hits the hills and jumps.

gotta buy more throttle cable wire from home depot. i bought plenty of cable conduit (black sleeve), but only planned enough wire for the throttle cable. ended up using that wire for the shifter. just ruined my day. not.
 

OzFab

Well-known member
Messages
15,615
Reaction score
67
Location
Warwick Qld, Australia
yup! it was the only way to do it unless i wanted to run the cable to the front of the shifter - and that would just be a waste of cable, and i'd have hoops everywhere. lol.

That depends on where the pivot is in relation to the cable. Is the cable currently above or below the pivot point? Can you post some pics?
 

landuse

Moderator
Staff member
Messages
18,746
Reaction score
518
Location
Pietermaritzburg, South Africa
got the battery frame done. used angle iron to make 3 sides, then welded that to the center floor beam. drilled holes on either side so i can hook a short rubber bungie cord over the battery to keep it from bouncing around when this beast hits the hills and jumps.

Bighead made a really cool battery mount You can see it in post #38 of THIS thread. He makes a bracket that goes all around the battery. Better than bungee IMO
 

mysteryboy28

New member
Messages
1,582
Reaction score
10
Location
Lansing, MI
i've done bungees on all my buggies and karts. as long as there's a solid base around the battery to keep it from sliding around (the angle iron), and strap over the top - they're not going anywhere. :) i make sure they're strapped down tight.
 

mysteryboy28

New member
Messages
1,582
Reaction score
10
Location
Lansing, MI
alright, here's some pics, and a video of the shifter in action. it doesn't take a lot of travel to fully engage forward and reverse. the shifter has the added bonus of having a pressure sensor, so that if i wanted to install a reverse tail light, i could. or i could make it make beeping sounds like a utility truck or forklift. lol.

also cut and linked the chain. contemplating making a tensioner, as there's a little more slack than i'd like. will take the buggy for a couple of test runs to see if it'll stretch the chain enough for a half-link, instead of fabbing up a tensioner.

http://www.youtube.com/watch?v=Ny_3CT3ei-U&feature=youtu.be
 

Attachments

  • DSCF3565.jpg
    DSCF3565.jpg
    101.1 KB · Views: 34
  • DSCF3566.jpg
    DSCF3566.jpg
    119.7 KB · Views: 31
  • DSCF3569.jpg
    DSCF3569.jpg
    105.8 KB · Views: 28
  • DSCF3573.jpg
    DSCF3573.jpg
    95.2 KB · Views: 24
  • DSCF3574.jpg
    DSCF3574.jpg
    97.2 KB · Views: 24
  • DSCF3575.jpg
    DSCF3575.jpg
    130.4 KB · Views: 19
  • DSCF3580.jpg
    DSCF3580.jpg
    107.8 KB · Views: 47

mysteryboy28

New member
Messages
1,582
Reaction score
10
Location
Lansing, MI
Its looking good man.

thanks dude. yeah, the sheet metal side panels didn't cooperate too well when welding - got a little warped. but i think once they're painted they'll blend in just fine.

is it time for a vacation yet? lol. i advertised for some help on craigslist, got one response from a guy with years of welding and fabrication experience. when i mentioned how much it (didn't) pay - i never heard from him again. lol.
 

greaser

new here
Messages
126
Reaction score
0
Location
moose lake mn
heck man i just used some lol i may be able to make it out but that would be a killer fuel bill at 4 bucks a gallon 8-0
 

mysteryboy28

New member
Messages
1,582
Reaction score
10
Location
Lansing, MI
i'm thinking if all goes well i'll be driving it this weekend, then it's time to strip it down and beautify it! the rack will be last, as you won't be able to get the motor out without cutting and re-welding the rack back on. i could make the rack with hinges, like a trunk/hood. but that would be one more thing to rattle around.

and where's the youtube video of you and Jeremy riding my buggy?

got the banjo brake ends today for the rear brake line. trying to find someone in town that can sell me an 8-10 foot piece of steel brake line. so far Carquest has a 25 foot roll for almost $30. not cool man...
 

mikeprosauceka

New member
Messages
39
Reaction score
0
Location
romeo mi
I need. Wifi to post it with my phone so i havnt got to it yet i was gona email it to youu but my phome wont let me do that either so ill get to it maybe tomorrow if i have the chance
 

mysteryboy28

New member
Messages
1,582
Reaction score
10
Location
Lansing, MI
cut and re-shaped the muffler and manifold to fit in the small space.

welded nuts onto the muffler and manifold to hook up the retaining springs.

patched up the bottom of the muffler, it was pretty rusty and hole-y in one area.

fabricated muffler mount and welded to the buggy. mounted muffler, attached retaining springs, wrapped a wire around the muffler (temporary) to keep it from bouncing around. heavy duty-er stap in the near future.

mounted front brake calipers and ran brake hoses. mounting bolts were too long. will get shorter ones tomorrow.

bolted motor to frame, connected enough wires to hear the motor turn over. beautiful.
 

Attachments

  • DSCF3590.jpg
    DSCF3590.jpg
    95.2 KB · Views: 19
  • DSCF3605.jpg
    DSCF3605.jpg
    65.7 KB · Views: 19
  • DSCF3587.jpg
    DSCF3587.jpg
    90.6 KB · Views: 17
  • DSCF3585.jpg
    DSCF3585.jpg
    82.1 KB · Views: 19
  • DSCF3583.jpg
    DSCF3583.jpg
    94.1 KB · Views: 19
  • DSCF3592.jpg
    DSCF3592.jpg
    103.3 KB · Views: 25
  • DSCF3611.jpg
    DSCF3611.jpg
    90.6 KB · Views: 20
  • DSCF3612.jpg
    DSCF3612.jpg
    101.9 KB · Views: 21
  • DSCF3599.jpg
    DSCF3599.jpg
    83.4 KB · Views: 27
  • DSCF3607.jpg
    DSCF3607.jpg
    98 KB · Views: 26

mysteryboy28

New member
Messages
1,582
Reaction score
10
Location
Lansing, MI
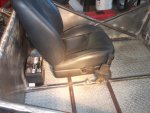
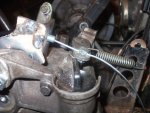
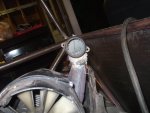
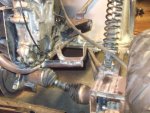
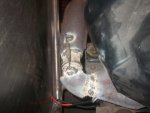
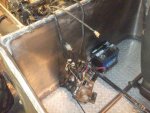
made a bracket for the speedo/tacho, welded it to the steering shaft so that the speedo/tacho will be visible through the steering wheel. made the wire stop plate for the throttle cable and welded it near the gas pedal. went to Lowes and got the correct size bolts for the front brake calipers. Mounted those. Tightened the brake hoses down. Still gotta get the rear brake line, but the banjo bolt ends came in the mail. Just a matter of getting the line, bending it to shape, and flaring the ends - and connect it all together!

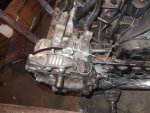
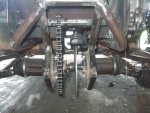
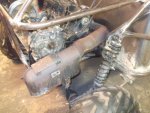
spent the bulk of the evening hooking up the various engine components. got it to the point where i thought it would fire up - no go. after a while of plugging this and unplugging that and replugging those - it started! such a sweet sound. :) 
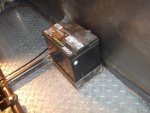
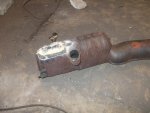
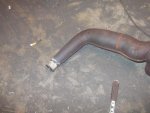
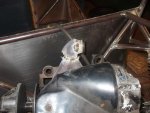
my patch job on the muffler sounded good too! quieter than i expected (quieter than my personal buggy!).

got a nice scolding from my wife yesterday about me coming in the bedroom at 6 in the morning, blaring the bright computer monitor, blaring the bright 46" tv and chomping on cereal - all when she's super tired from a hard week of school and dealing with kids. so long story short, i will be posting pics later in the afternoon/evening from here on out.
 
Status
Not open for further replies.
Top