chancer
ɔ ɥ ɐ u ɔ ǝ ɹ
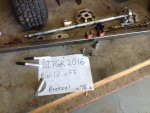
2016 Champion


Thanks to all my Friends here There it is the winning Kart for 2016.
If you can Imagine it you can Build it, and below and on the Following pages is how I did this one.
Alright I will get this started.
Here is my Entry for the 2016 DIYGK Build off.
I will be building a "Fahrende Bierkiste".
For those of you not named Sid, It is a Beer Krate Racer.
The difficulty of this project is these are NOT popular this side of the Pond. So unless you speak German and (I do Not) it is difficult to find alot of info, build threads or build plans.
I have been doing some research and with the help of Google Translate I have been able to scrape enough info together to commence building.
These Bierkistes usually use a small 125cc motorcycle engine with tranny. I however will be using the Typical Clone motor. More on that as we get there,
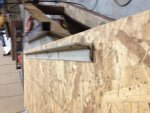
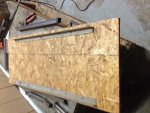
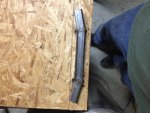
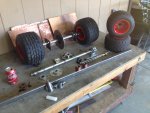
My small parts pile consists of some parts from a Good Craig's list haul last month and some bits I had lying around. The small silver Axle will be my steering Rod. I had it left over from a stock "Razor Buggy" It will be nice cause I have bearing hangars that fit it.
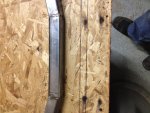
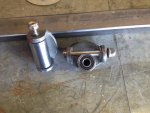
Finally on this parts pile are my Spindle Bearings. I got the hangars with the other CL parts. Then I bought some 7/8od bearings with a 3/8 Bore. I then shipped it all to Utah, and asked Desertduler to machine me Barrels to hold the bearings. Just got these today
I was nice to do a fellow member a favor, I just couldn't see Brett wasting away in retirement with nothing to do!
So anyway now I have my own Thread and Project so I can do more than just
Thanks to all my Friends here There it is the winning Kart for 2016.
If you can Imagine it you can Build it, and below and on the Following pages is how I did this one.
Alright I will get this started.
Here is my Entry for the 2016 DIYGK Build off.
I will be building a "Fahrende Bierkiste".
For those of you not named Sid, It is a Beer Krate Racer.
The difficulty of this project is these are NOT popular this side of the Pond. So unless you speak German and (I do Not) it is difficult to find alot of info, build threads or build plans.
I have been doing some research and with the help of Google Translate I have been able to scrape enough info together to commence building.
These Bierkistes usually use a small 125cc motorcycle engine with tranny. I however will be using the Typical Clone motor. More on that as we get there,
My small parts pile consists of some parts from a Good Craig's list haul last month and some bits I had lying around. The small silver Axle will be my steering Rod. I had it left over from a stock "Razor Buggy" It will be nice cause I have bearing hangars that fit it.
Finally on this parts pile are my Spindle Bearings. I got the hangars with the other CL parts. Then I bought some 7/8od bearings with a 3/8 Bore. I then shipped it all to Utah, and asked Desertduler to machine me Barrels to hold the bearings. Just got these today
I was nice to do a fellow member a favor, I just couldn't see Brett wasting away in retirement with nothing to do!
So anyway now I have my own Thread and Project so I can do more than just
Attachments
-
 diygk sign.JPG596.6 KB · Views: 84
 -
 IMG_4453.jpg261.4 KB · Views: 85
 -
 IMG_4456.jpg328.1 KB · Views: 78
Last edited:
 JK.
JK.


 Nice start!!!!