1987 Suzuki quad AKA "The Ditchbanger"

Brianator

Gettin' er done!
Messages
860
Reaction score
12
Location
Barrie, Ontario, Canada
Well, alot of you here seem to like just about anything with wheels and a engine so I thought I'd start a build thread on "The Ditchbanger"!

I stumbled upon this site while doing research on the best way to get power from the engine to the wheels, scouring threads for info and the hurldes you guys face with your karts and buggies for about 3 or 4 weeks. I liked the sense of community 'round here and felt I could be helpful at times so I decided to sign up! (Sorry about that!)

In it's current state it runs, drives and stops just fine but there's still a few bugs to work out, a (temporary) motor plate that needs to be upgraded (now that I know the machine works) and plenty of finishing touches to apply! I do have pictures from as I was going along and should be able to recreate steps I don't have pictures of as I tear down and rebuild to make this as chronological and complete as possible, hope you enjoy it!

Many thanks to all users past and present that took the time to help others providing a wealth of information (for me) to browse and make this happen! :thumbsup:
 

Brianator

Gettin' er done!
Messages
860
Reaction score
12
Location
Barrie, Ontario, Canada
Part 1 : A new life for an old quad

Here it is as I got it, no motor, no ownership, no rear caliper, front brakes not working, beat to crap (and zip tied) plastics and some stupid low-rise handlebars but I did get the factory carb, factory exhaust, a milk crate full of good engine parts plus a spare wiring harness and a random Mikuni carb with it. The seat is in perfect condition, it looks as if a skilled hand made and installed a custom seat cover, the guy even had and threw in the factory rear gold alloy wheels which are in pretty good shape! A few months later I found factory front gold alloys to match, both front and rear still have the original Dunlop tires and are decent aside from being worn but are perfect for an underpowered "frank 'n quad" (as my neighbor calls it). I don't need tons of traction to have fun on it anyways!

What we have here is a 1987 Suzuki LT230E(H), the first of it's kind. Semi auto 5 speed with electric start, pull start backup and reverse. I would in fact like to find an original engine for it one day as I think it would be a great casual trail cruiser and something that would be great for less experienced riders because it won't be overly intimidating, plus it would be nice to restore it to it's original configuration! BUT for now it's going to work well and I get to do more than just look at it!

I traded away a "tough as nails" 50cc pocket dirtbike (and a bunch of parts for it) for this old beast, more on that coming up next!
 

Attachments

  • 20200623_183350.jpg
    20200623_183350.jpg
    439 KB · Views: 2
  • 20200623_185813.jpg
    20200623_185813.jpg
    784.6 KB · Views: 2
  • 20200623_185523.jpg
    20200623_185523.jpg
    176.1 KB · Views: 2
  • 20200623_185539.jpg
    20200623_185539.jpg
    212.3 KB · Views: 3

Brianator

Gettin' er done!
Messages
860
Reaction score
12
Location
Barrie, Ontario, Canada
Part 2 : The trade...

This is the mini dirt bike I traded for the quad including alot of extras to go with it! I bought it with a bucket of spare parts for cheap, it was just for something to play around with. It ran but not well, had expanding foam in the tires instead of tubes and broken plastics but it was complete! I got it running, installed inner tubes, added some more "stylish" zip ties (note the "stitching"), did some upgrades (throttle grips, brake levers, foot pegs, a conical air filter) rebuilt a motor in better shape, painted the frame, touched up the wheels and installed a FMF muffler (that's now on The Ditchbanger). Basically I broke it, fixed it, broke it, fixed it ect. ect. until it didn't break anymore and got bored of it. Lol. My buddies and I had a blast ripping it around my yard, it was quicker and more nimble that I thought it would be but all good things must come to an end... a good end it was for this little bike as it found a good home with the guys nephew and they should have little to no problems with it!
 

Attachments

  • 20190830_180031.jpg
    20190830_180031.jpg
    629.9 KB · Views: 5
  • 20190830_180023.jpg
    20190830_180023.jpg
    524.6 KB · Views: 5
  • 20190830_180056.jpg
    20190830_180056.jpg
    597.4 KB · Views: 6

Brianator

Gettin' er done!
Messages
860
Reaction score
12
Location
Barrie, Ontario, Canada
Part 3 : "Motorvation"

I got bored of just looking at the quad and :idea2: an "plan" started a brewin'! I had bought a snowblower (5/24) with a bunk motor (Champion 6.5hp) but a solid, heavy, all metal chassis off my neighbor (Frank) for $30 with the intention of taking the 8hp Tecumseh and tires from my red snowblower and swapping it over to create a monster that would cut through anything! That's exactly what I got with the "Frank 'N Blower"! So much extra power and traction that it snapped the axle in half on its first outing and so heavy it took me 10 minutes and 3 breaks to drag it home from 2 doors down but that's another story in itself!

I had previously unseized the Champion, cleaned the head, lapped the valves and got it to run! :wai: With it off the blower and sitting loose it was time to mock it up in the quad frame and check for clearances so I cut the motor plate from the old red snowblower, trimmed it to sit on the framerails and placed the engine in it's new home... to my surprise it fit right in without the muffler or airbox on and seemed to have enough clearance everywhere to work! :2guns: This is great news for me as I do NOT want to modify the frame in any way, shape or form as the plan from the start is to find the proper motor for it one day and I've been 100% successful with that (frame) goal! I have tack welded the "motor plate", seemingly enough that it hasn't snapped any welds but not so much it will be a nightmare to remove, after all it's just a temporary solution AND completely reversible.

I decided to beautify it a bit as I go along so the frame has been spot painted in the areas I'm working around with bedliner (same with the recoil), I used some red Rustoleum on the fan shroud and slapped a Suzuki sticker on the recoil for good luck! The whole frame will get another (proper) coat during teardown/rebuild but I figured there's no harm in freshening it up as I go along right!?

The first clearance hurdle I faced was the airbox, I had to notch the backside to get the motor moved over enough for pulley alignment. My first idea to get power from the motor to the axle was to use pulleys, a frictional belt and make a lawn tractor style "clutch" with all the spare snowblower parts and raw materials I have kicking around. Second idea was a centrifugal clutch and a jackshaft buuut that would've required frame modification and you already know how I feel about that! :roflol: That's around the time I found my way here, started learning about CVTs... :smiley_omg: Amazon here I come! Lol.
 

Attachments

  • IMG_20191020_164609.jpg
    IMG_20191020_164609.jpg
    492.5 KB · Views: 4
  • IMG_20191020_164605.jpg
    IMG_20191020_164605.jpg
    485.6 KB · Views: 3
  • IMG_20191025_184643.jpg
    IMG_20191025_184643.jpg
    400 KB · Views: 5
  • IMG_20191025_202621.jpg
    IMG_20191025_202621.jpg
    377.7 KB · Views: 4
  • IMG_20191026_163012.jpg
    IMG_20191026_163012.jpg
    506.1 KB · Views: 6

Brianator

Gettin' er done!
Messages
860
Reaction score
12
Location
Barrie, Ontario, Canada
Part 4 : The Plastics

With winter in full force and my outdoor projects on hold I fired up the heater in my workshed and turned my attention to doing something about the sad state of the plastics. They were beat up and broken pretty badly (especially the rear) but were complete for the most part (aside from a couple missing chunks), zip tied together and flimsy as heck so I hatched a "plan"! :idea2:

I decided to continue the "stitched" zip tie theme from the mini bike, after a few hours, a hundred new holes and even more zip ties it was "stitched" together and surprisingly sturdy! :wai: I actually like the tough beat up look and it goes along well with the "Ditchbanger" theme so what I'll do to them next is cut some plastic to fill the holes and zip tie them in place of course! :roflol:

Then it will be time to make 'em look good while still looking tough! :2guns:I'll cut all the zip ties, paint the plastic in Rustoleum red, install new zip ties (mostly red with the occasional hints of black), seal the holes from the underside with hot glue then lay some shredded fiberglass matting on the underside for reinforcement! Those steps will come in the form of an update later in this thread once I've completed them.
 

Attachments

  • IMG_20191025_215743.jpg
    IMG_20191025_215743.jpg
    301 KB · Views: 6
  • IMG_20191026_210426.jpg
    IMG_20191026_210426.jpg
    361.8 KB · Views: 6

Brianator

Gettin' er done!
Messages
860
Reaction score
12
Location
Barrie, Ontario, Canada
Part 5 : The Exhaust

With things coming together I figured my next step was to make an exhaust! I already had the flange and head pipe (on the stock muffler) and a FMF Powercore muffler I was given for free months earlier (and had it on the pocket dirtbike), I just had to connect the dots inbetween... I needed some pre-bent 3/4" tubing so I hit the scrapyard one day and had a look around. Sitting in the "clip" pile I saw 2 pieces of electrical conduit that were the right size, each had a couple bends in them and they only cost me $5! :thumbsup:

Unfortunately I didn't take pics of the process of making the bits into a single piece but in the first picture you'll notice 2 (red) highlights, that's where I butt welding them together :2guns: In the second picture you'll notice I routed it between the frame and air filter and got it to tuck in right in the factory exhausts location which is under the rear brake fluid reservoir, it's actually designed with a "notch" in it to allow the exhaust to pass by with a little clearance! A couple coats of flat black high heat paint sealed it up and made it look nice but wow did it shed ALOT of heat and I couldn't have that!

The next step was to wrap it in 15' of 1" DEI "Titanium" header wrap :wai: As per my research I soaked it in water for 15 minutes, wore gloves and wrapped it good and tight! The high heat silicone hose I ordered matches the inlet on the muffler perfectly but leaves a little to be desired on the pipe end so what I did was spend extra time wrapping/unwrapping/rewetting the wrap until I got it evenly spaced all the way down the pipe with enough leftover at the end to get it built up a couple extra layers therefore increasing it's size to be a (close) match with the silicone "coupler" (which I cut in half lengthwise).

I wanted the exhaust to be safe AND as legal as possible but I'm not willing to spend $400 on a spark arrested muffler or hack the factory exhaust up, (as I mentioned earlier I hope to find an original motor for it) so I started shopping around for spark arrestsors and found this! (Picture 6) An official USDF approved spark arrestor for some muffler I don't own! Lol. What I did was stuff it into the muffler "core", marked it about a 1/4" longer, cut it with a grinder & cutoff disc, then folded/rolled the edge over, used pliers to pinch and form it to the core and then tapped the end cap on. I didn't take pictures of the process but I opened it up to show you(s) the handiwork (pictures 7,8 & 9). Due to the great, rebuildable design of the muffler it's very easy to remove it for cleaning and or to prove to law enforcement that I have indeed made the effort to not burn down the forest! :roflol:

*Note from the future* The exhaust sounded great and the silicone hose was holding up after an hour of trail riding but on the way home it blew a huge hole out the side so I will have to weld the exhaust up solid, something I was trying to avoid as I wanted it to have "flex". In picture 5 you can see the rear muffler mount has a rubber bushing (eg. isolater) in it and I don't expect the motor to move or twist more than that can handle so it will have to do! :surrender: 
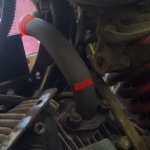
More on that in the "exhaust upgrade" section when I get to that point.
 

Attachments

  • 20200624_205930.jpg
    20200624_205930.jpg
    632.8 KB · Views: 8
  • 20200624_210122.jpg
    20200624_210122.jpg
    527.3 KB · Views: 8
  • 20200114_173701.jpg
    20200114_173701.jpg
    251.5 KB · Views: 8
  • 20200624_210746.jpg
    20200624_210746.jpg
    242.7 KB · Views: 8
  • 20200624_211907.jpg
    20200624_211907.jpg
    168.8 KB · Views: 8
  • 20200624_213929.jpg
    20200624_213929.jpg
    417.2 KB · Views: 7
  • 20200624_213826.jpg
    20200624_213826.jpg
    300.9 KB · Views: 6
  • 20200624_213848.jpg
    20200624_213848.jpg
    279.6 KB · Views: 6
  • 20200624_213907.jpg
    20200624_213907.jpg
    331.4 KB · Views: 6
Top