
 |
Fig. 1 |
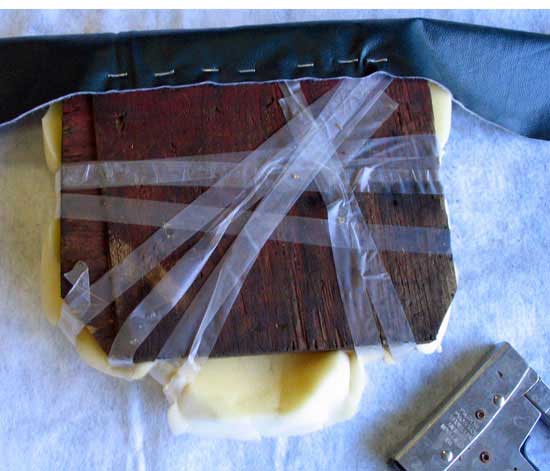 |
Fig. 2 |
 |
Fig. 3 |
 |
Fig. 4 |
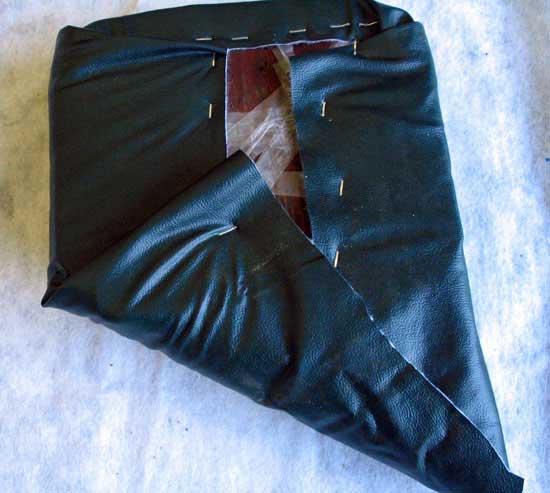 |
Fig. 5 |
 |
Fig. 6 |
 |
Fig. 7 |
 |
Fig. 8 |
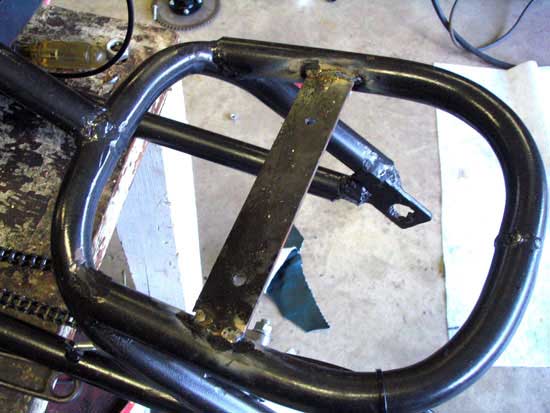 |
Fig. 9 |
 |
Fig. 10 |
Sitting in Comfort
How to Make a Mini Chopper Seat
After you're done with the chopper's frame and other doodads, you'll still need to make a comfortable seat. Though a small part, it's design might be on of the most important parts to enjoying riding the chopper.
What Material to Use?
We've used vinyl, which is purchased at any fabric store. Look in the remnants section, and you'll find a yard or two of all the various colors for at least half the price.
For a classier seat, go to your local leather dealer. They will also have remnants from upholstery jobs. We found a suitable piece of leather for our next project for only $8. This small addition will make for an awesome looking chopper.
Foam can also be purchased at a fabric store.
For a low-cost idea, consider checking directly at an upholstery shop. They're certain to have all matter of material lying about, and would probably be tickled to help, especially if you can find a small operation and bring your project with you to show them.
Preparing the Job
After you have your materials, it's time to get down to work. We used a piece of 1/2" plywood as the base of the seat. First the plywood is cut to the desired shape of the seat.
Then you'll cut the material at least 2" over the edges of the seat pan. This is so the seat can be overstuffed.
Begin the shaping process with some common tape. This wrap makes sure that the stuffing stays the right shape, and doesn't shift during the upholstering process. (Fig. 1).
Upholstering the Seat
Using a staple gun with short staples (we uses 1/4"), attach the back of the vinyl to the board. (Fig. 2). Make sharp creases by pulling the side of the material tight (Fig. 3) before folding it over and securing (Fig. 4). Repeat for the opposite side.
The front is the folded for both sides. (Figs. 5-6).
Do not use too many staples at this point. If you mess something up and have to start over, you'll appreciate not having to pull many staples out, which will invariably ruin the entire piece of material.
Inspecting Your Work
Turning the seat over, inspect the finished product. If acceptable, finish staple it around the edges. (Fig. 8).
You'll then use a razor to cut away this material so that you can mount the seat properly.
Mounting Methods
You can either use bolts, with the special wood nuts that should be embedded in the top side of the board, or use large wood screws. Since we used the special nuts on the go kart project, we used large wood screws to test their capacity.
Drilling a pilot hole that is just smaller than the screw, we installed the seat (Fig. 9) and have had no problems.
A mounting bar (Fig. 8) was added to the frame and two mounting holes were drilled. This is the only mounting on our seat.
The mounting bar is 1/8" below the profile of the seat portion of the frame. This ensures that the seat is sucked down toward the mounting bar, and against the frame members for a tight fit with no wobble.